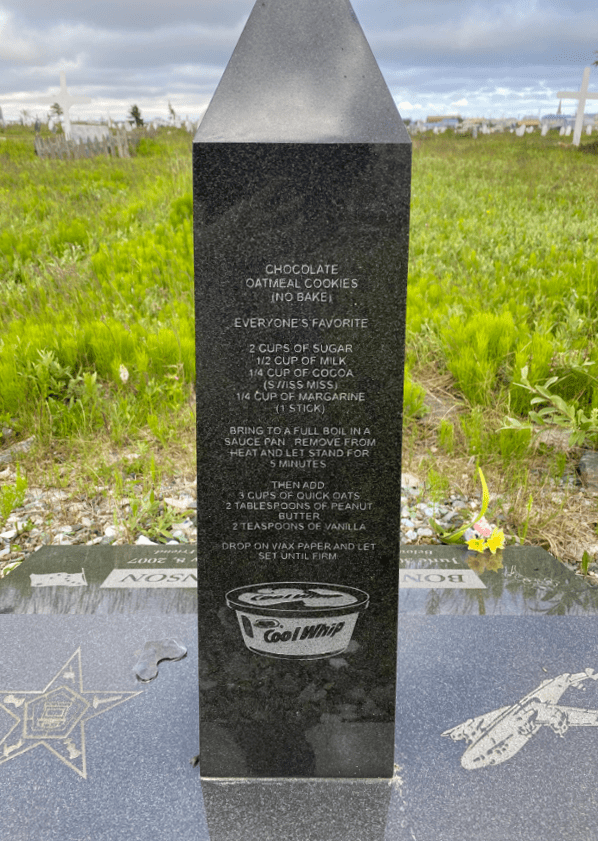
Today’s gravestone recipe is another one I have seen floating around on the internet pretty frequently. Since the success of last month’s cookie recipe, I thought it might be time to try another one, this time with some baking involved.
I am pretty sure I have had a snickerdoodle before, but I don’t recall when. I asked my mother if she had ever made them before, and she said yes, quite often actually. So for today’s gravestone recipe, I try my hand at making Annabell’s Snickerdoodles.
This tombstone treat comes from the gravestone of Annabell R. Gunderson of Willits, California. Found in Willits Cemetery, this gravestone recipe takes up the entire backside of Gunderson’s grey granite gravestone.
Annabell Gunderson passed away at the age of 87, in 2007 after a battle against an unidentified illness.1 In life Gunderson was very active in her community, volunteering her time to multiple organizations. In particular with the St. Anthony’s Ladies Guild.1 Gunderson was known to especially love helping with the yearly enchilada feed—a fundraiser where trays upon trays of enchiladas are made and sold.1
She is lovingly remembered as a great cook and for her hugely popular snickerdoodles. A recipe that now lives on, etched in stone.
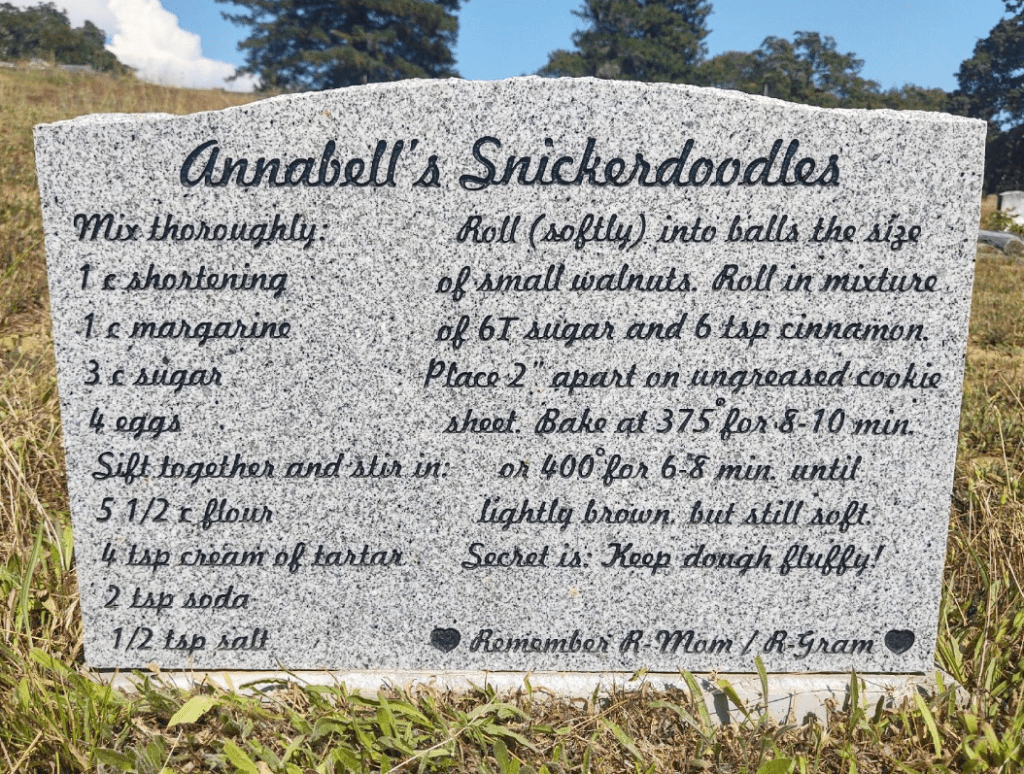
Annabell’s Snickerdoodles recipe on the back of Annabell Gunderson’s gravestone. Photo by Find a Grave contributor JDFH. Photo used with permission.
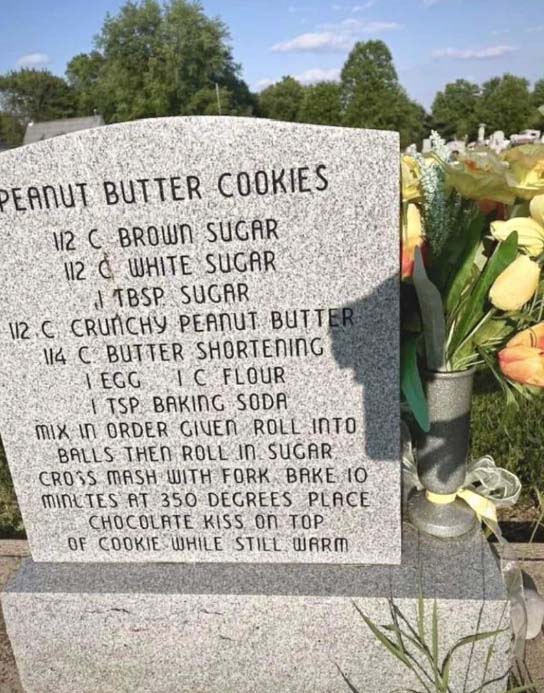
Here is the recipe as engraved on the tombstone:
Annabell’s Snickerdoodles
Mix thoroughly:
- 1 c shortening
- 1 c margarine
- 3 c sugar
- 4 eggs
Sift together and stir in:
- 5 1/2 c flour
- 4 tsp cream of tartar
- 2 tsp soda
- 1/2 tsp salt
Roll (softly) into balls the size of small walnuts.
Roll in mixture of 6T sugar and 6 tsp cinnamon.
Place 2” apart on ungreased cookie sheet.
Bake at 375° for 8-10 min. or 400° for 6-8 min. until lightly brown, but still soft.
Secret is: Keep dough fluffy!
Making the Recipe
I spoke to my mom about making this recipe, and right away she was surprised at how much this recipe makes. She suggested I cut the recipe in half to make a smaller batch. Normally I do try to make the recipe as it is written, but I thought making half of this recipe would be more manageable for me in my small kitchen. After learning about Gunderson’s love of community and cooking, I think I understand why this recipe makes such a big batch.
So after getting out my ingredients and figuring out the new measurements on my kitchen blackboard, I got started on mixing up a batch of Annabell’s Snickerdoodles.
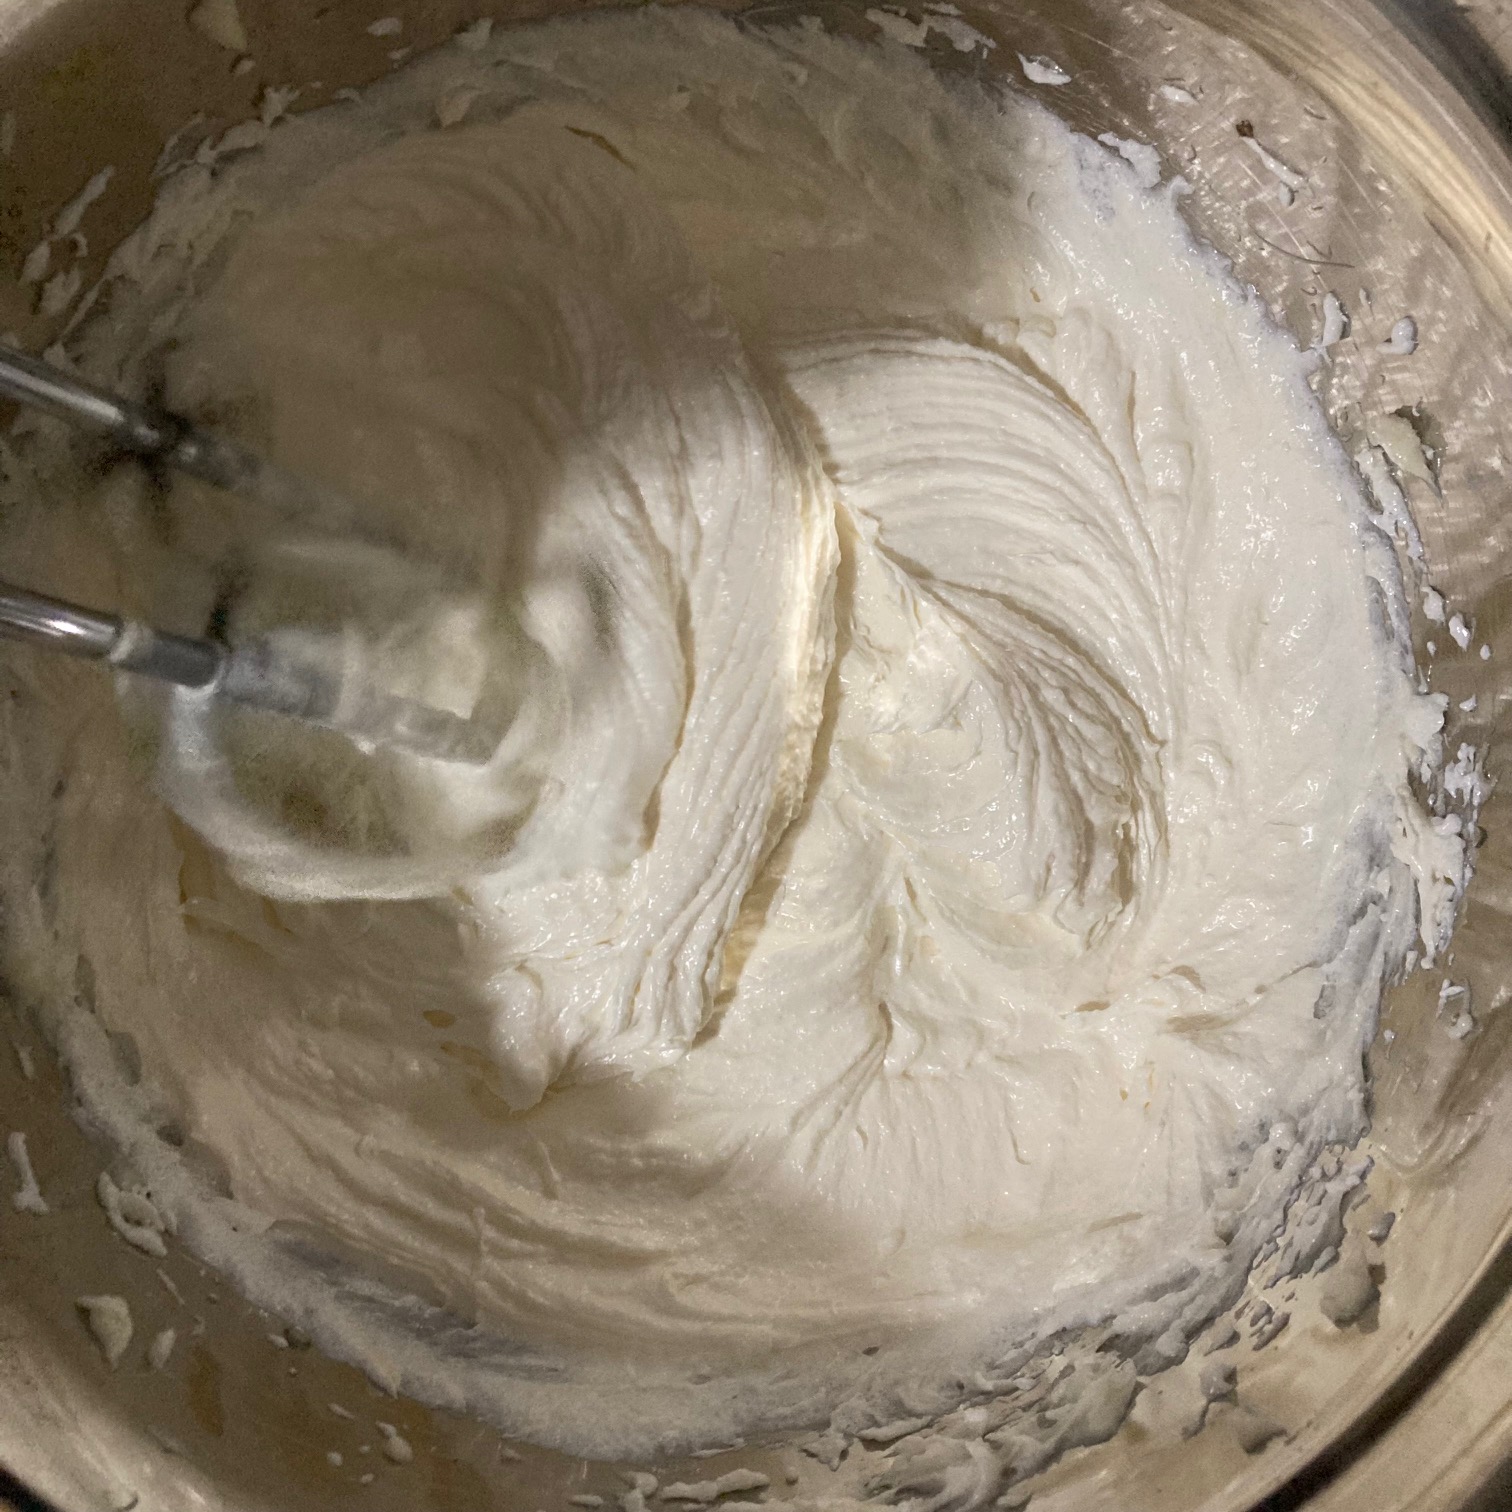
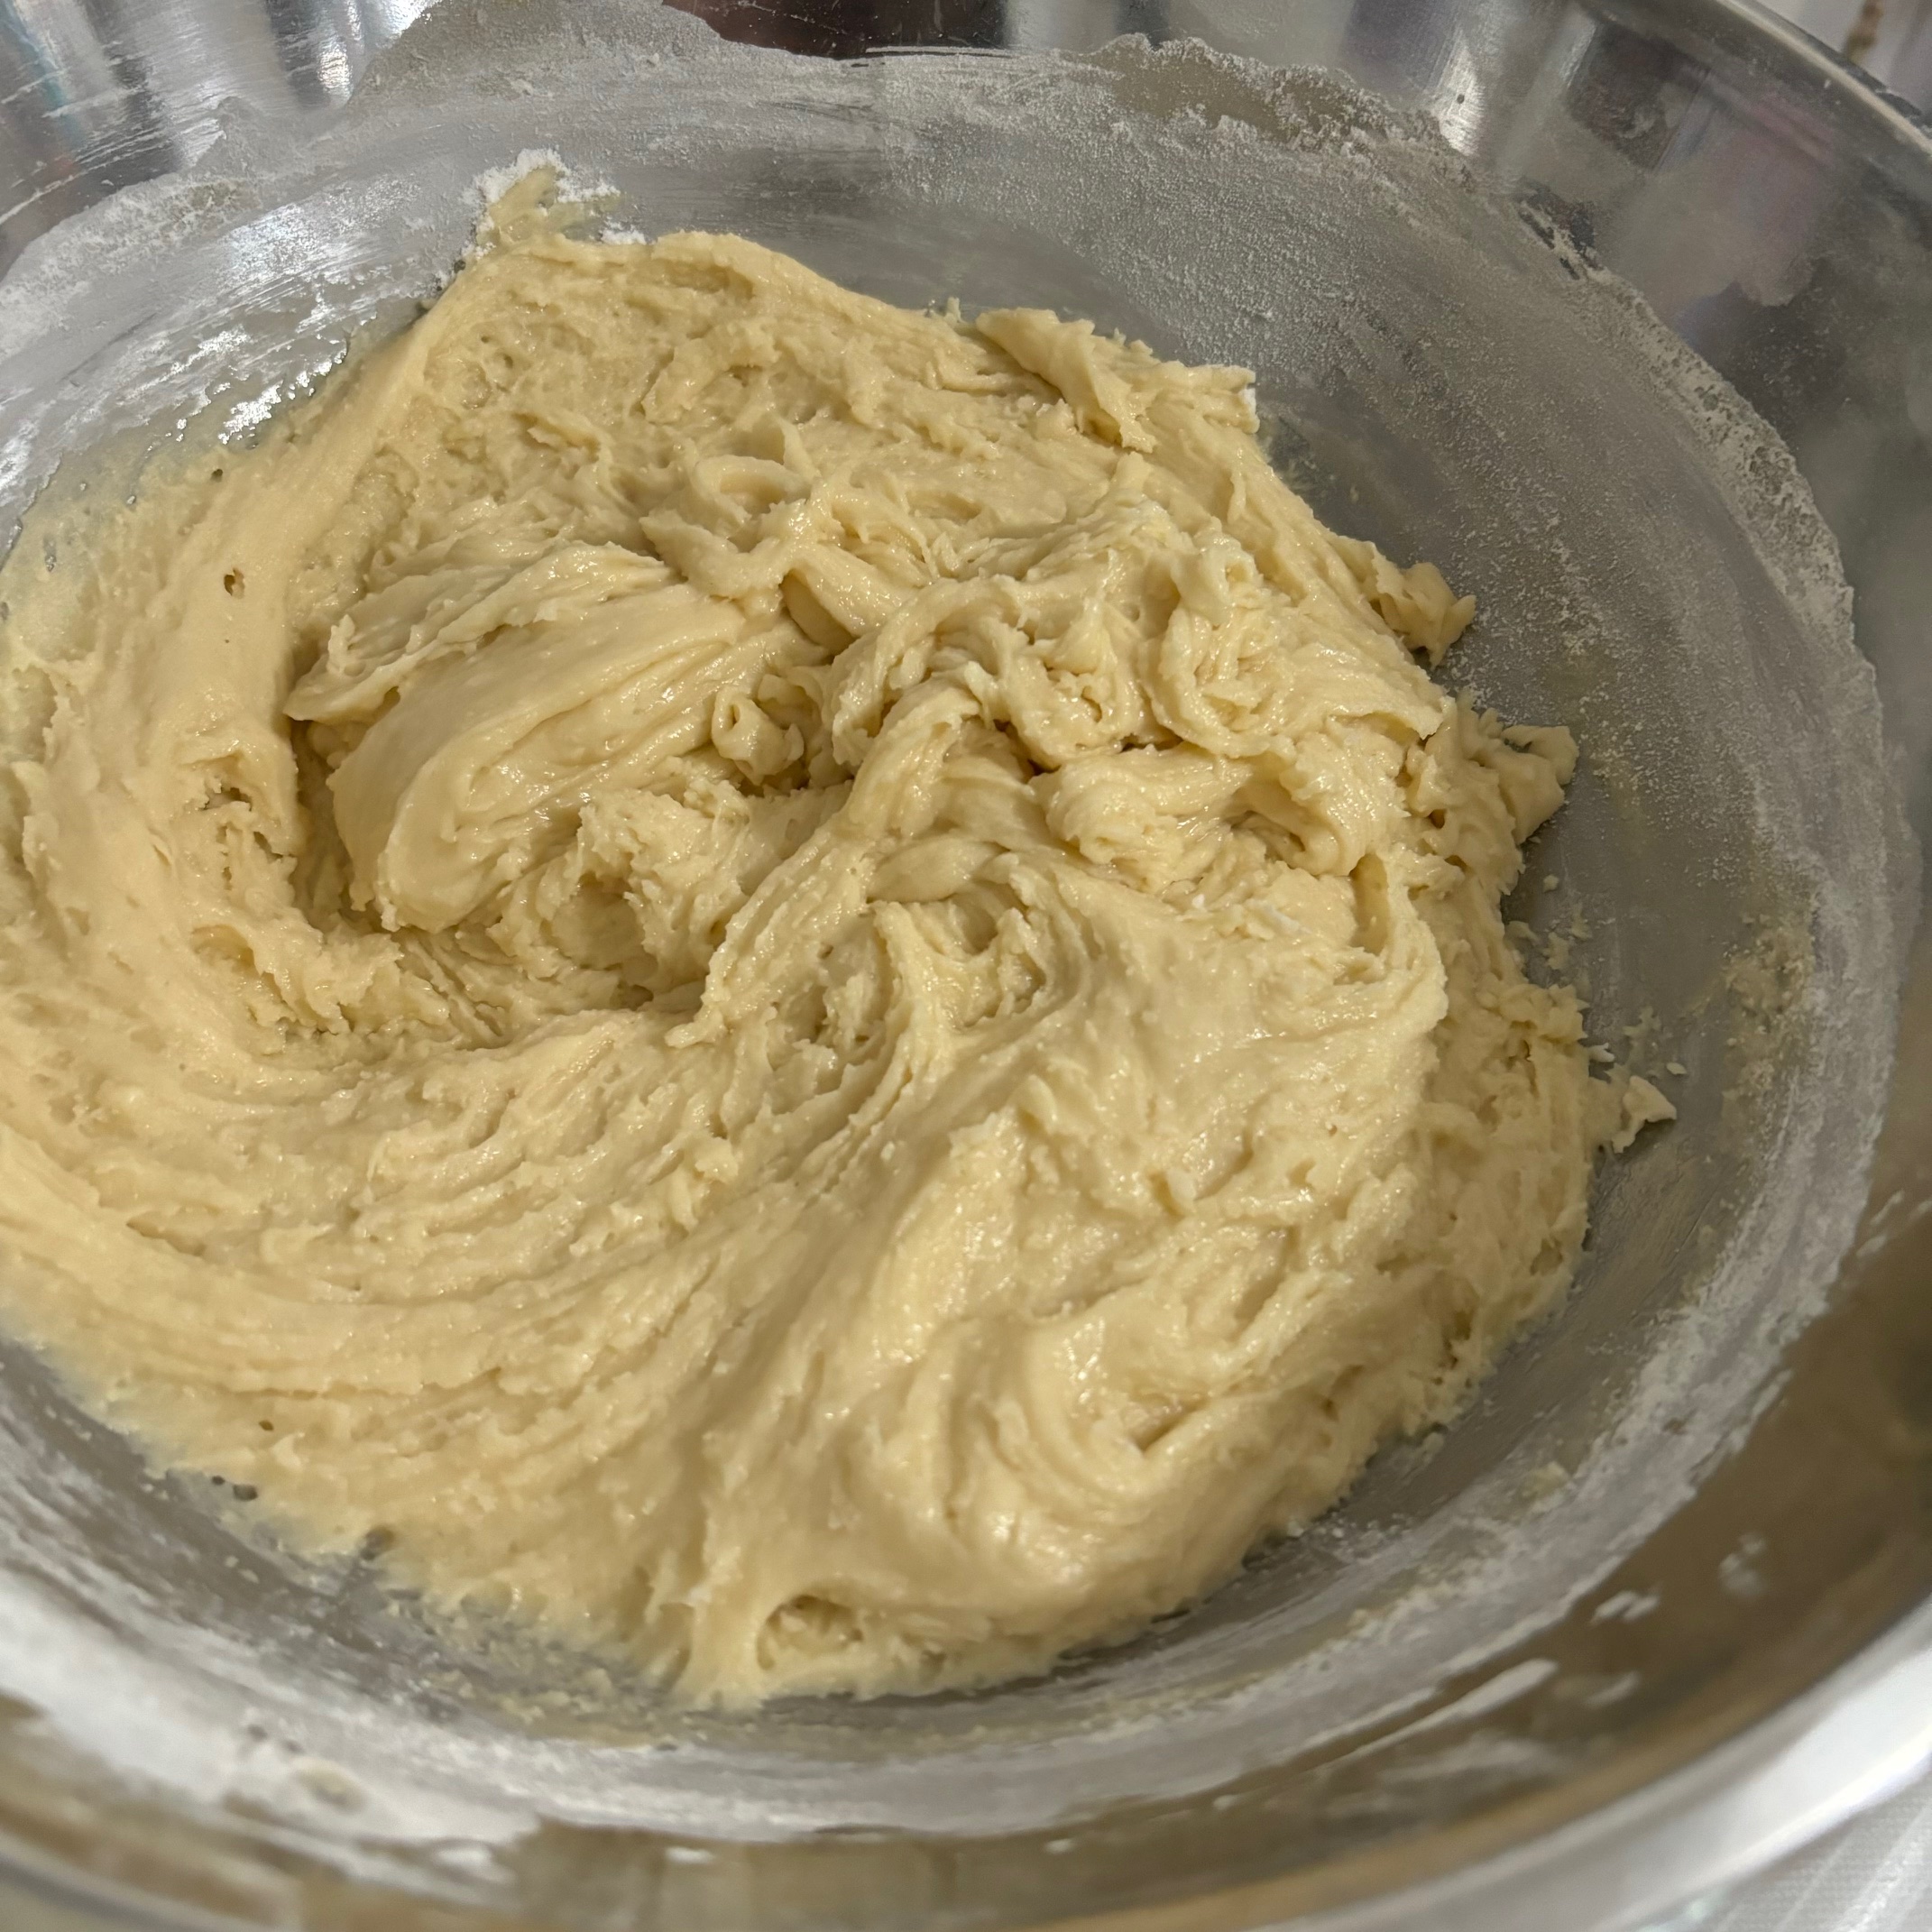
The recipe is very easy to follow, and is very well written. I did have to soften my margarine and shortening in the microwave a bit so it would combine nicely with the sugar and then the eggs. I made sure not to heat them too much though, as I didn’t want to cook the egg at all.
After that, I sifted in the dry ingredients till the mixture was well combined. I tried my best to not overwork the dough, keeping Annabell’s secret in mind.

Making Annabell’s Snickerdoodle gravestone recipe.
Now came the fun part!
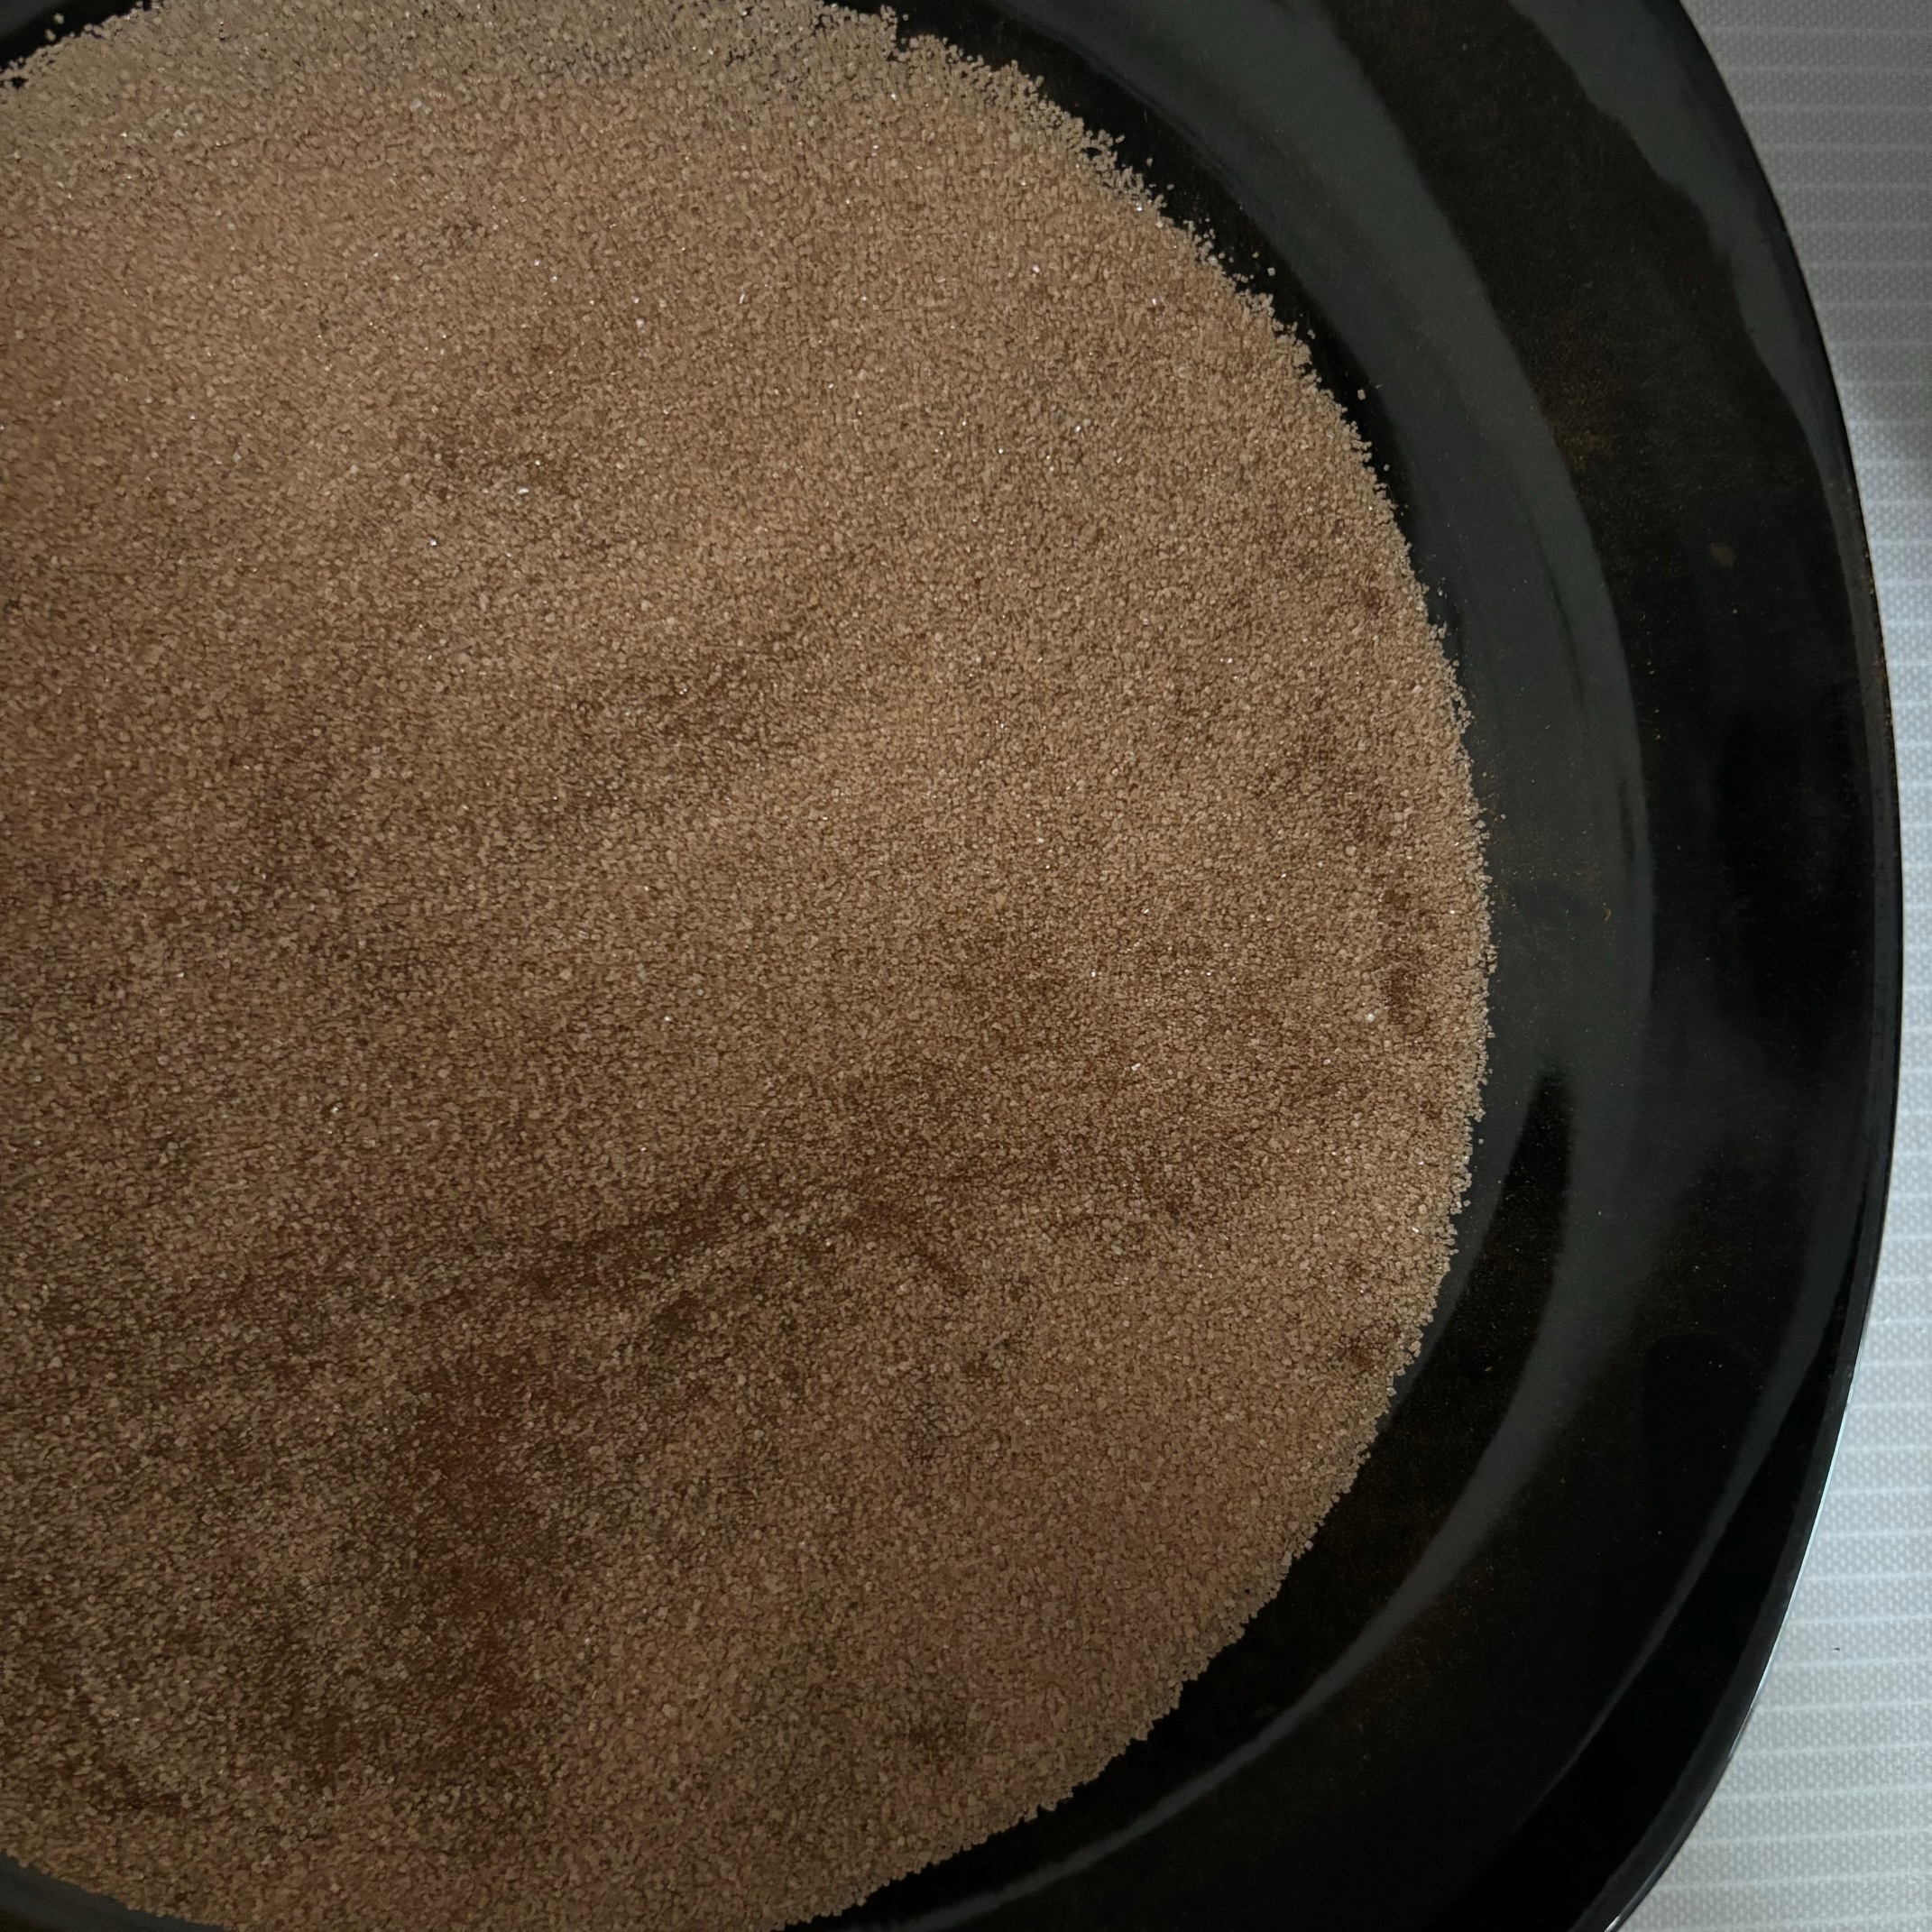
I made sure to mix the sugar and cinnamon very well and put the mixture into a dinner plate so I had lots of surface to roll the dough around. To form the cookies, I pinched off small parts of dough, rolling them between my hands into a ball and then rolled them in the sugar and cinnamon mixture. Then I shaped them a little more with my hands before placing them on the ungreased cookie sheet.
Making Annabell’s Snickerdoodle gravestone recipe.
I did flour my hands now and then while rolling the dough to try and stop it from sticking to my hands. I tried my best to space the cookies out evenly between two cookie sheets. I didn’t realize that the cookies would spread, so if I made them again, I would space them out a little more between multiple cookie sheets instead of only using two sheets.
I then placed both cookie sheets in the oven to bake at 375° for 10 minutes. I did a bit of washing up while I waited for them to turn a golden brown.
Even though they did spread out a bit on the cookie sheet, it wasn’t terrible. After cooling on top of the stove for 10 minutes I was easily able to break them apart without ruining their shape too much.

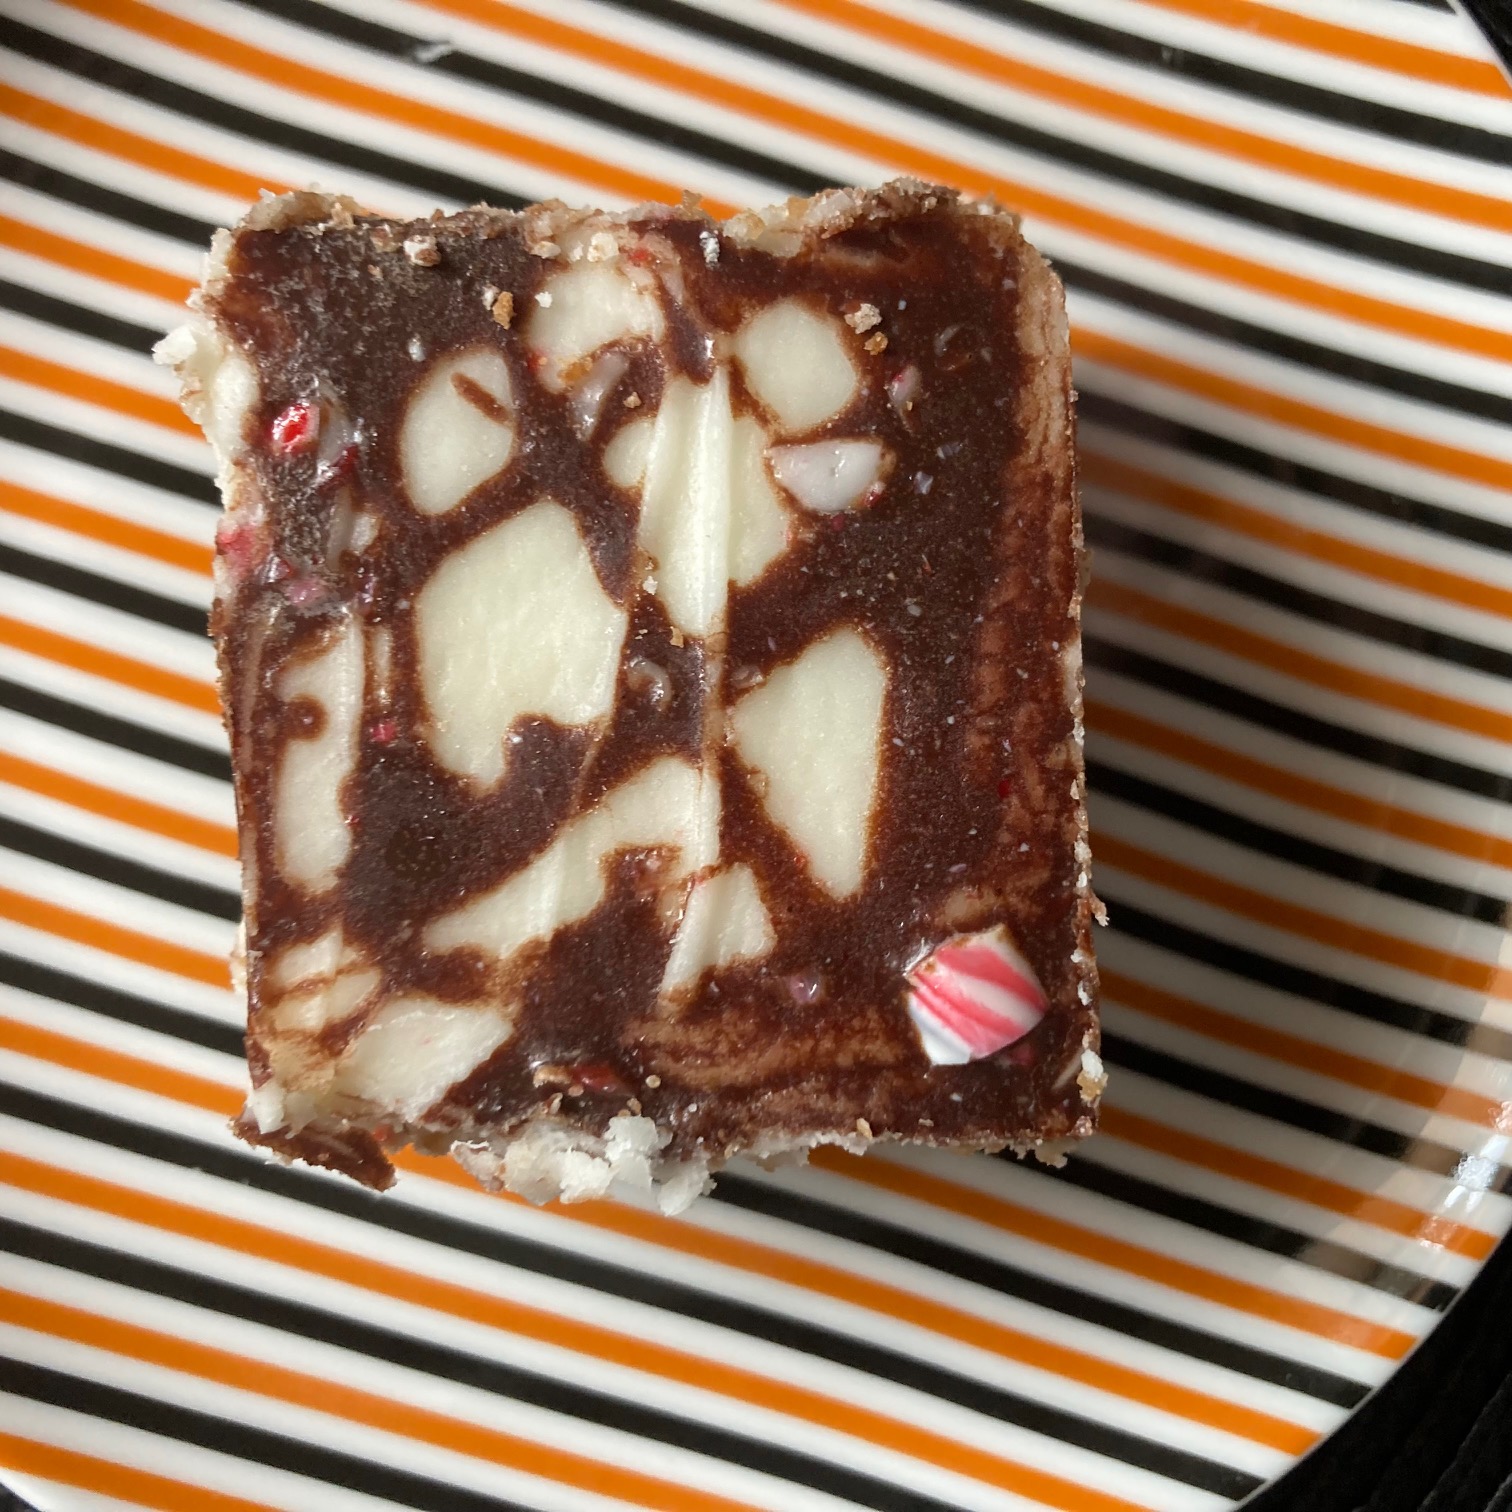
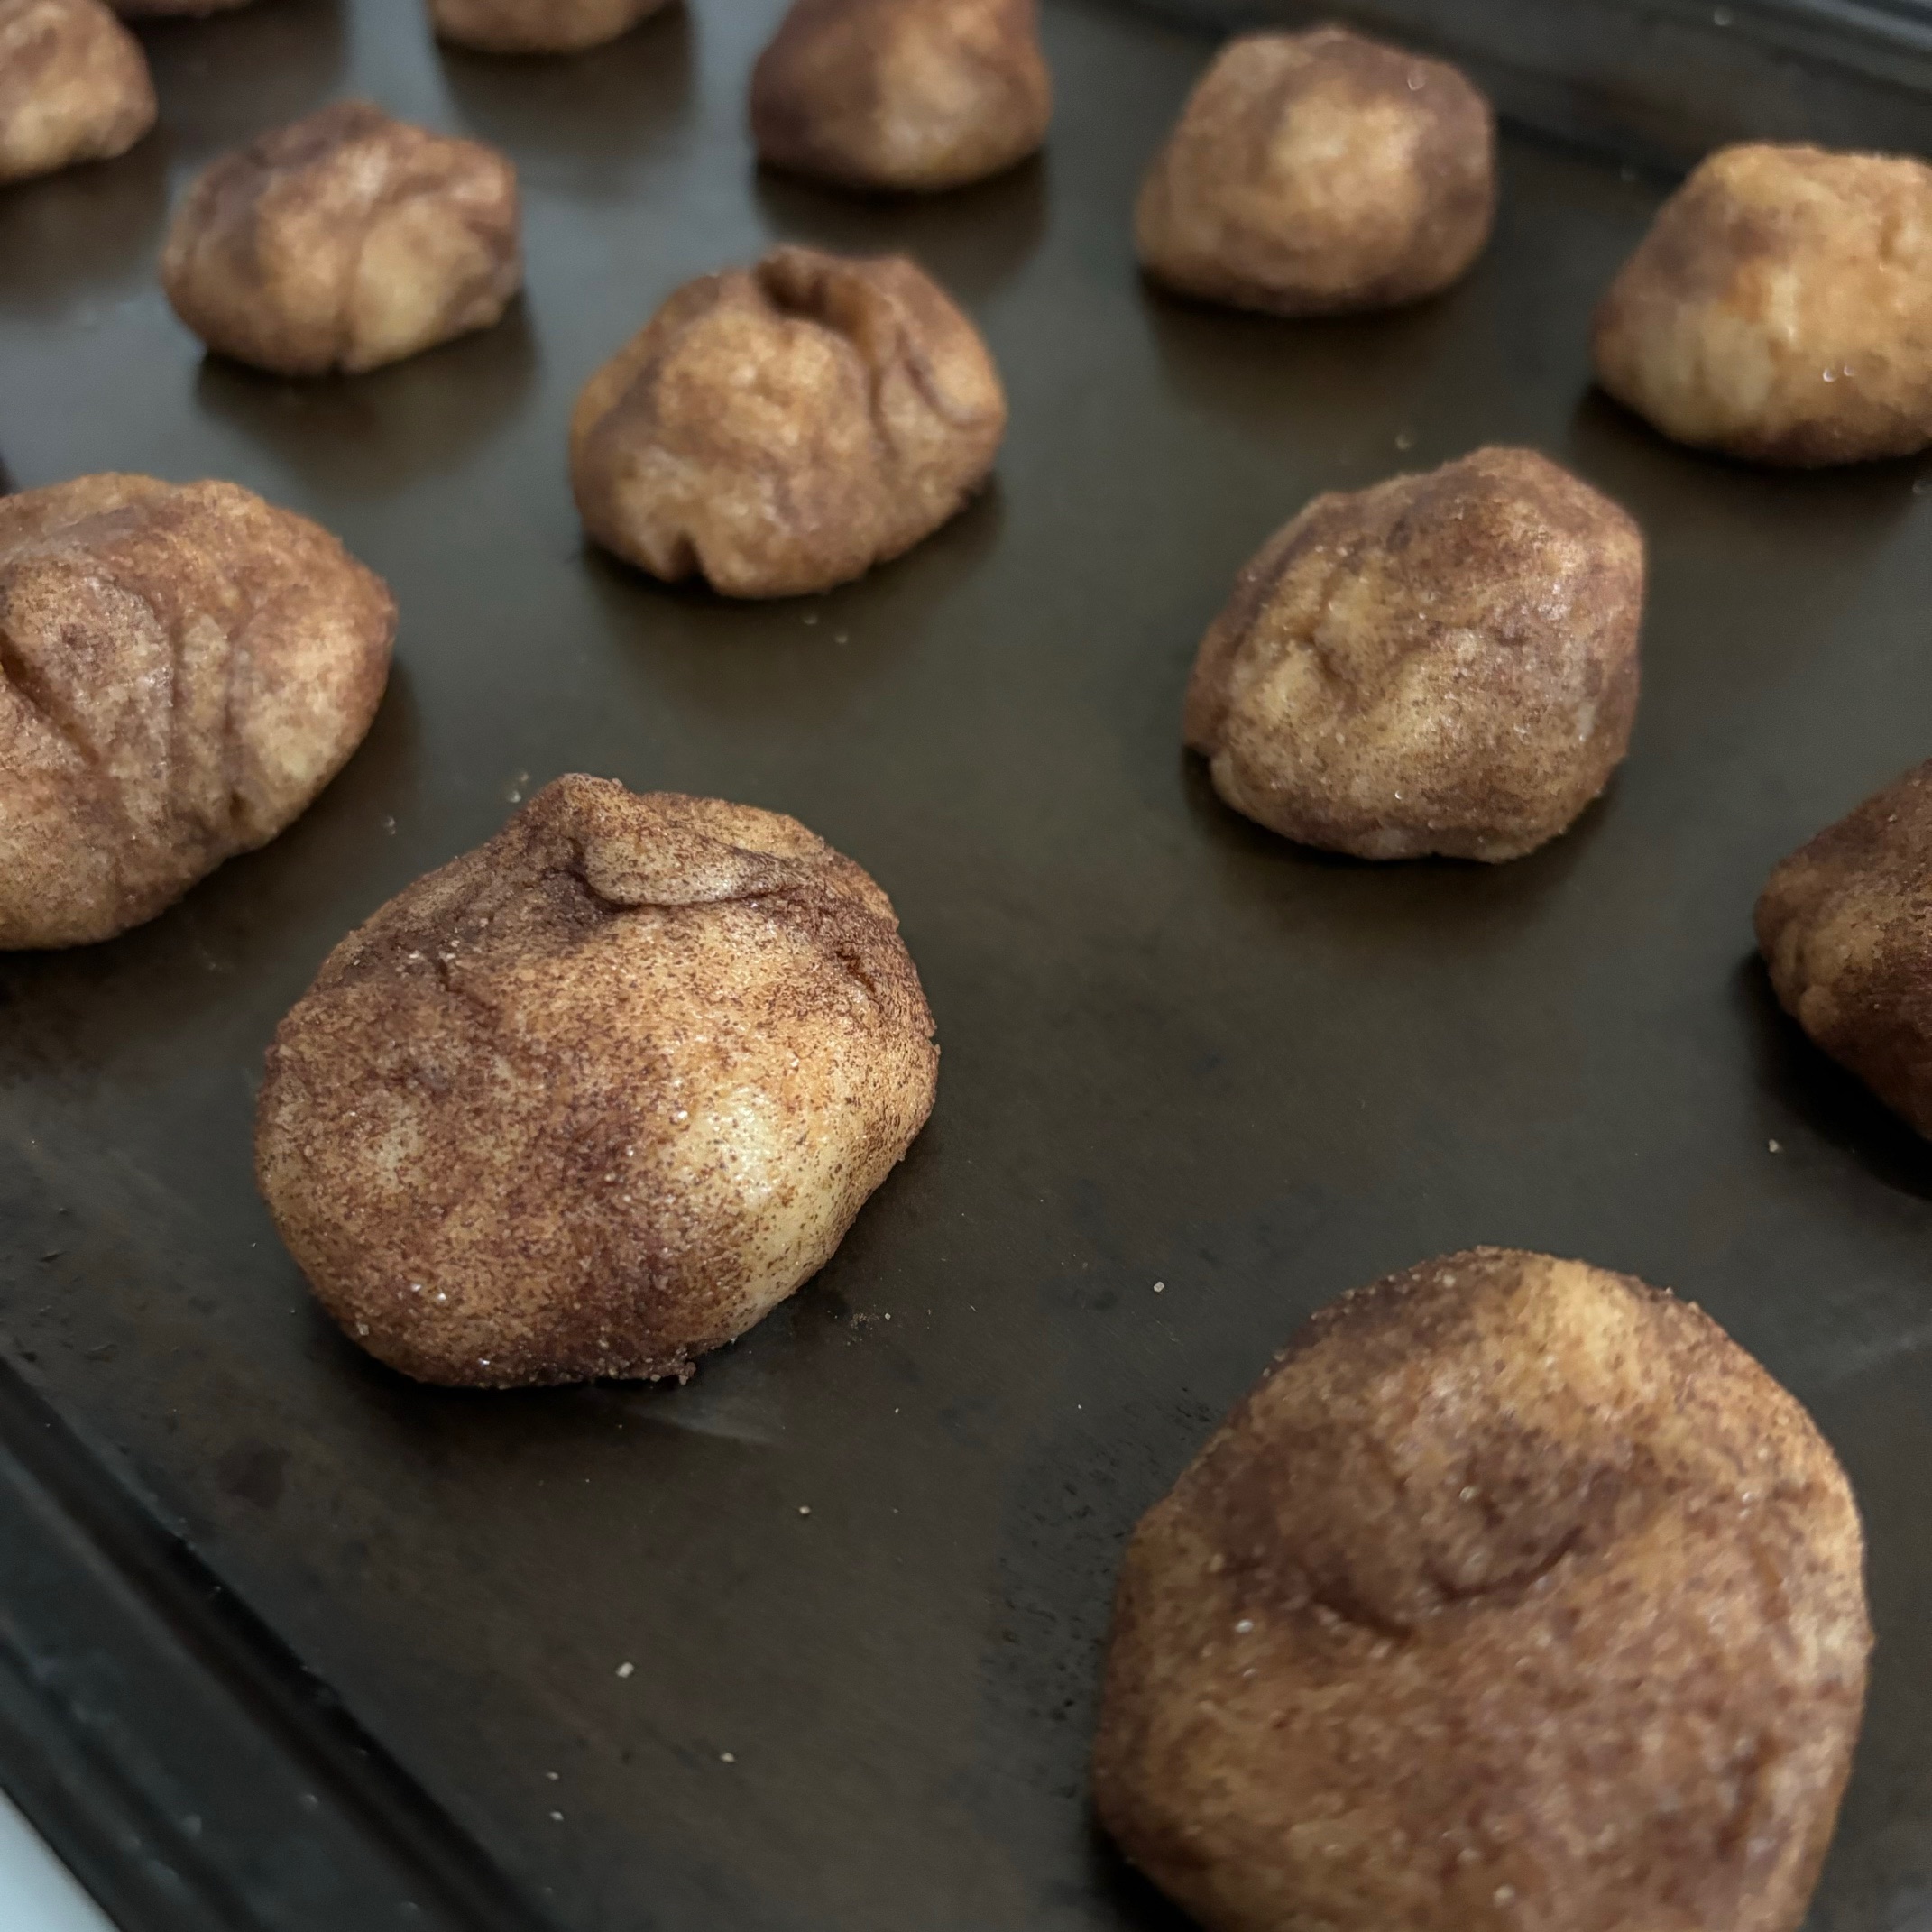
Annabell’s Snickerdoodles, fresh out of the oven.
These cookies turned out amazing! I was a little bit daunted by the amount of work that had to go into these. But, it turned out to be not as intimidating as I thought, and the result are some of the best cookies I’ve ever tried—especially right out of the oven.
They are soft and buttery, sweet with a hint of cinnamon. I don’t think they will last too long in my house, as I couldn’t eat just one. I love how they turned out and will definitely be making these again!

Annabell’s Snickerdoodles
This recipe would be great for someone looking for the perfect cookie for a bake sale or cookie exchange. They would also be a fun cookie to make in the kitchen with kids, as I am sure they would love rolling the dough around into the sugar and cinnamon.
Have you tried this recipe before? Do you have a favorite snickerdoodle recipe? I would love to read about it in the comments!
Thanks for reading!
References:
- Annabell Gunderson obituary | The Ukiah Daily Journal