Some cemetery stories come from wandering through the rows of gravestones in person, but others show up through research, photographs, and the unexpected things people choose to leave behind on a memorial.
This is one of those stories.
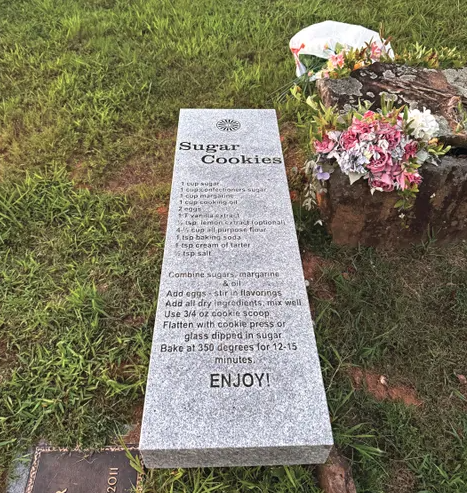
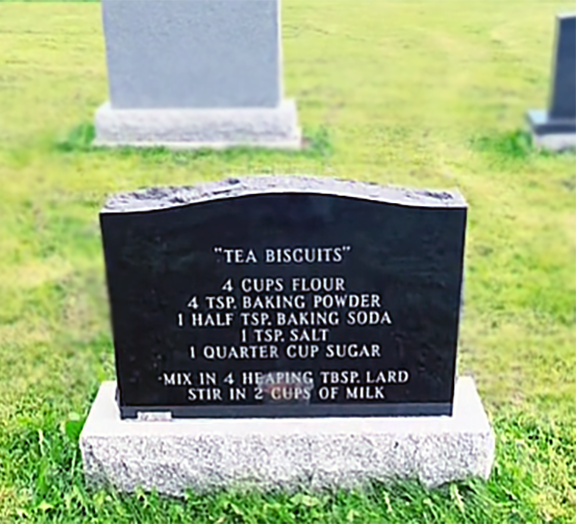
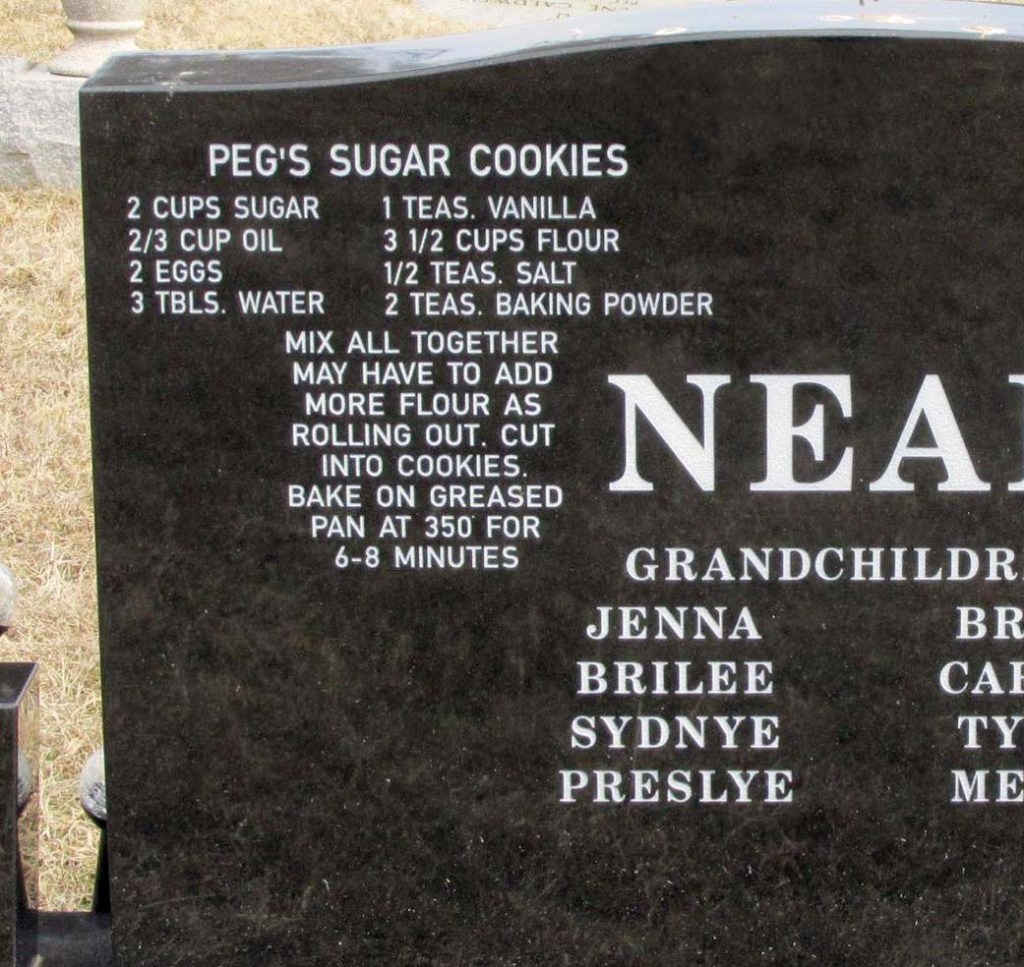
A French Silk Pie recipe engraved on a gravestone somehow manages to feel sweet, funny, personal, and a little unexpected all at once. It turns a memorial into something that feels almost like a family recipe card left behind for anyone curious enough to stop and read it.
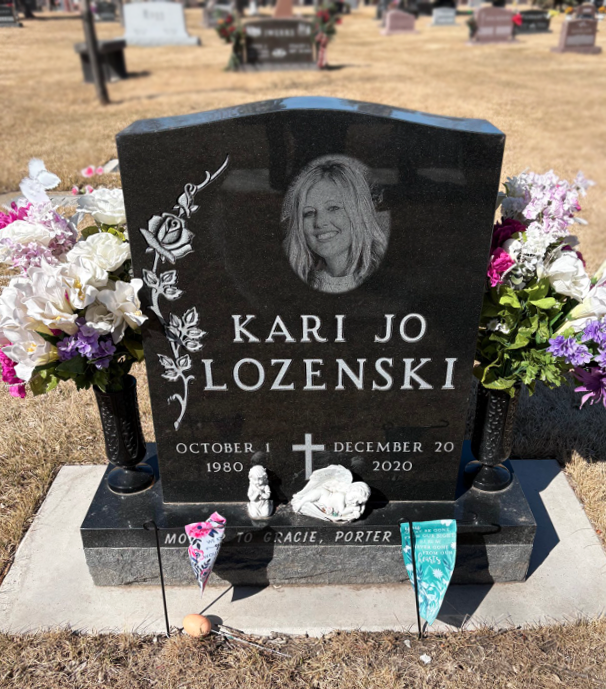
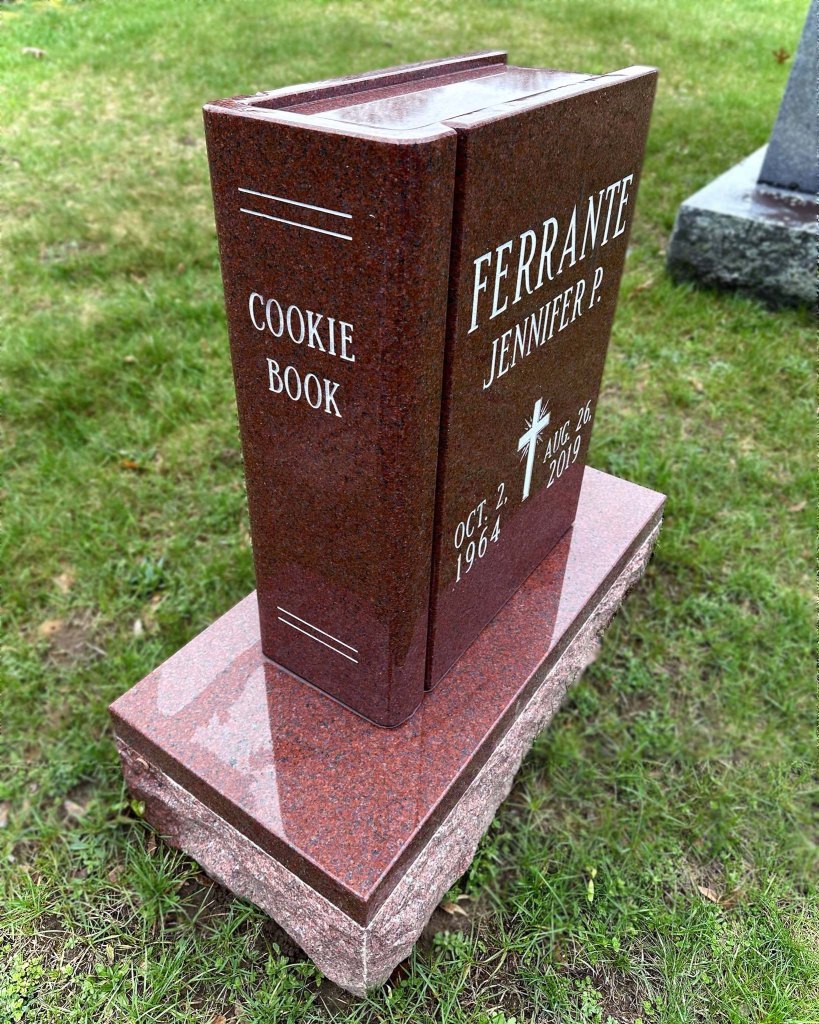
Sharon Kay Edwards is remembered in a way that feels very real and relatable. The front of her memorial carries the line: “Well, that didn’t go how I thought it would…” which genuinely made me laugh the first time I read it.
She is buried in Friends Cemetery, a cemetery that also holds the graves of baseball brothers Clete Boyer, Cloyd Boyer, and Ken Boyer.¹
Sharon’s obituary talks about her life, family, and the people she loved, but there is absolutely no mention of French Silk Pie.² No hints. No baking references. Nothing that prepares you for what is carved onto the back of her headstone.
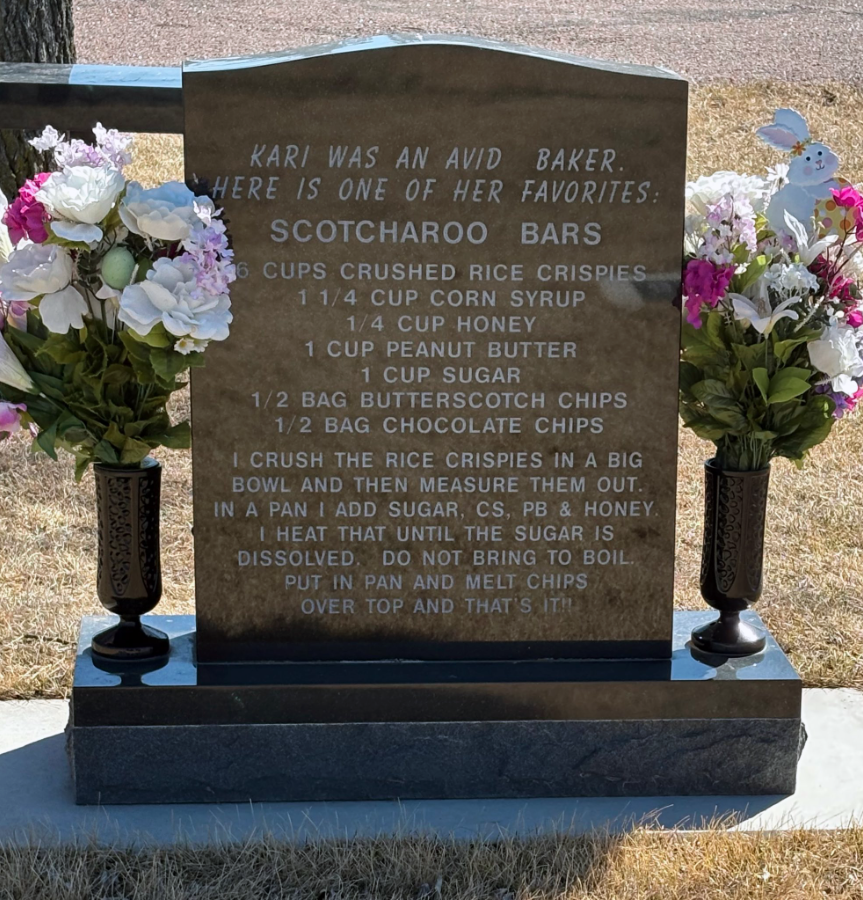
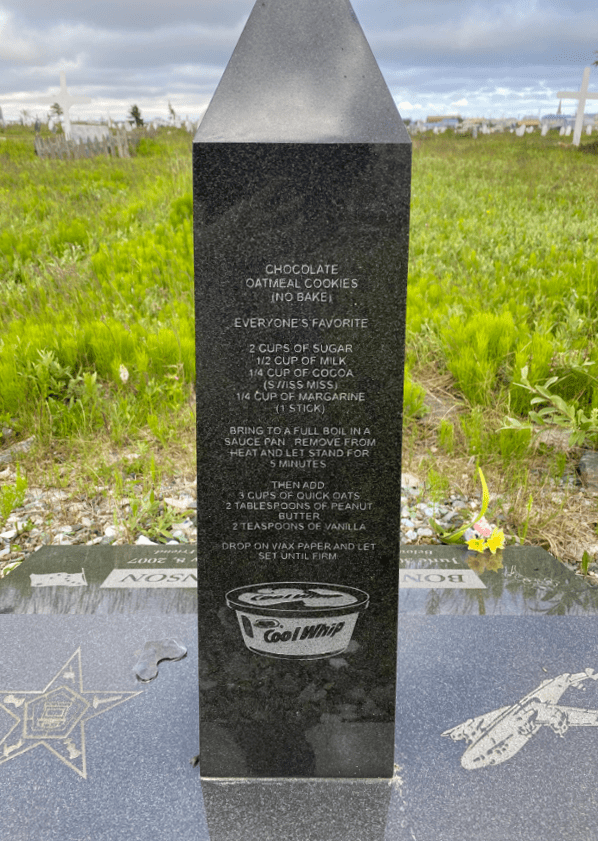
On the back of her tombstone is a full French Silk Pie recipe, engraved into the stone as though it was always meant to be shared and passed around.
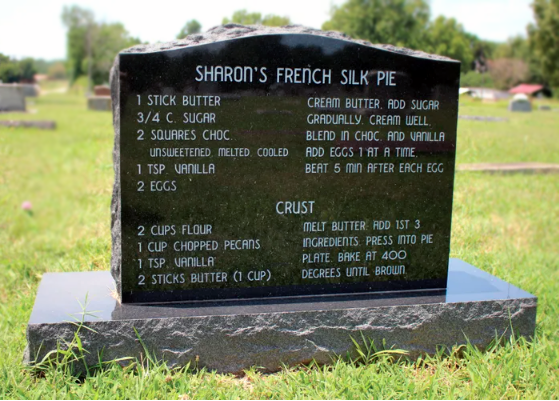
Sharon’s French Silk Pie gravestone recipe. Photo by Jill Petracek.
Here is the recipe exactly as it appears on the stone :
Sharon’s French Silk Pie
- 1 Stick butter
- 3/4 C. Sugar
- 2 Squares Choc.
- Unsweetened. Melted. Cooled
- 1 Tsp. Vanilla
- 2 Eggs
Cream Butter. Add sugar gradually. Cream well. Blend in choc. and vanilla. Add eggs 1 at a time. Beat 5 min after each egg.
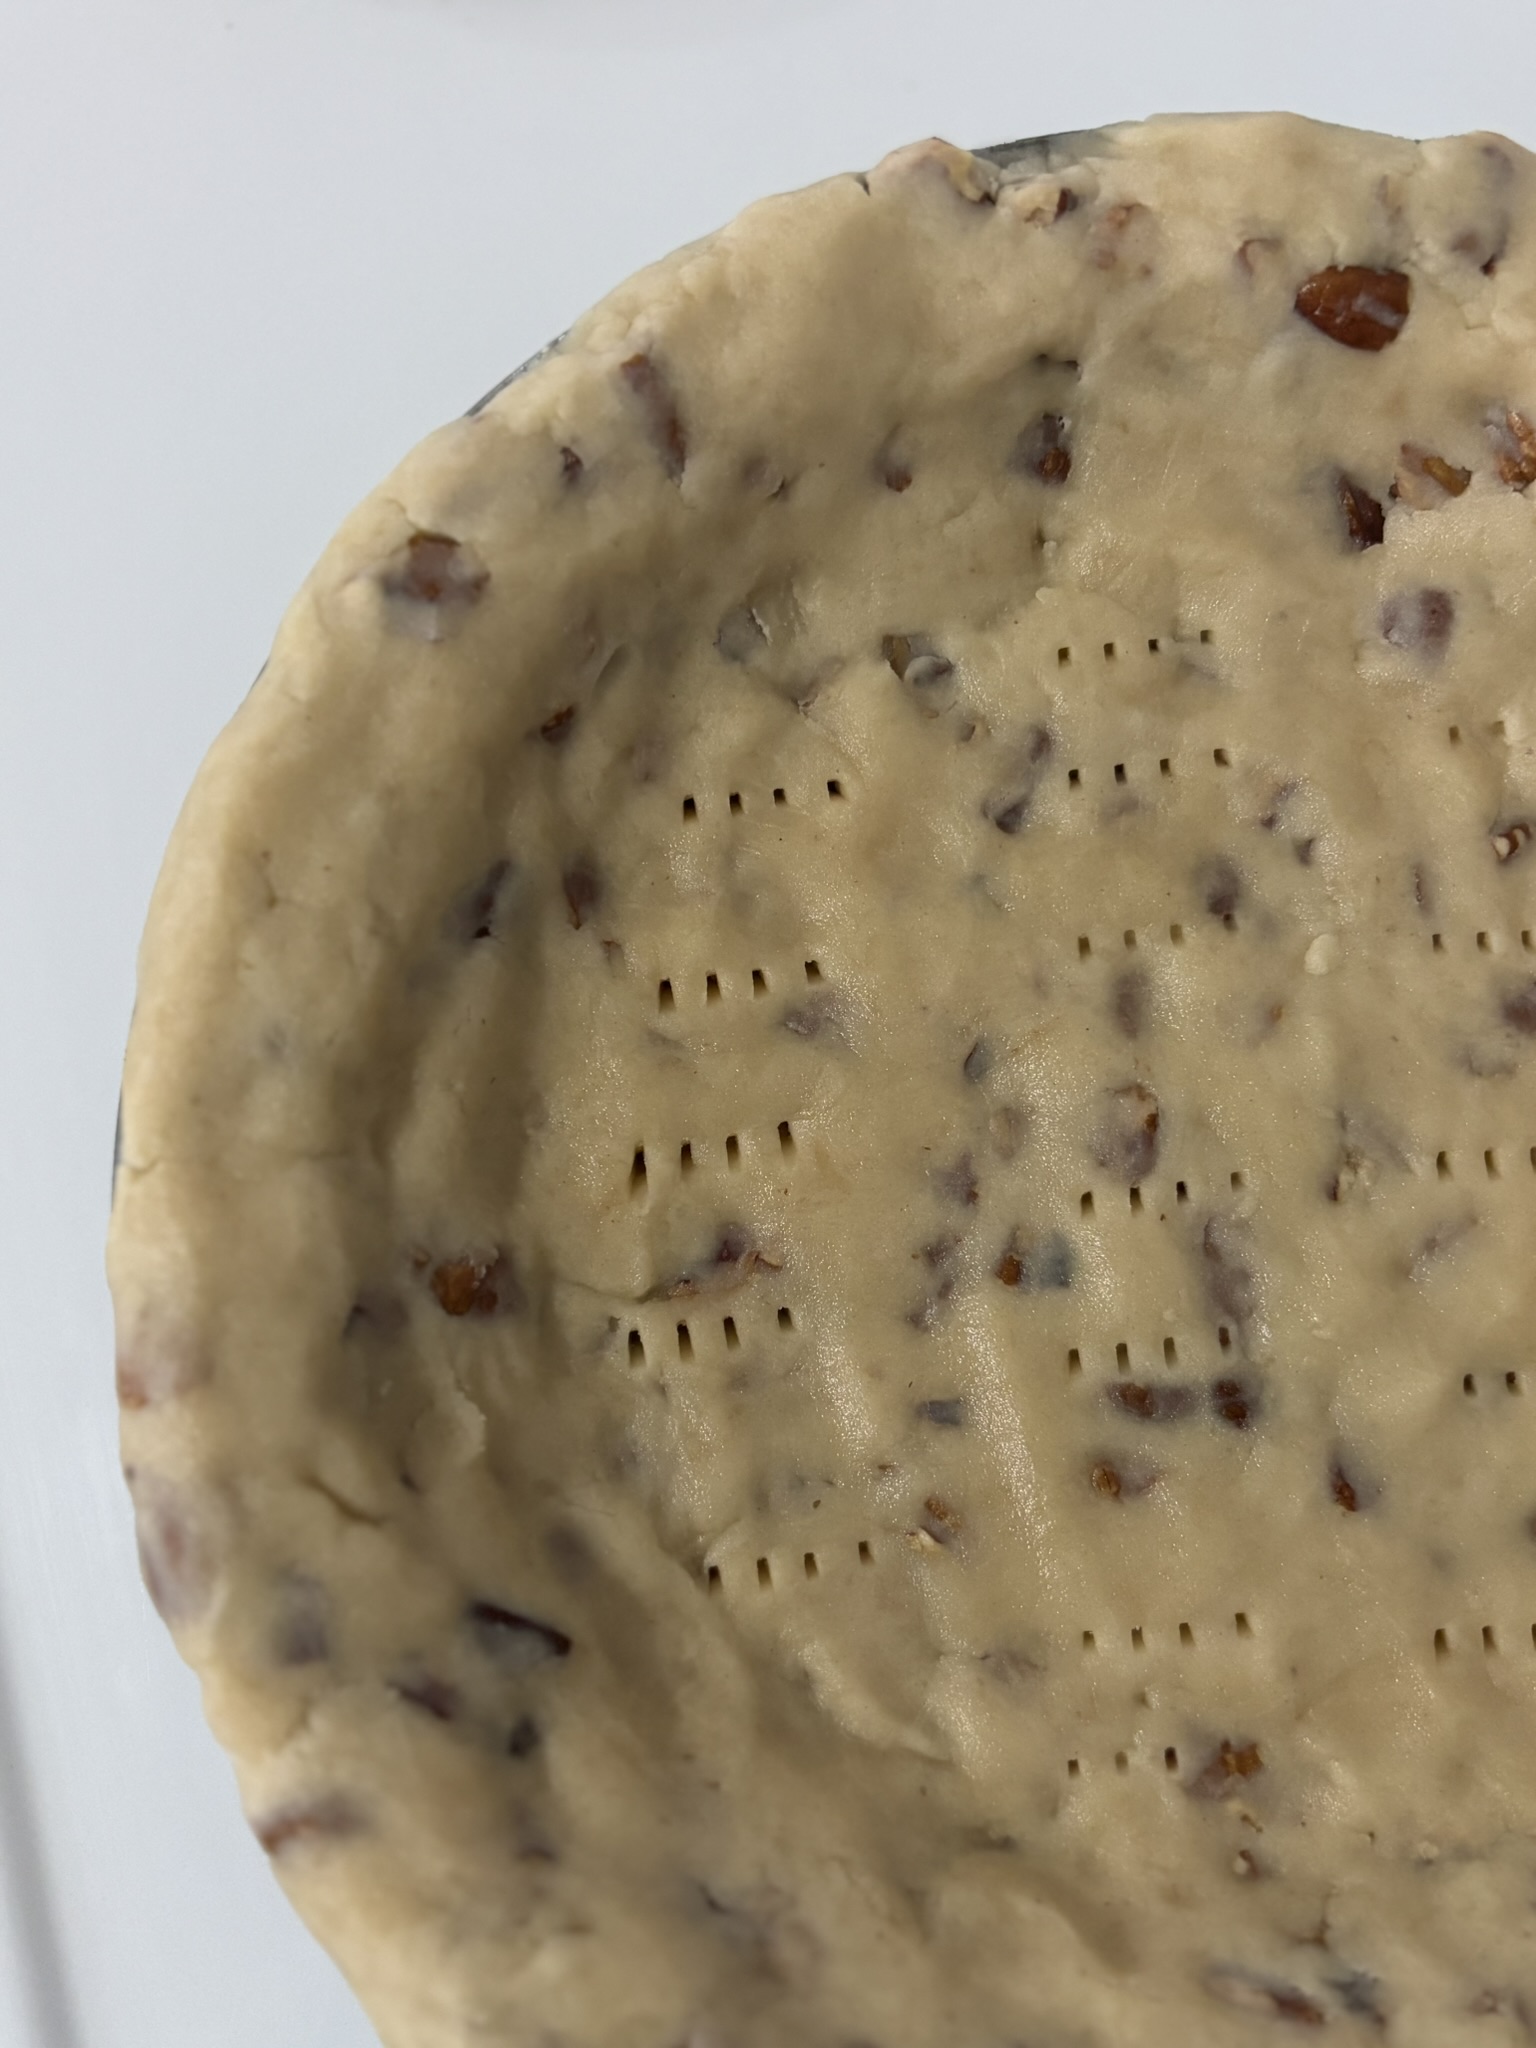
Crust
- 2 Cups flour
- 1 Cup chopped pecans
- 1 Tsp. Vanilla
- 2 Sticks butter (1 cup)
Melt butter. Add 1st 3 ingredients. Press into pie plate. Bake at 400 degrees until brown.
In the Kitchen
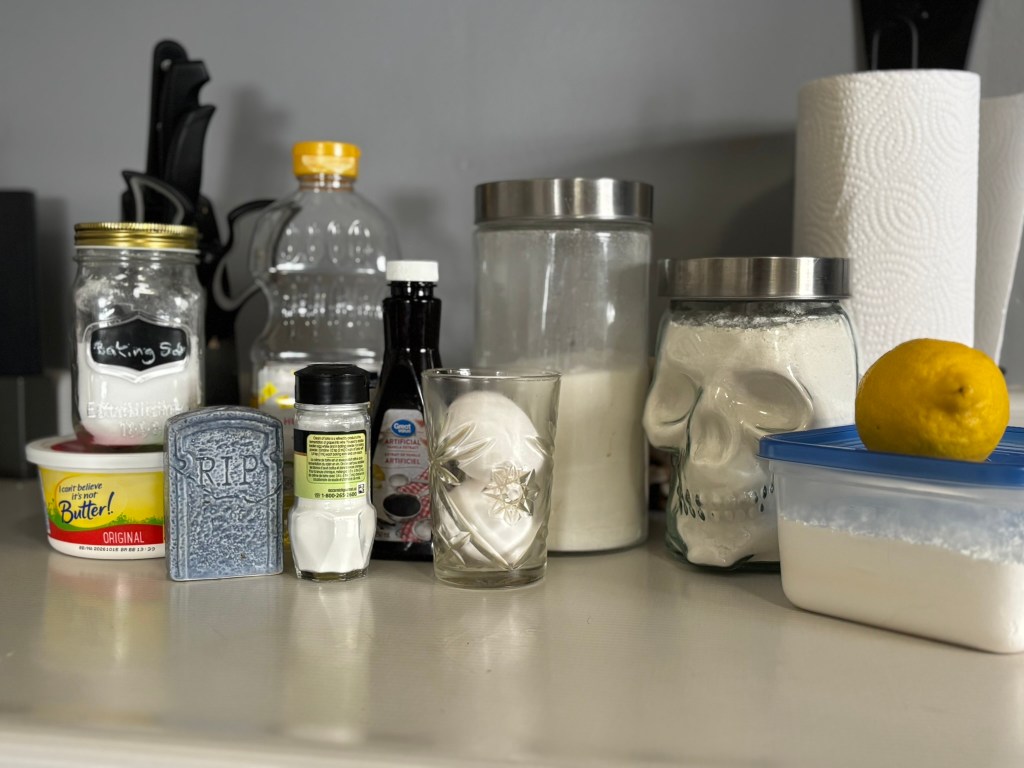
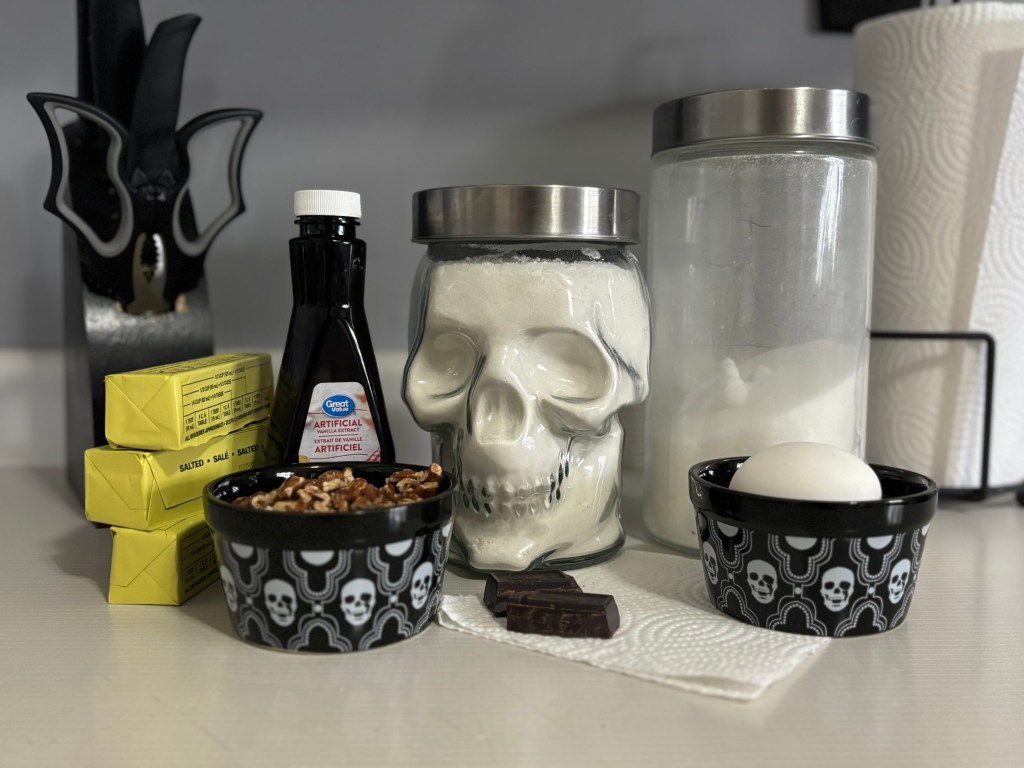
This recipe has a surprisingly small ingredient list, so pulling everything together was pretty easy.
The raw eggs were the first thing that piqued my interest. I had to look into that a little bit. Traditional French Silk Pie recipes often relied on them for that smooth, rich texture, but modern versions usually recommend pasteurized eggs or other safer methods while still aiming for that same silky finish.³
I was not able to find pasteurized eggs at my local grocery store, so I decided to live dangerously and use regular eggs.
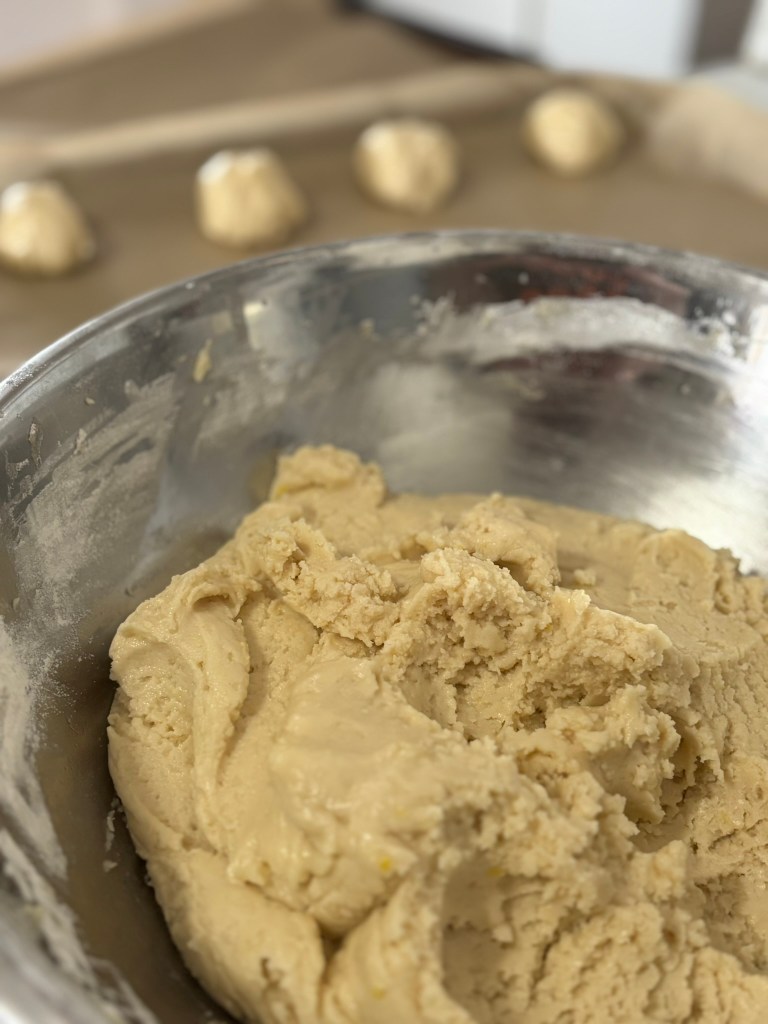
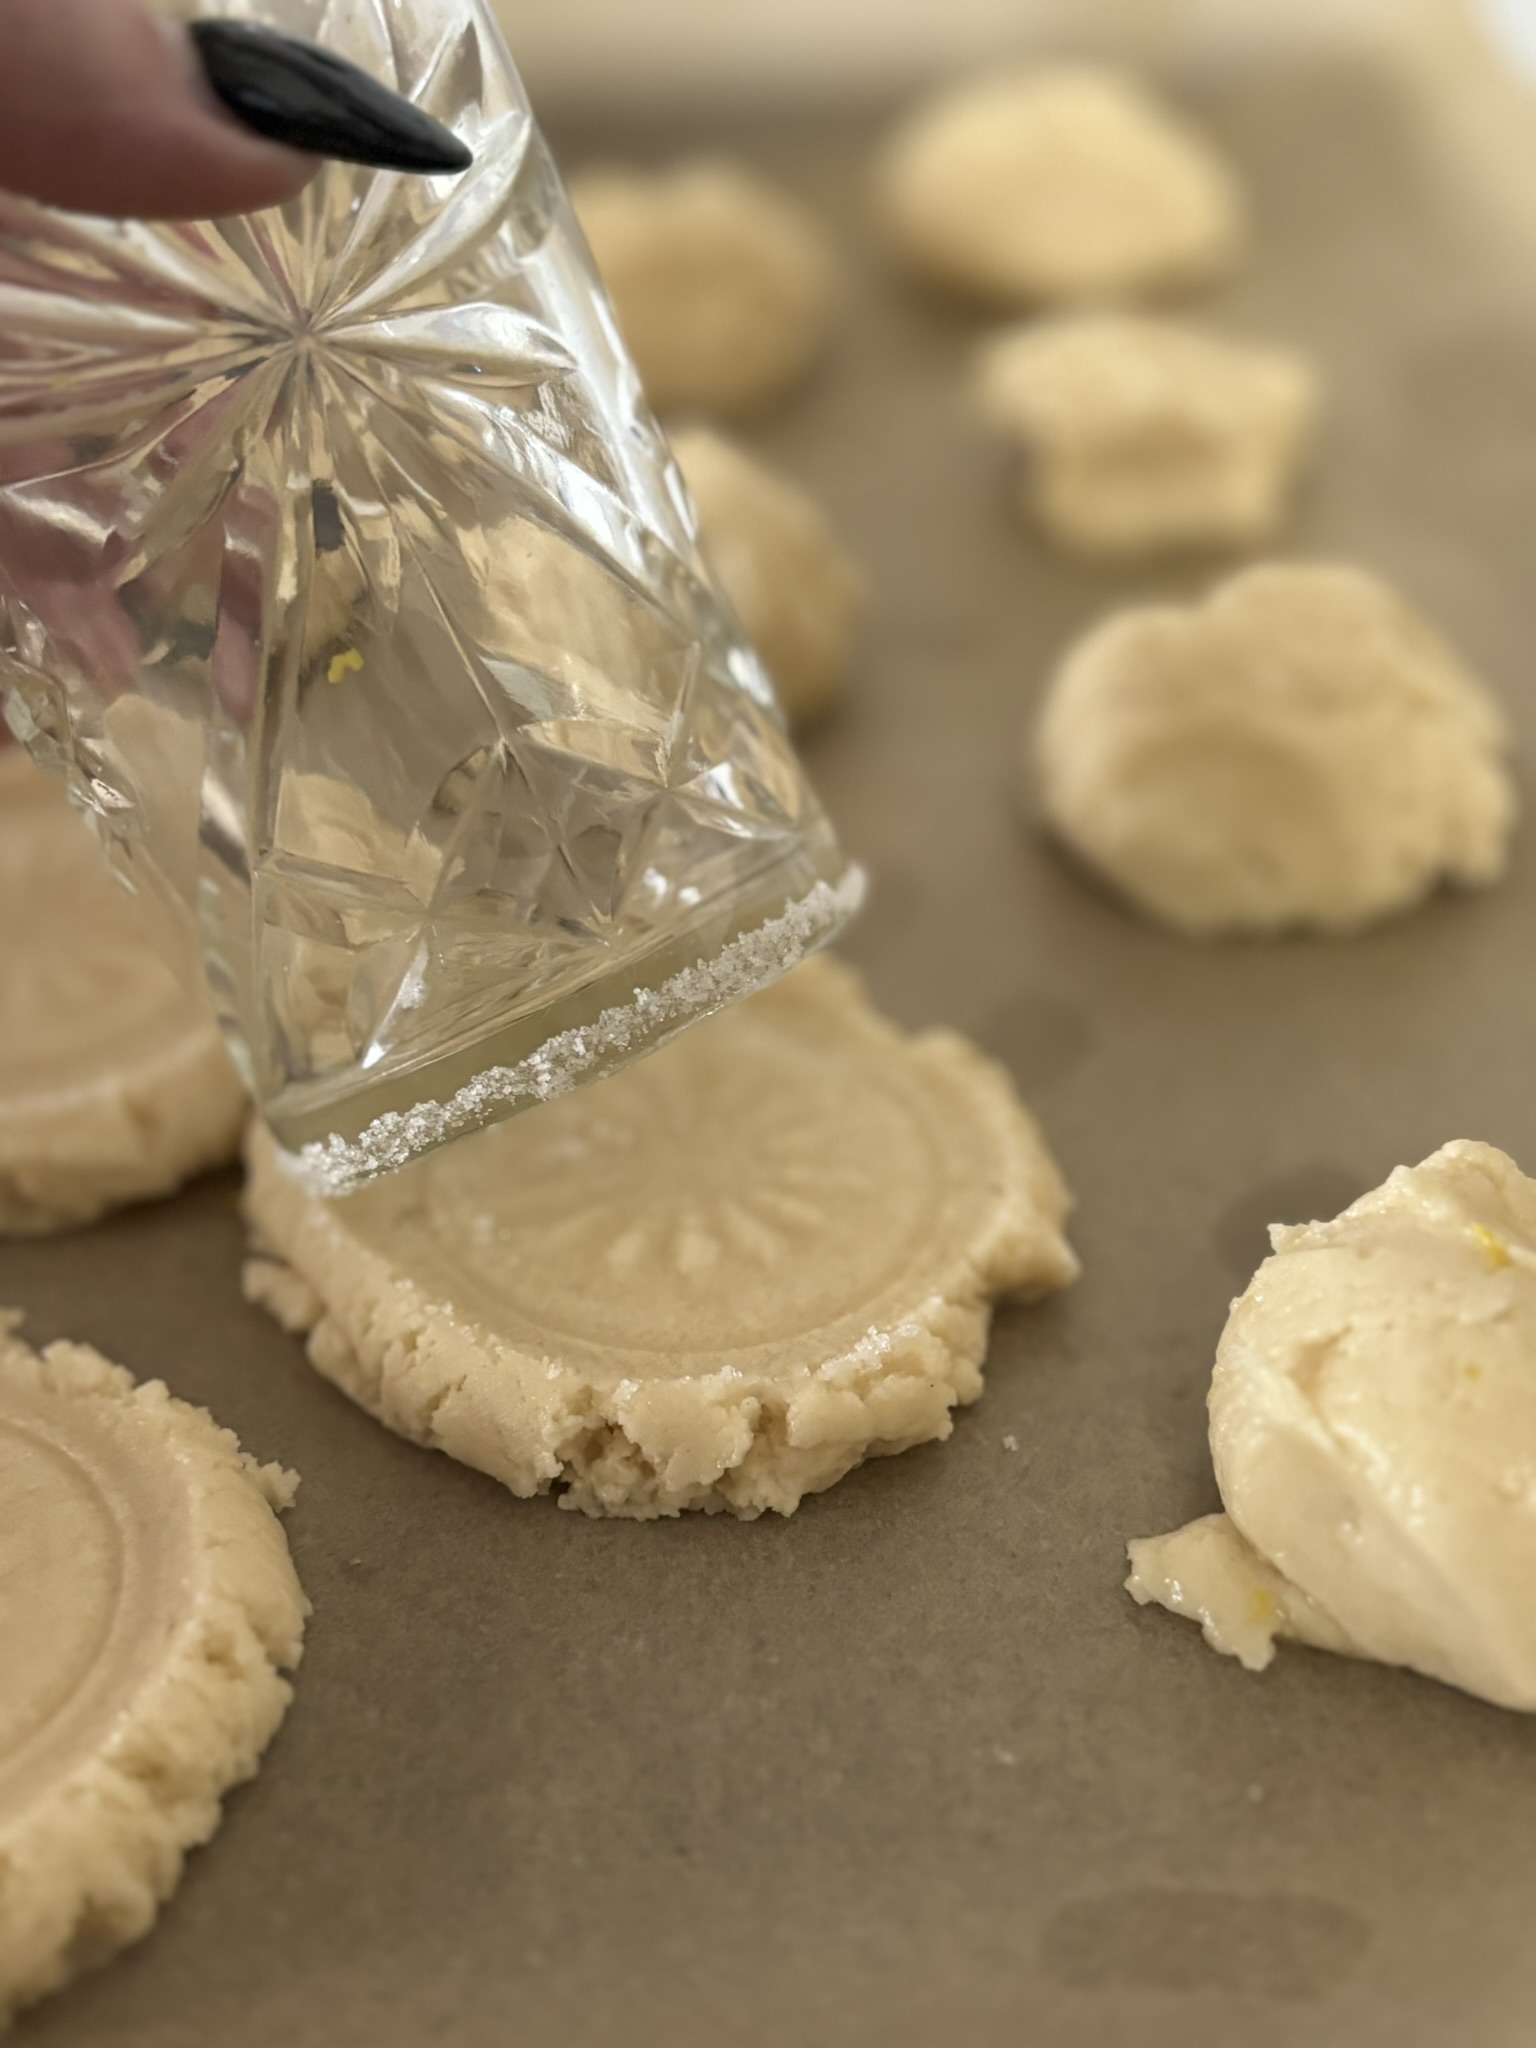
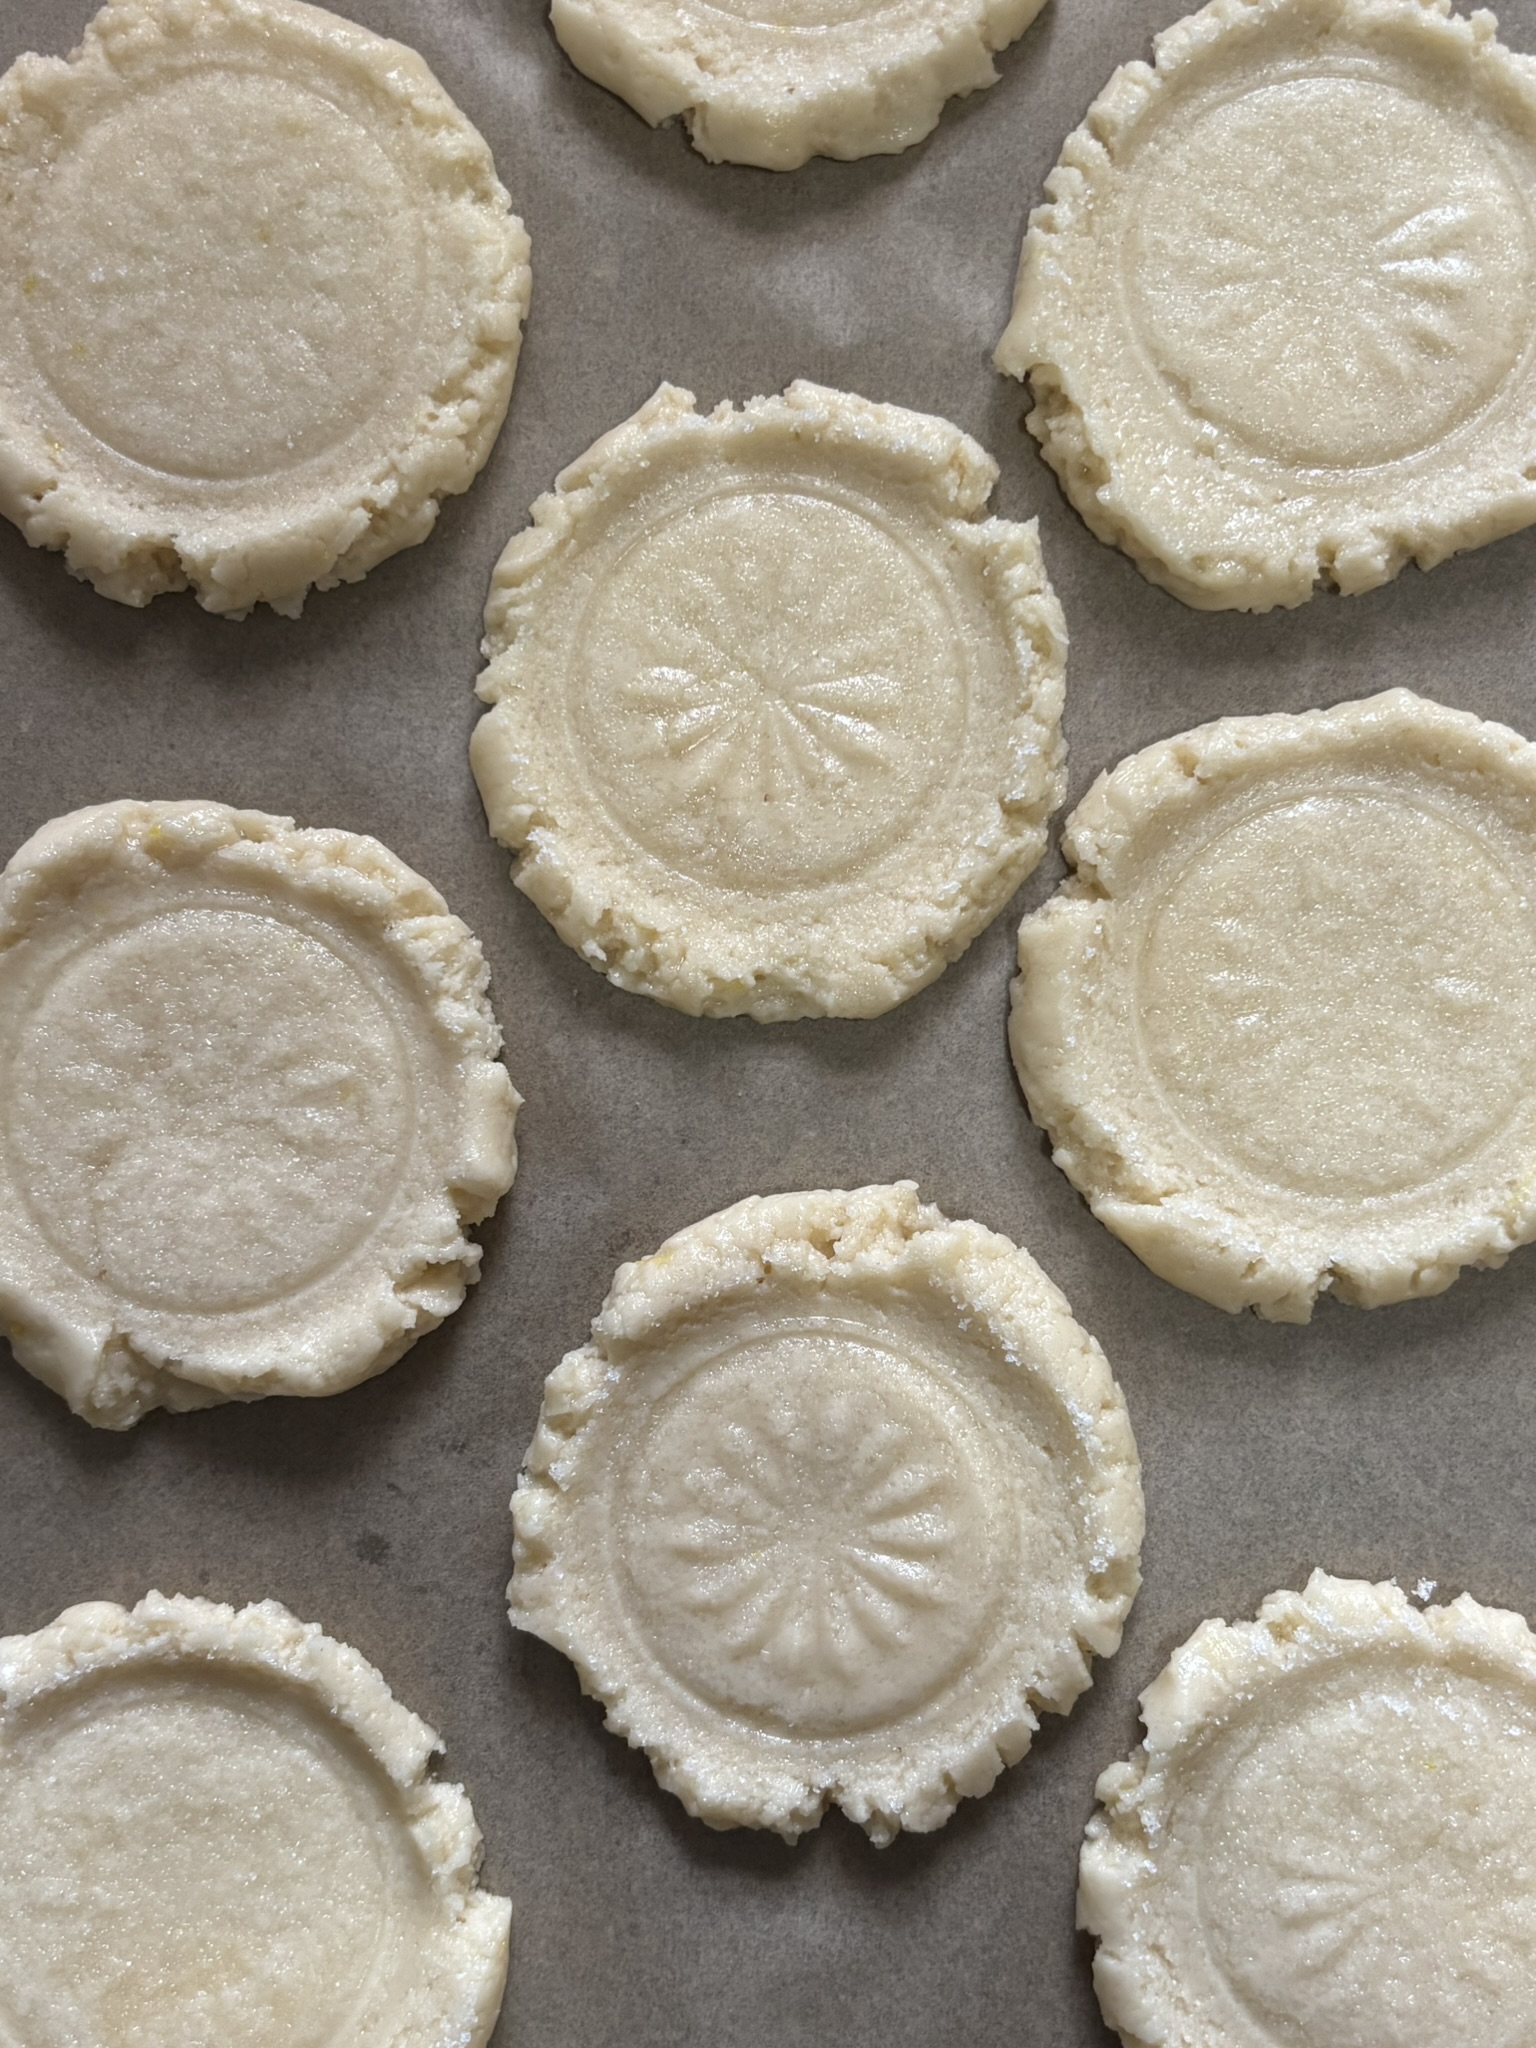
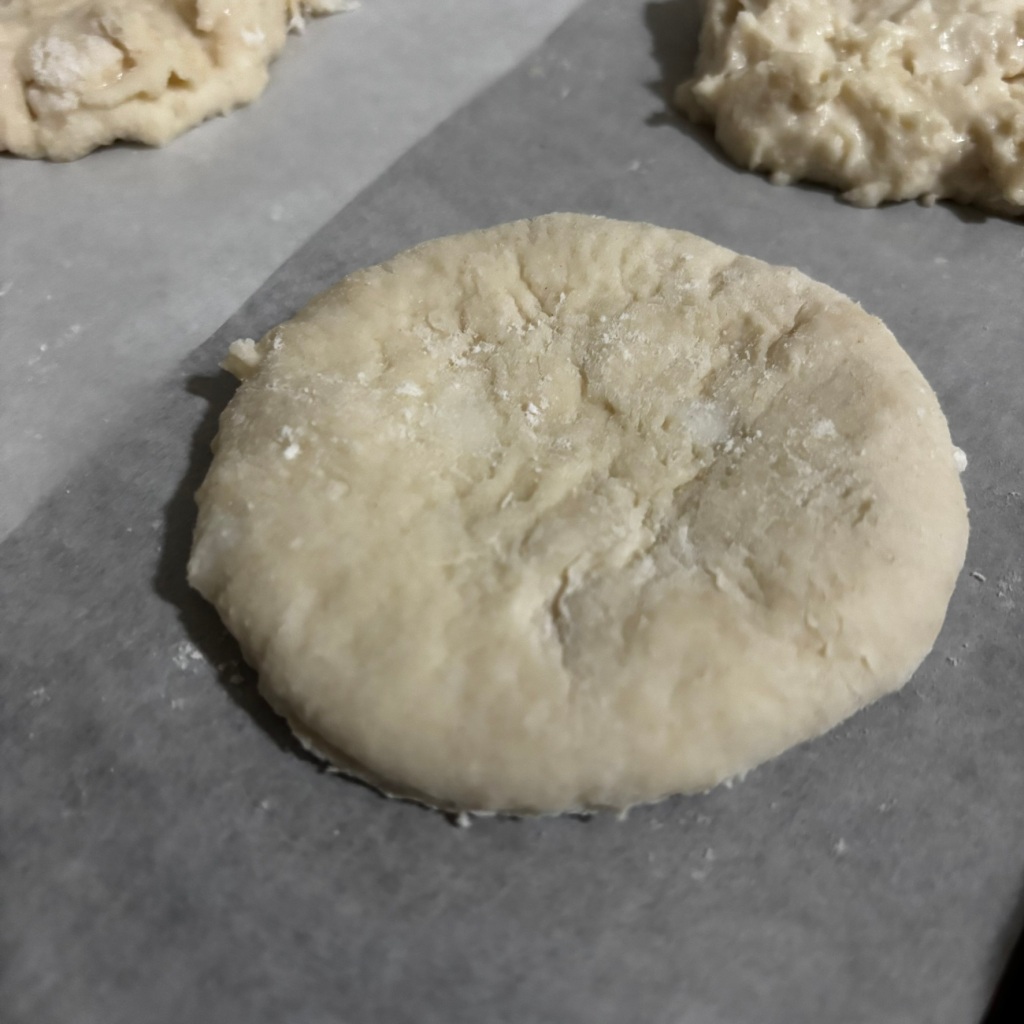
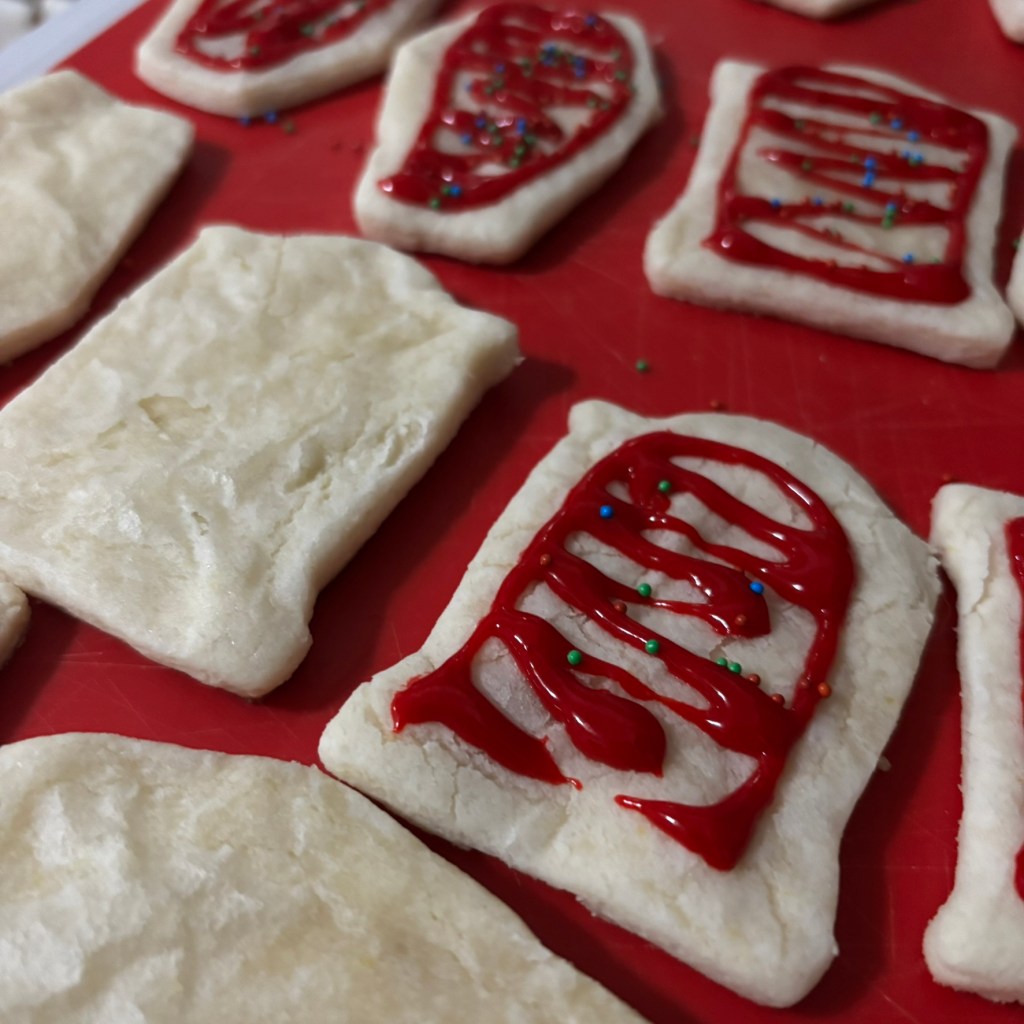
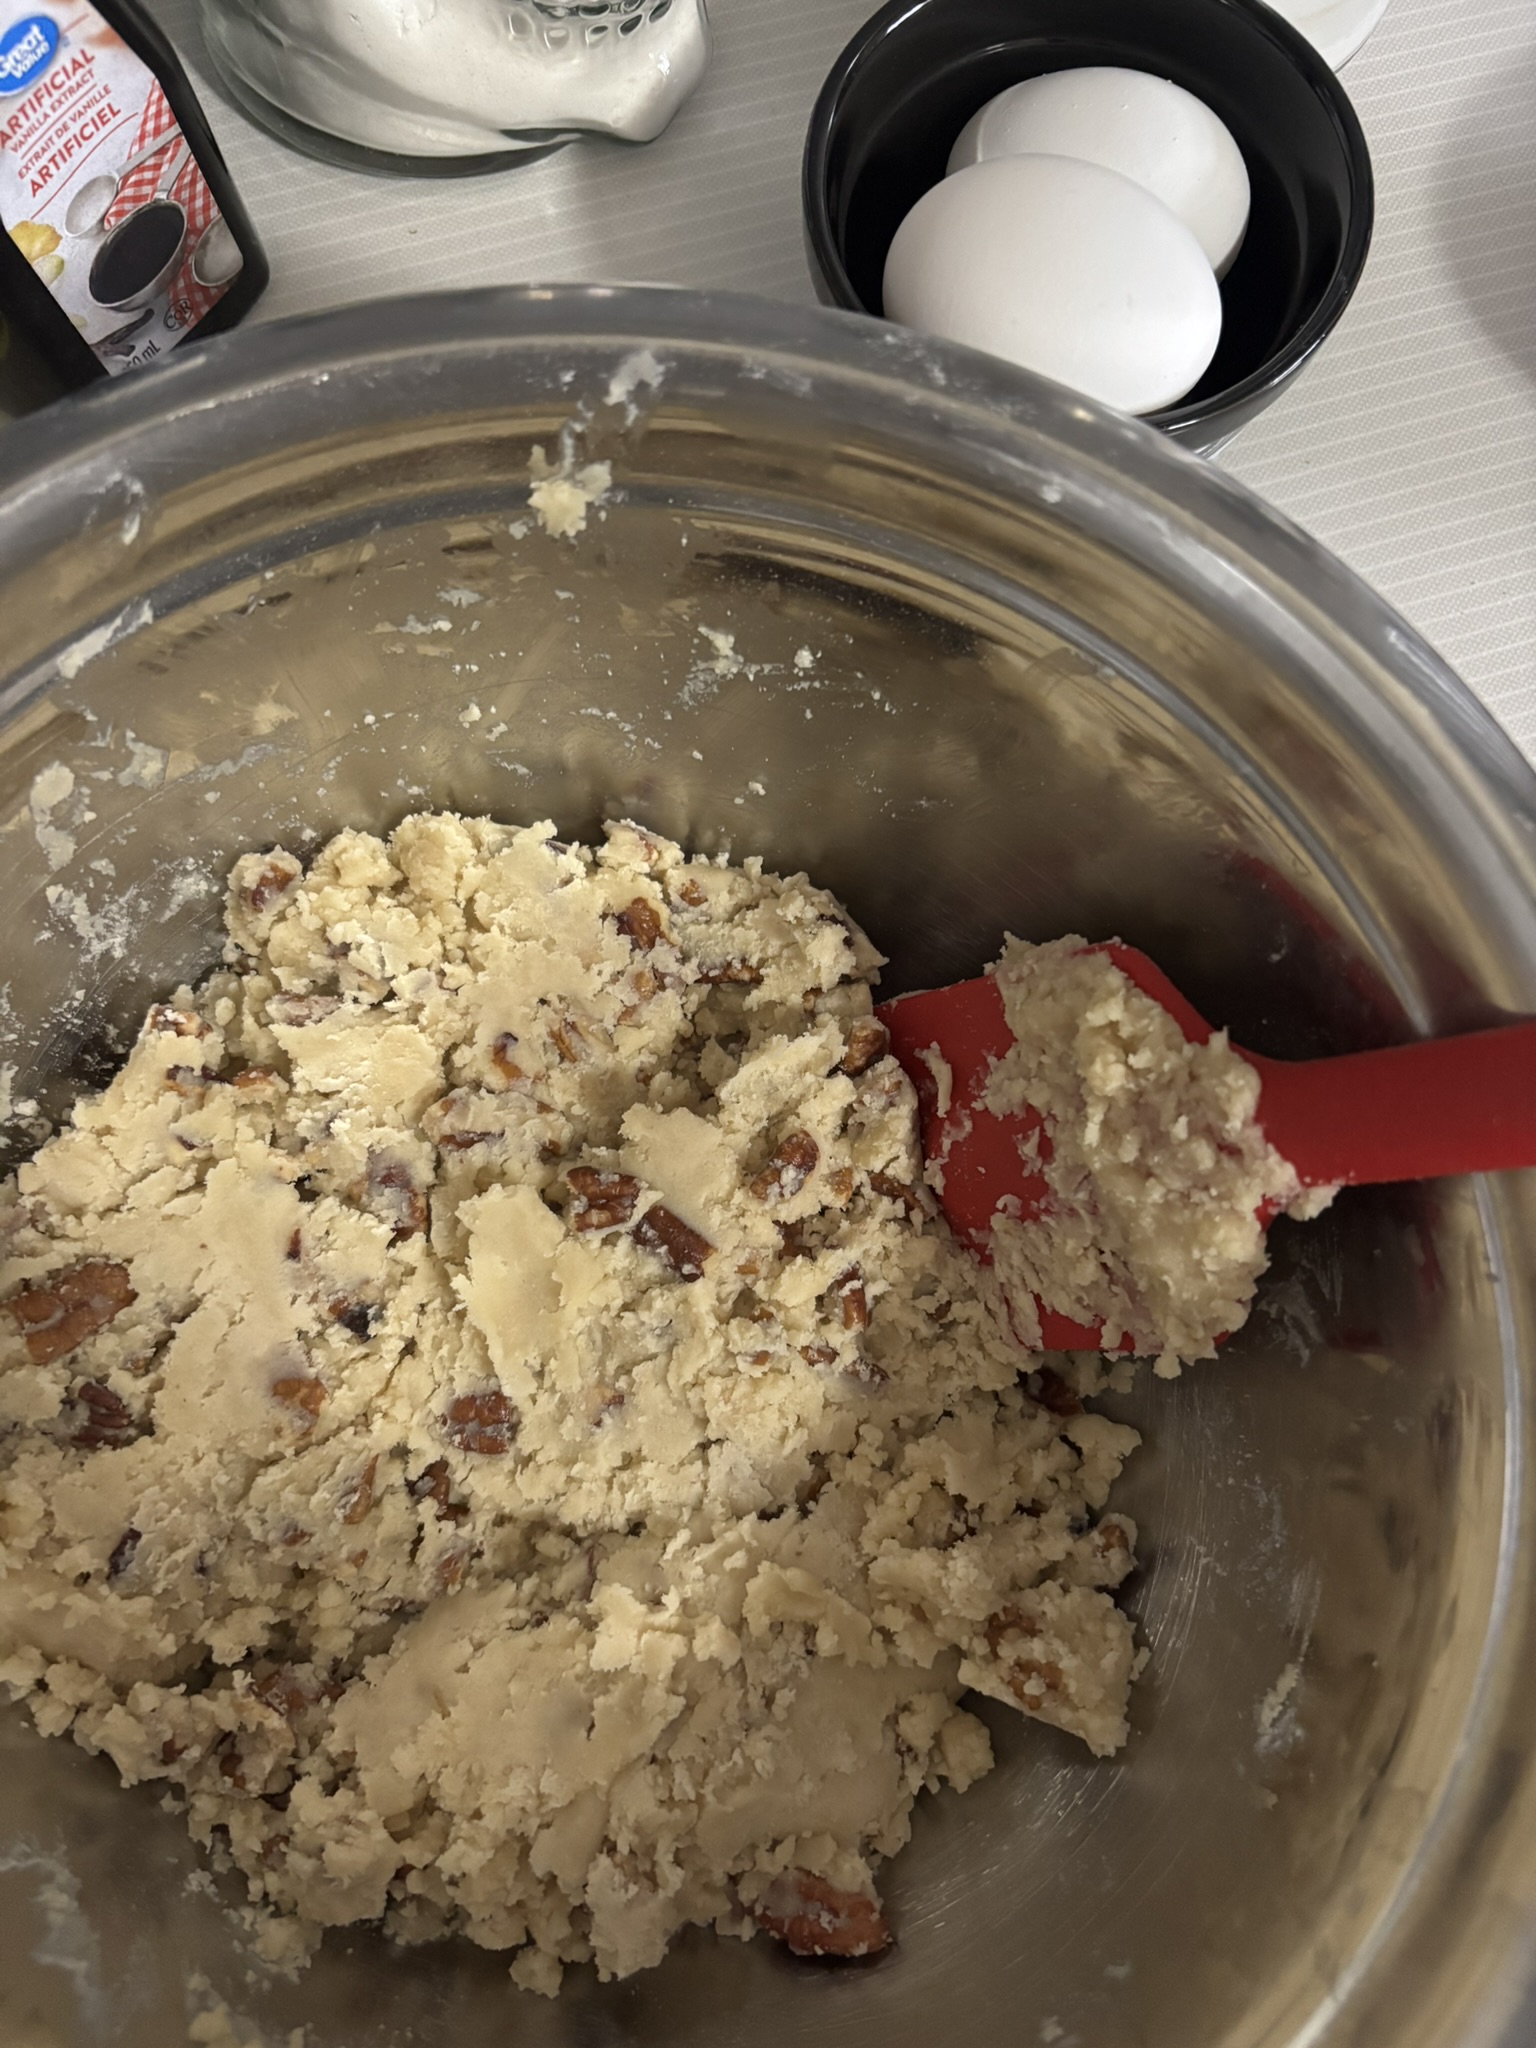
I started with the crust first.
I mixed everything into a rough dough and pressed it into a pie plate. I have long acrylic nails, so this was a bit more difficult than I thought it would be. I ended up using my knuckles and the palm of my hand to flatten everything out and get it somewhat even.
The recipe doesn’t mention pie weights, but some of my research had suggested them. I don’t have any pie weights anyway, so instead I just poked holes in the crust with a fork and hoped for the best.
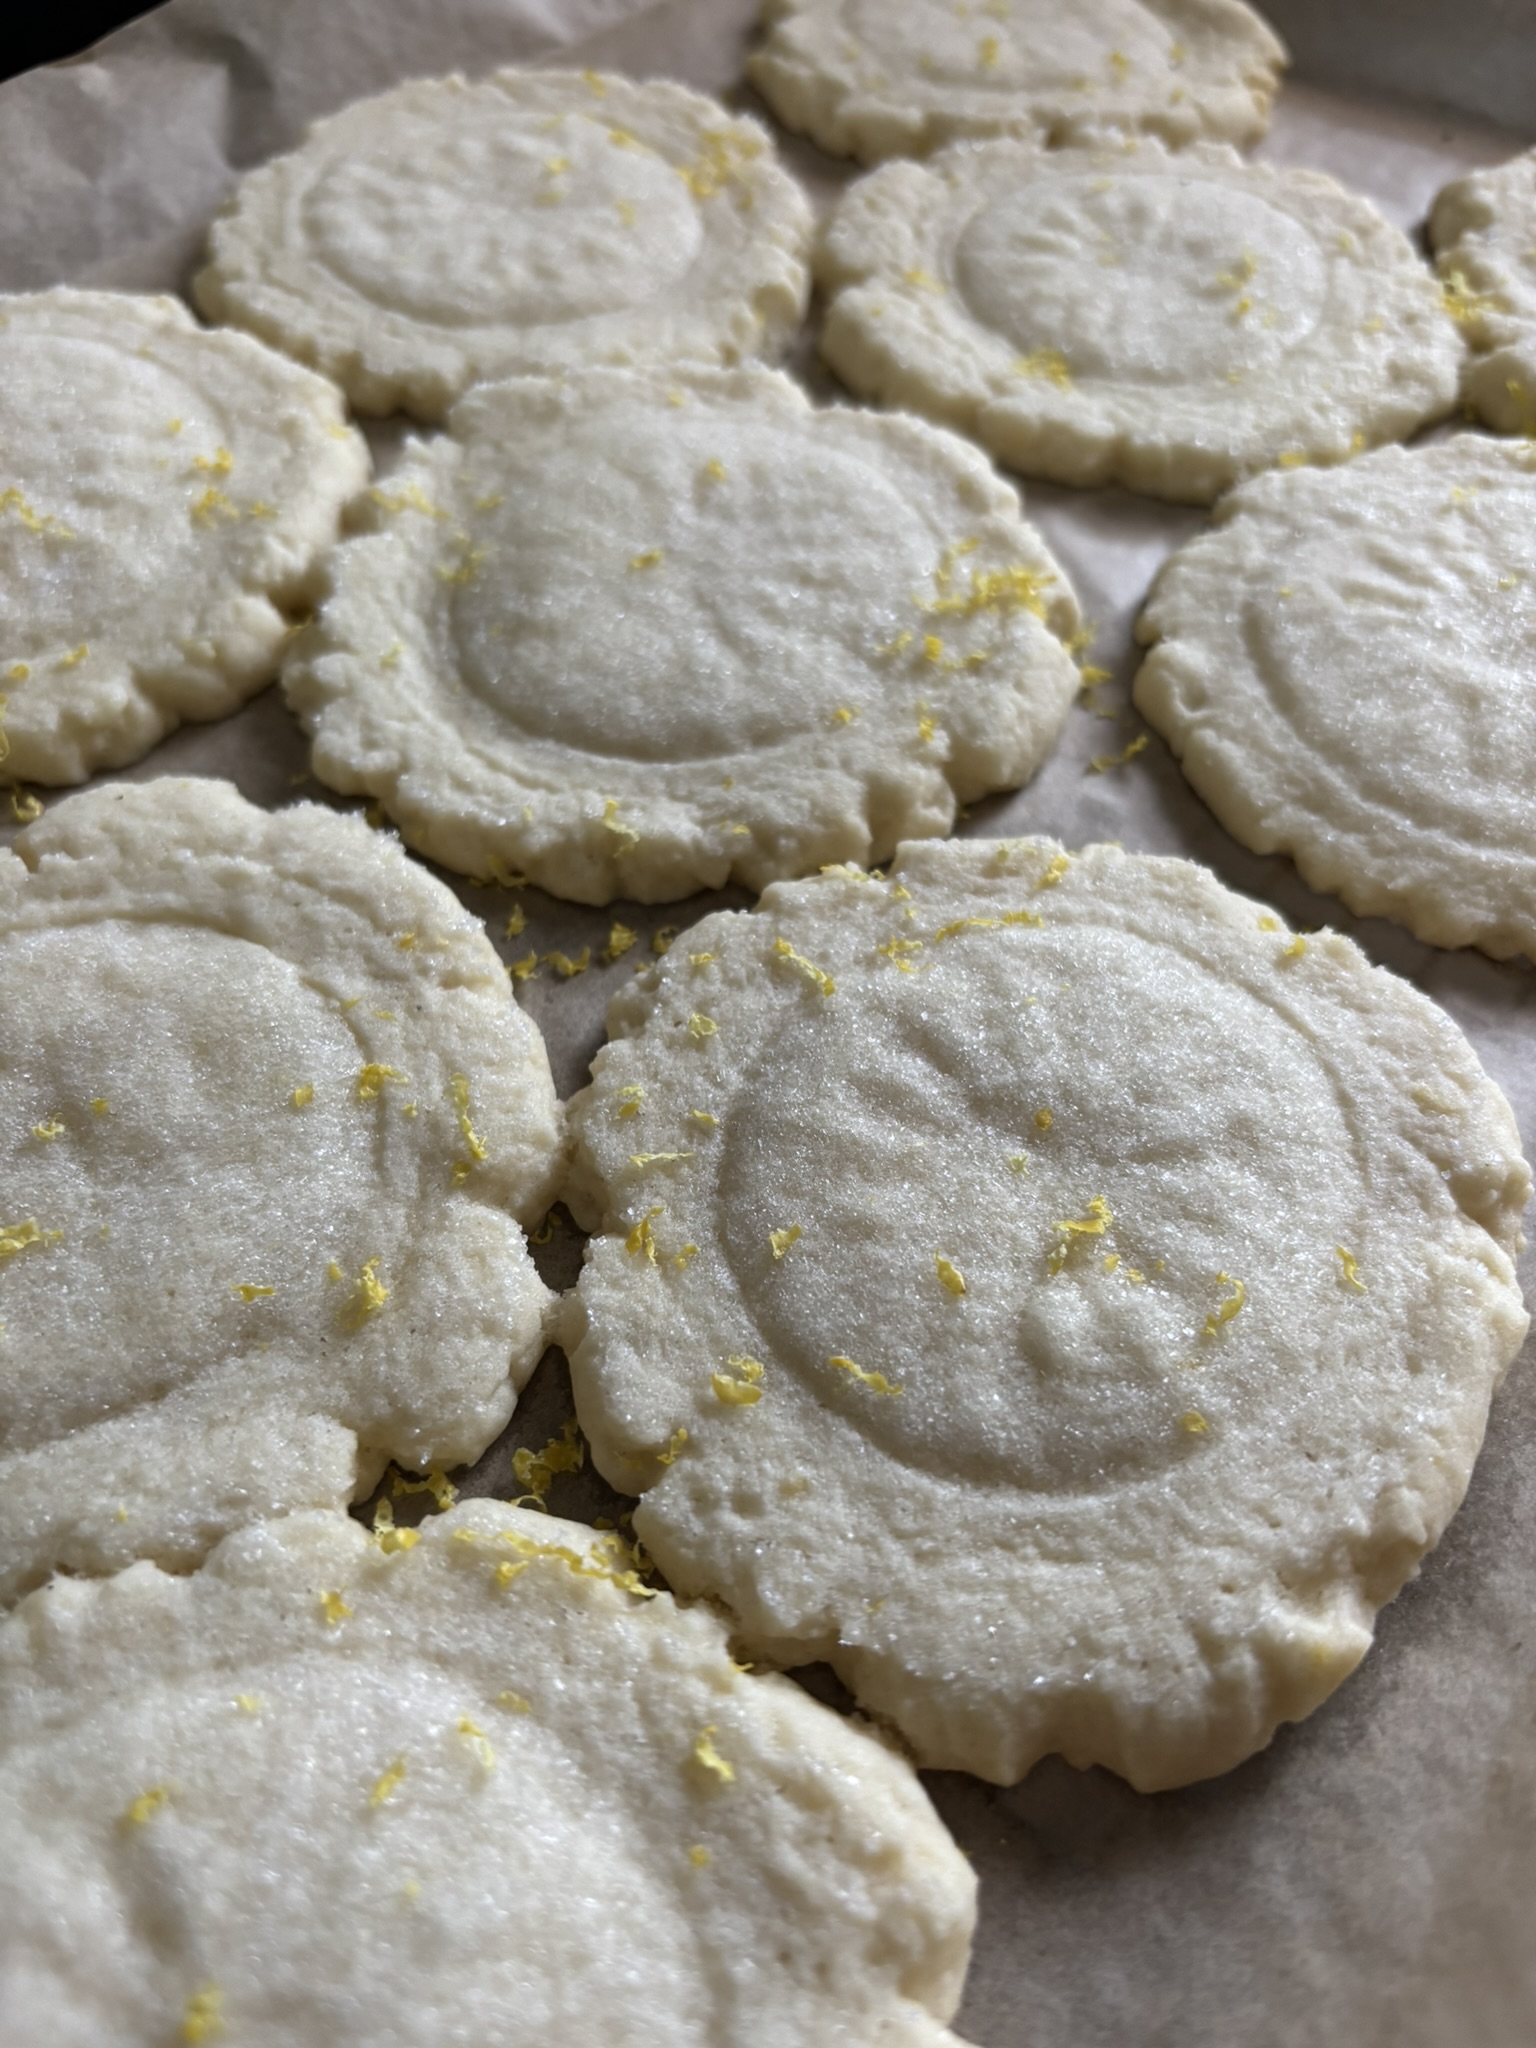
Into the oven it went for 15 minutes. After checking on it, I put it back in for another five. It probably could have baked a little longer, but I was scared of burning it and ruining the whole thing.
After 20 minutes total, I pulled it out and left it on a wire rack to cool while I started the filling.
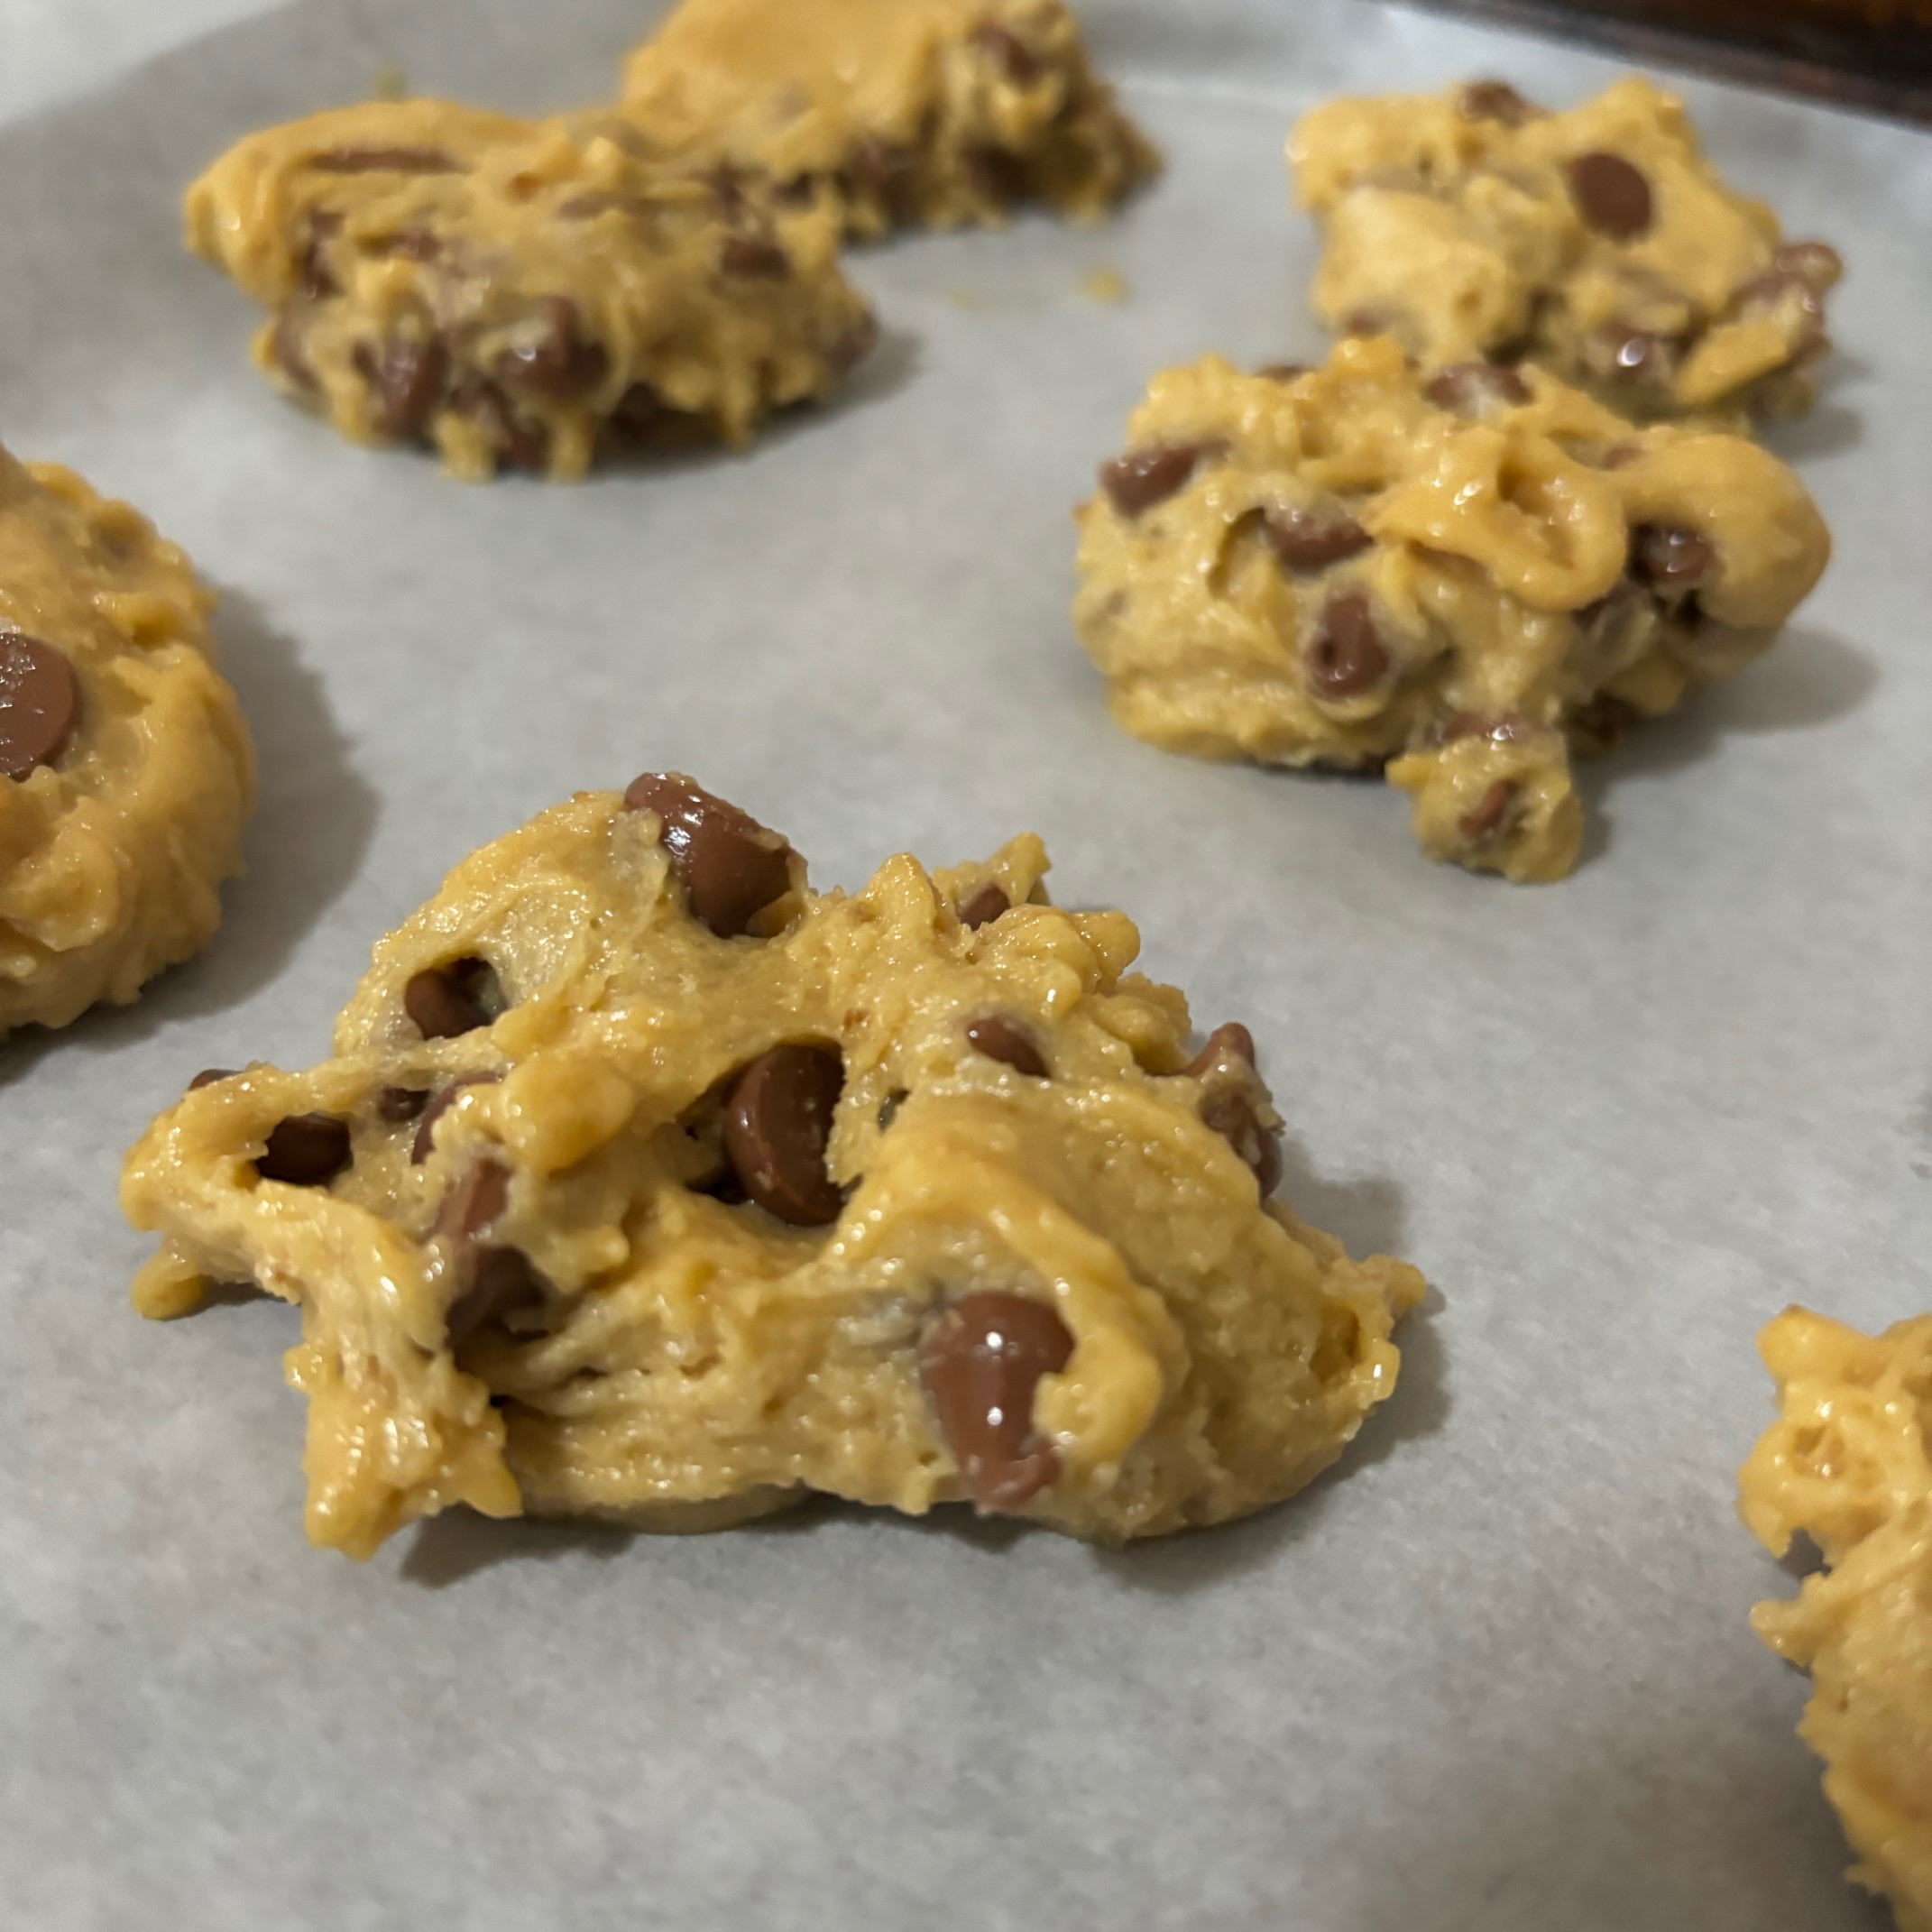
The filling definitely took more effort. I followed the instructions exactly as written and used my hand mixer to save my wrists a bit, but beating each egg for five full minutes still felt like an upper-body workout.
As soon as I added the first egg, the texture noticeably changed and became lighter and fluffier. It actually reminded me a bit of making meringue. I kept scraping down the sides of the bowl while mixing to make sure everything blended properly.
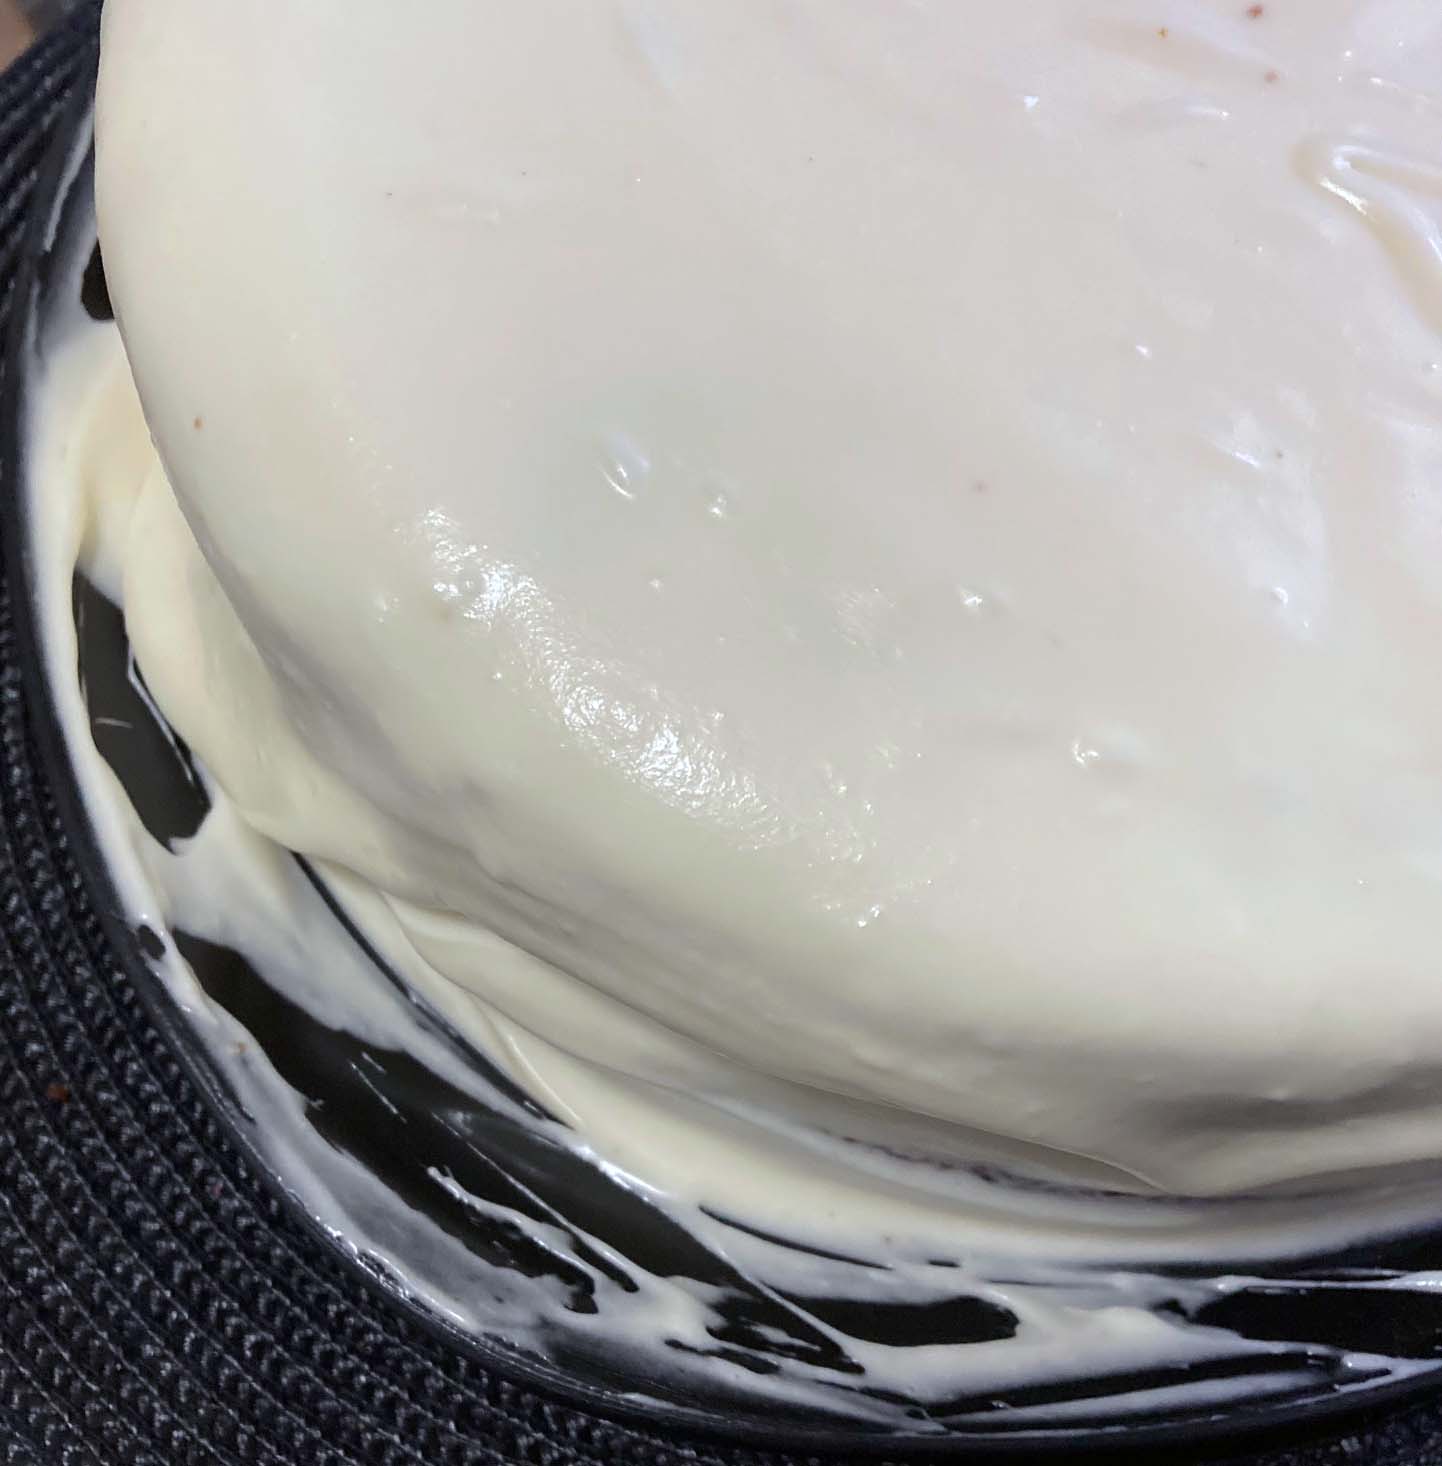
Once it looked smooth enough, I spread the filling into the crust with a spatula and hoped for the best.

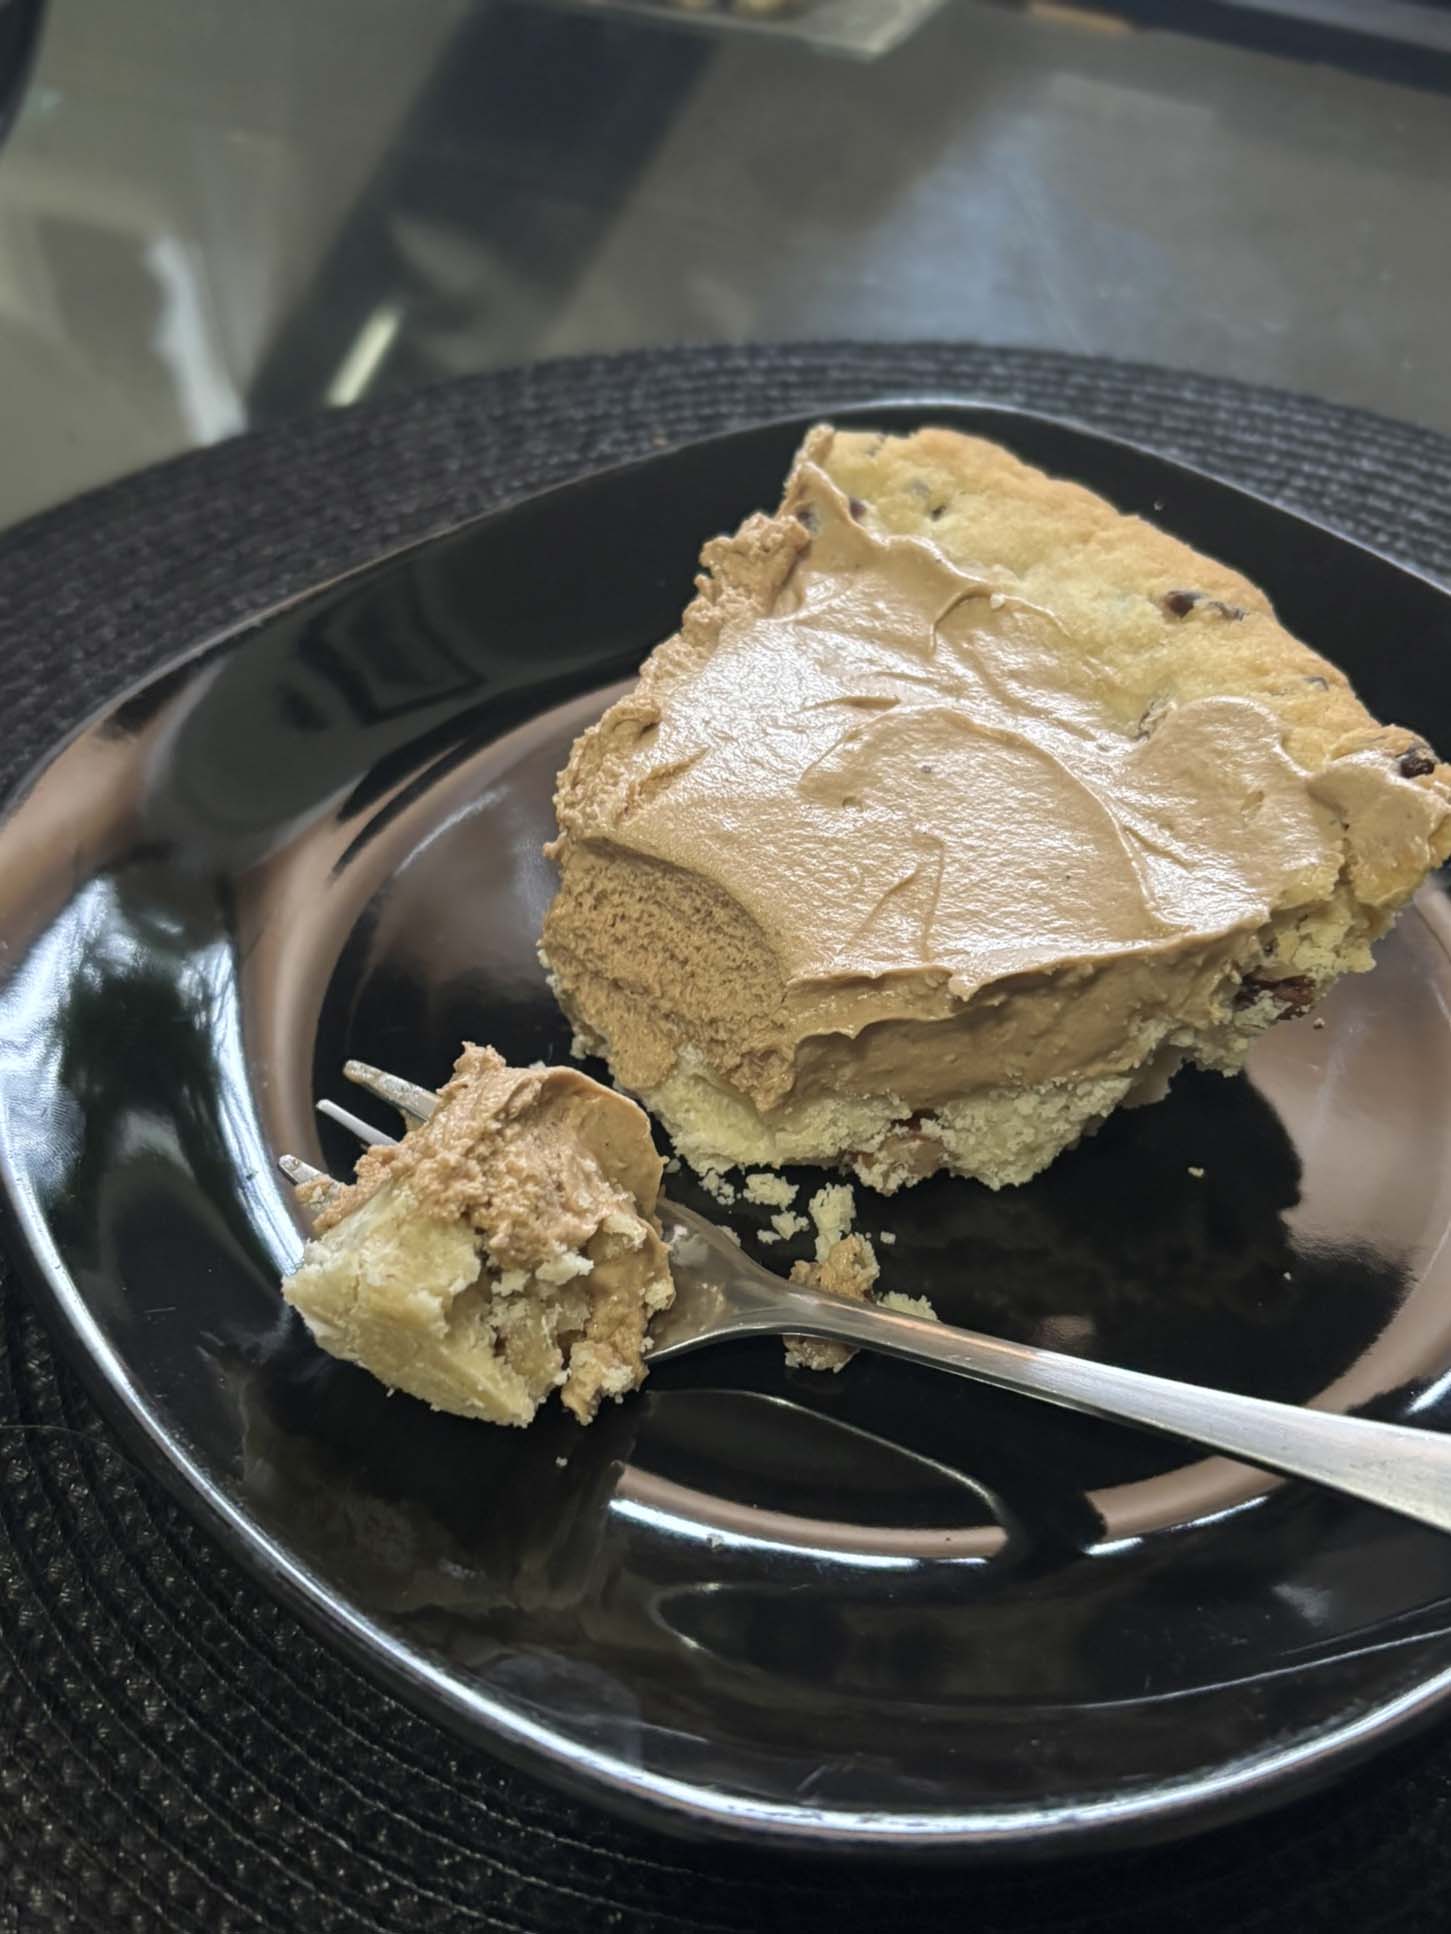
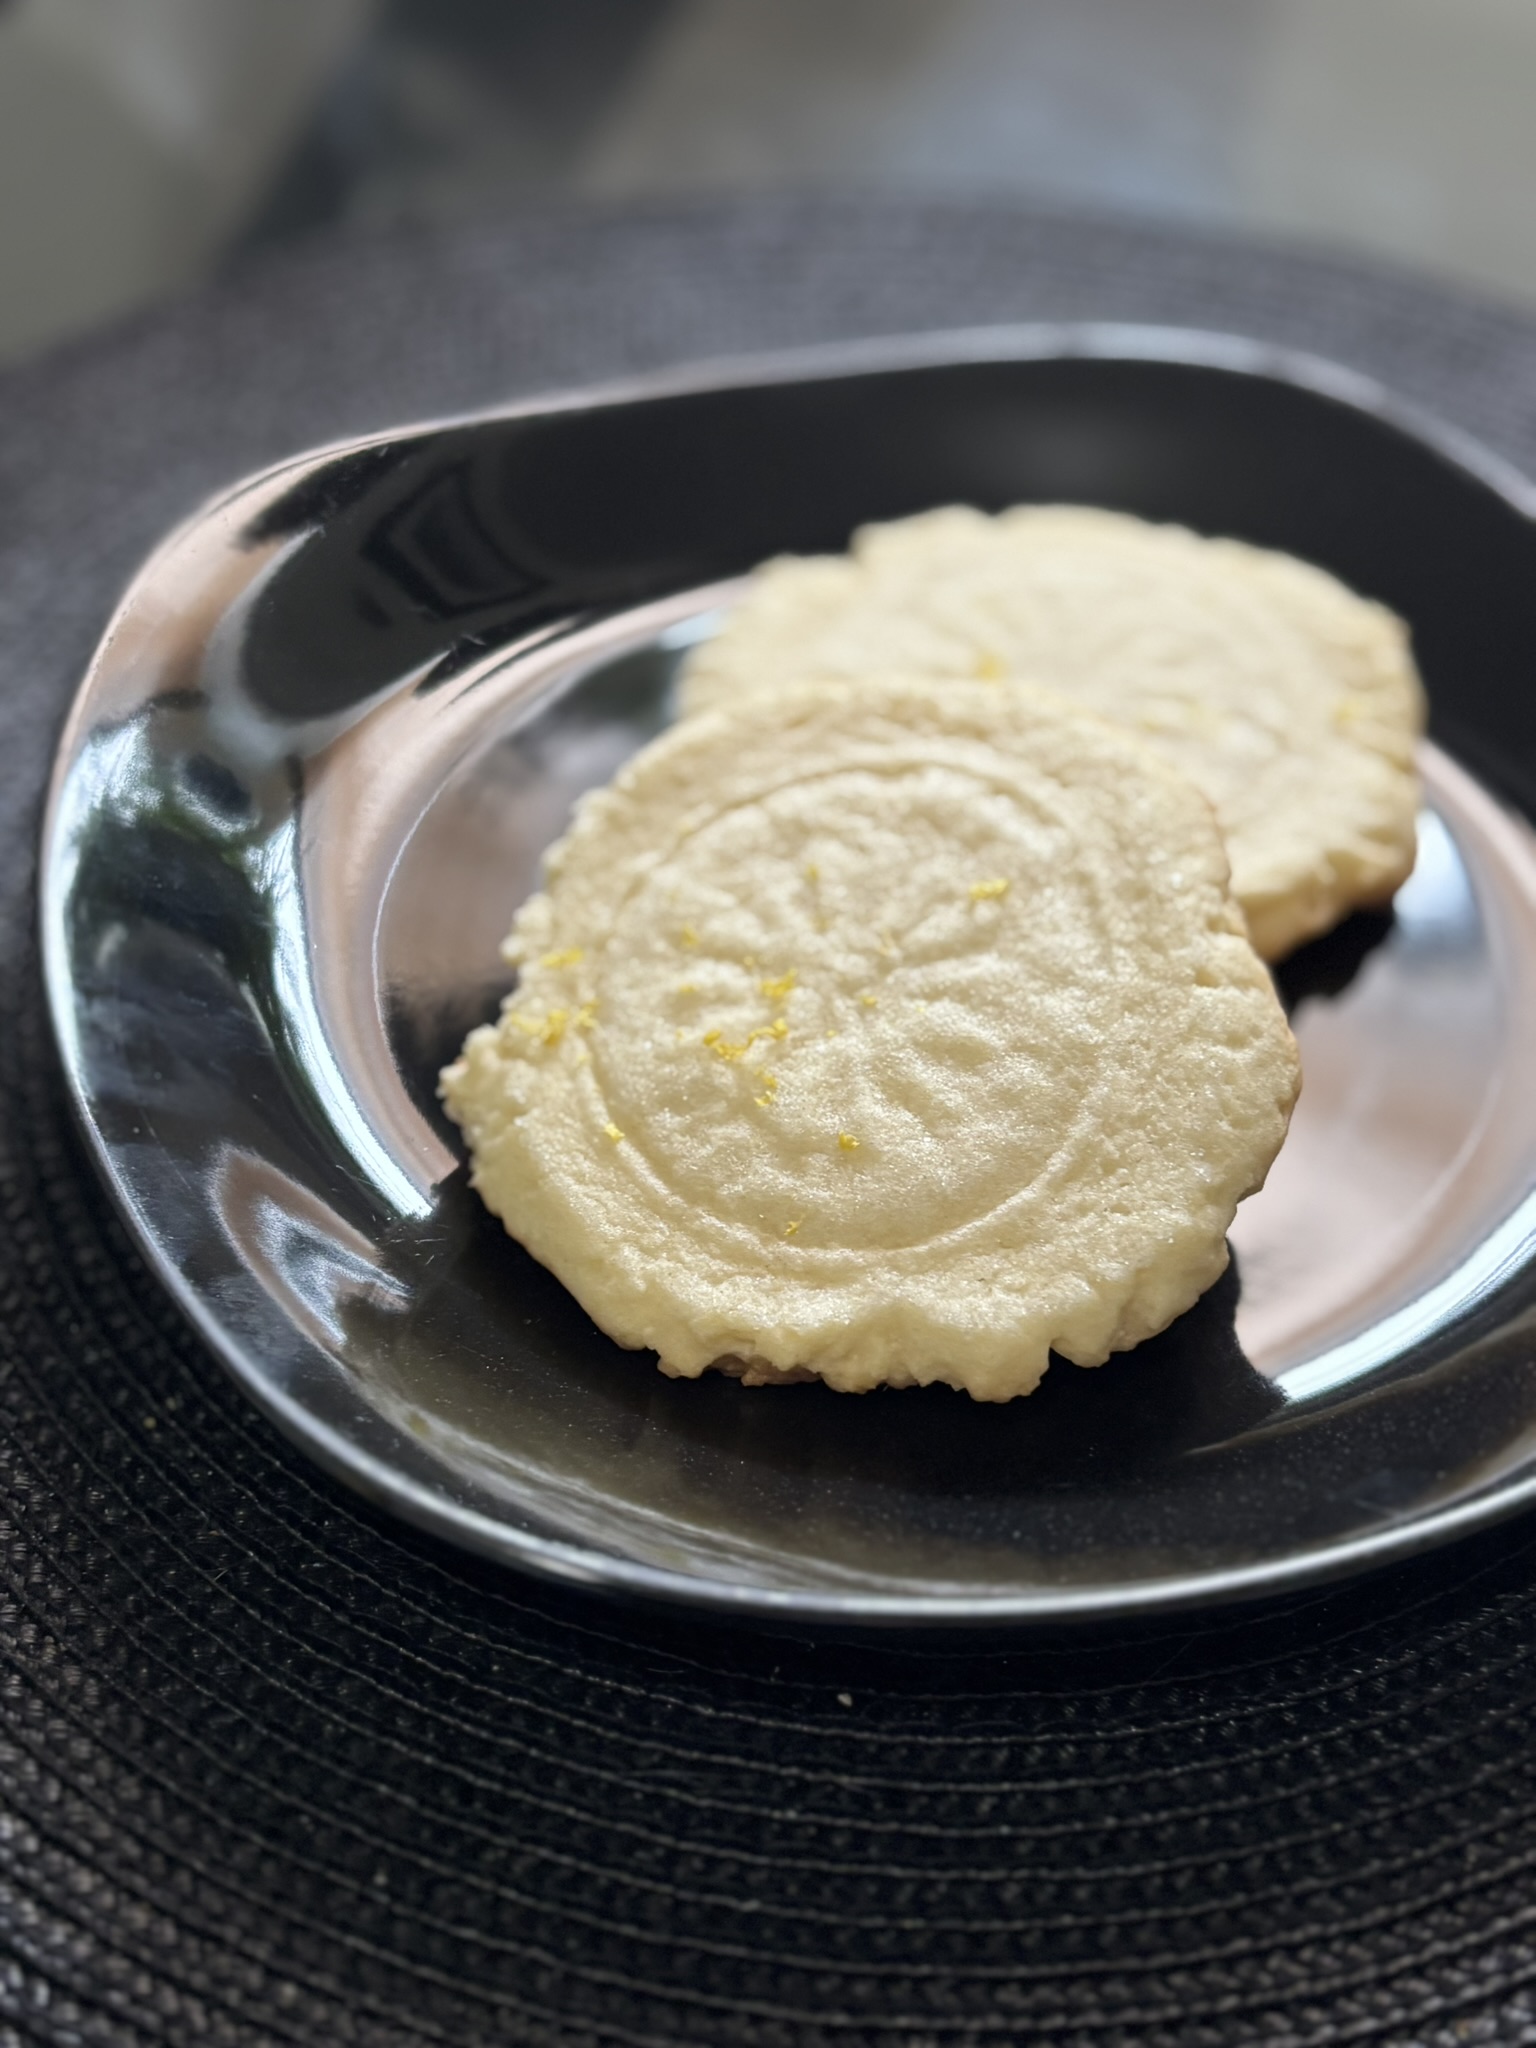
The crust was buttery and flaky, and the filling was rich with that smooth, silky texture French Silk Pie is known for. And so far, no ill effects from the raw eggs, which feels like a win.
Trying it once felt worth the risk for the experience, though I think I would want pasteurized eggs before tempting fate a second time.
It’s funny how a recipe like this can also reflect how cooking habits and food safety awareness have changed over time, while still hanging onto the comfort and nostalgia of a classic dessert.
At the end of the day, this whole story comes back to something pretty simple: pie.
It is the kind of dessert that probably showed up at family gatherings, holidays, and kitchen tables for years. The kind people went back for seconds, even when they claimed they were full.
Seeing a recipe like this engraved on a gravestone adds a completely different layer to that idea. It turns a dessert into part of someone’s legacy, which is kind of amazing.
And somewhere out there, Sharon’s pie recipe is still being made.
Thanks for reading!
References:
- Friends Cemetery | Find a Grave
- Sharon Kay Edwards (obituary) | The Joplin Globe
- Chocolate French Silk Pie | Barley and Sage