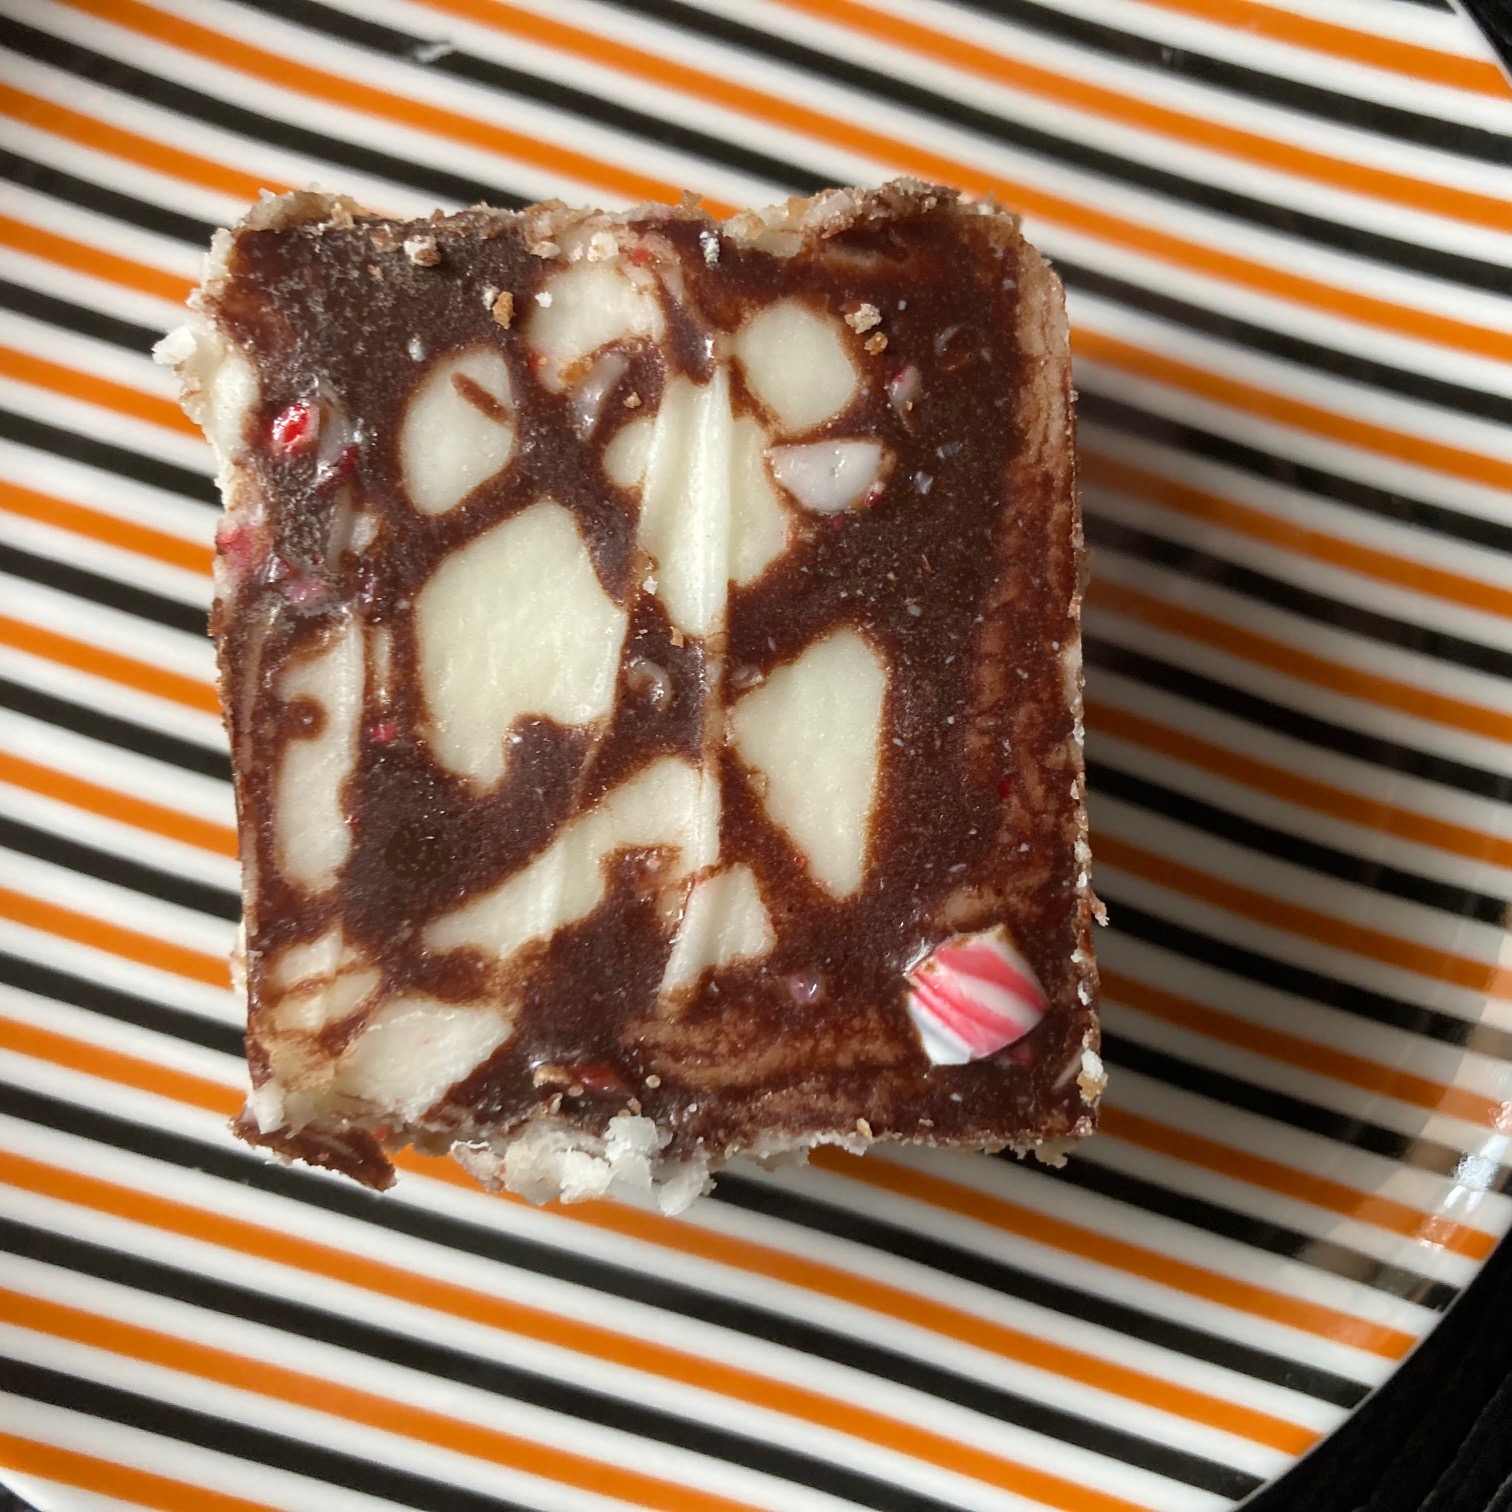
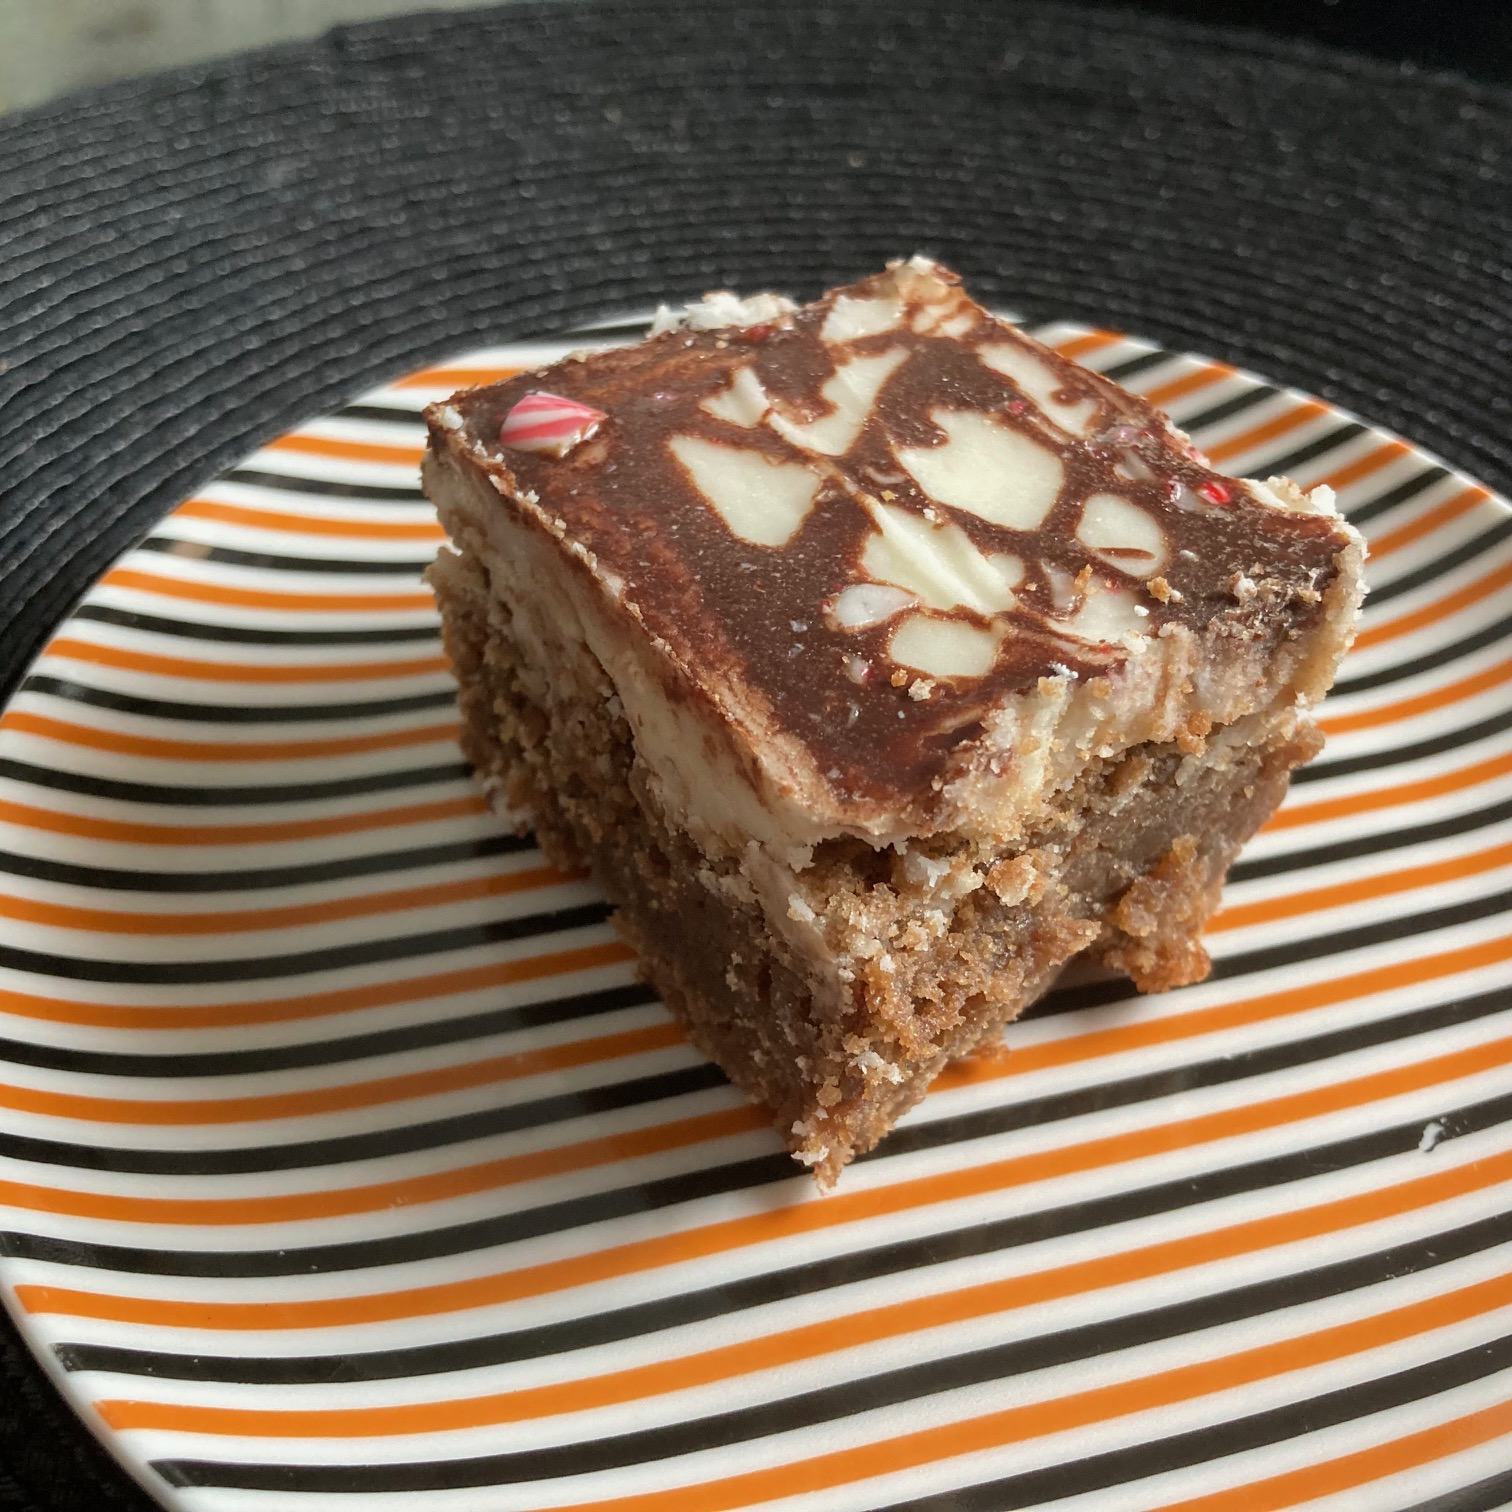
Cemetery Recipes: Chocolate Mint Brownies

This past Wednesday was Valentine’s Day, and like many others this past week, I wanted to make a little sweet treat for my sweetheart. So earlier in the week I tried out another gravestone recipe. My fiancé is quite supportive of my gravestone hobby, so I knew he wouldn’t mind where I got the recipe from. 

For this month’s gravestone recipe, I made chocolate mint brownies. This tombstone recipe can be found on the gravestone of John Rodda, in Maple Grove Cemetery in Wichita, Kansas. 

John Harold Rodda passed away on January 18, 2019, following a brief but courageous battle with cancer. He was a compassionate Funeral Director and Embalmer, having worked at Cochran Mortuary for 54 years. He enjoyed music, cooking, and collecting recipes and cookbooks.1 He was famous for his chocolate mint brownie family recipe, so famous that it was inscribed on a black marble plaque that can be found on his gravestone.2

Here is the recipe, as written the gravestone:

Chocolate Mint Brownies

  • Bake: 350 
  • Time: 20 Minutes

By Sharon Wiens (Aunt Marie McKee’s recipe)

  • Beat: 4 beaten eggs, 1 cup melted margarine, 2 cups sugar.
  • Add: 4 squares melted unsweetened chocolate, 1 tsp peppermint flavouring, 1 cup flour.
  • Beat.
  • I put in a greased and floured small cookie sheet (can use a 9×13 baking dish).
  • Bake 20 minutes 350. Bake a little less with the thinner brownie.
  • Cool.
  • Frost with > for a 9×13 top: 1/4 cup margarine, 2 tbsp cream, 2 cups powdered sugar, 2 tsp peppermint flavoring (I go 1.5 of this to frost the cookie sheet top).
  • Place the frosted brownie in the freezer for 10 to 15 minutes.
  • Melt 2 squares of unsweetened chocolate, 2 tbsp Margarine. 
  • Cool. 
  • Drizzle over brownie and sprinkle with crushed peppermint.

This is one of the most complete gravestone recipes I have made. The directions are very straightforward, and they even include variations for bake time and measurements depending on what you bake the brownies in.

Unfortunately, I don’t have a 9×13 pan so I opted to bake my brownies in a 9×9 pan. In hindsight, I should have tried baking them on the cookie sheet. Because the 9×9 was deeper than both the cookie sheet and the 9×13, I had to bake my brownies for about an extra 15 minutes. After the initial 20 minutes in the oven, I could tell right away that the center was not cooked through so I put it back in for another five minutes, which then turned into 10 more. I knew it was done when the toothpick I pushed into the center of the dish came out clean.

I followed the cooling instructions and frosted the brownies. I thought about adding a bit of food coloring to the frosting to make it red for Valentine’s, but I also wanted to see how it would look without the added color so I decided against it. You could add whatever color you like to the frosting easily by adding a bit of gel food coloring. 

Because I used a 9×9 pan, I think the two squares of baker’s chocolate for the drizzle were a bit too much since I had less surface area to cover. I should have reduced it to half. I then took a candy cane and put it into a zip-lock bag to crush up for the topping. I wrapped the bagged candy cane in a dish towel and used a pint glass to crush the candy, as I didn’t have a rolling pin. It worked perfectly. 
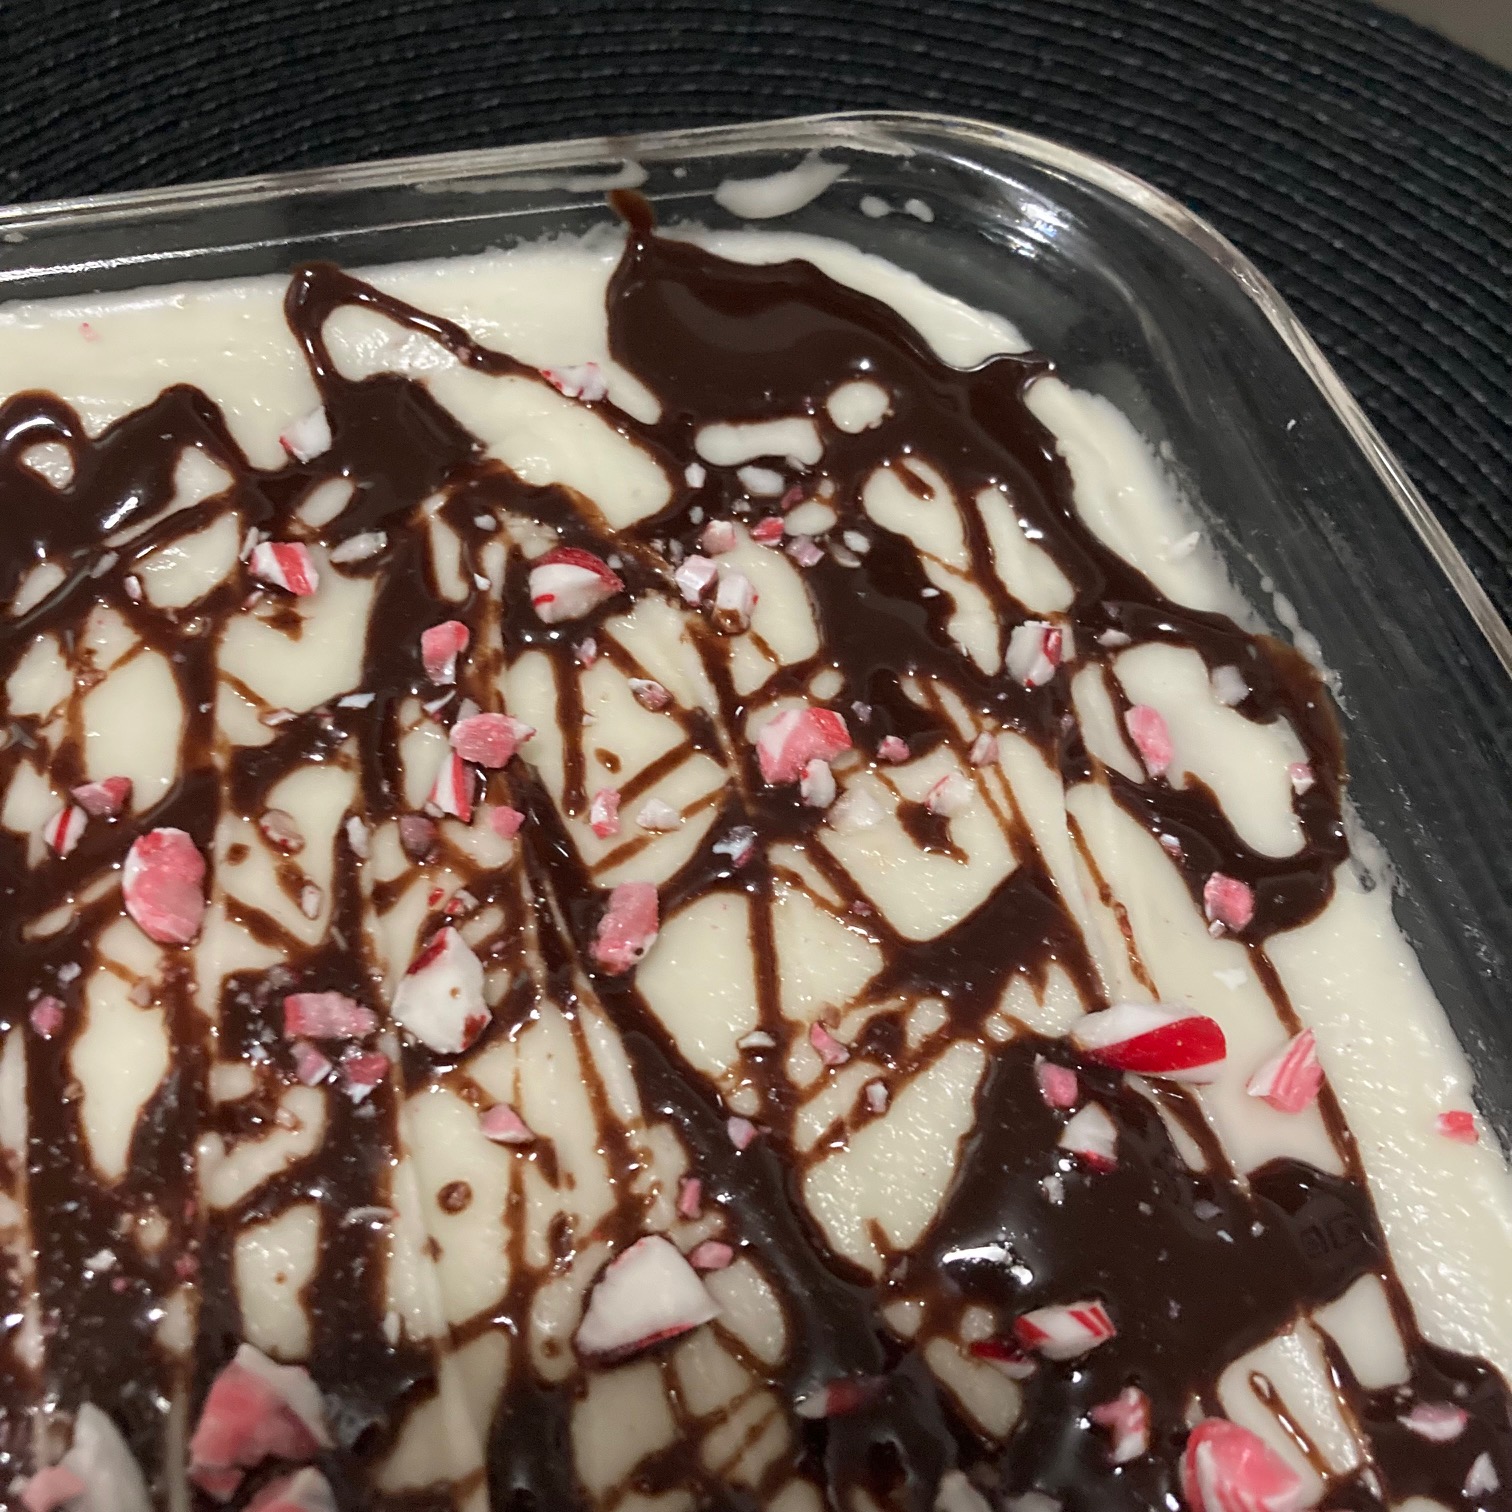
These are super minty, and sweet, but I would have liked them to be a bit more chocolaty. I think maybe my peppermint extract was a bit off because my batch has a bit of an aftertaste, or perhaps I just used too much? Either way, I still think they turned out decent and would try this recipe again with some slight modifications. Learning and experimenting are all part of the fun, after all. 

Have you tried this recipe before? Do you have any helpful tips for me? I would love to read them in the comments! 

Thanks for reading!


References:

  1. John Harold Rodda Obituary | Cochran Mortuary & Crematory
  2. John Harold Rodda | Find a Grave

Cemetery Recipes: Chicken Soup

We recently had our first big winter snowfall, after enjoying a pretty mild start to the season. The snow and cold weather have me craving warm and cozy comfort food, so I thought this might be a good time to try out another gravestone recipe—Chicken Soup!

This gravestone recipe comes from the tombstone of Valerie C. Volpe, of West Seneca, New York. I’m not sure exactly where Volpe is laid to rest, but her pink granite gravestone topped with an open book design features her chicken soup recipe in her own handwriting. I thought that was a beautiful touch. 

The recipe, inscribed on the open book is laid out like a recipe card and even has her signature. In life, Volpe was co-owner of Valerie’s Family Restaurant where she not only fed her family but her community as well.1

The epitaph reads: “Beloved Daughter, Mother / Wife, Grandmother, / Sister, Aunt & Friend / Valerie C. Volpe / She was a lady raised by a lady / Apr. 18, 1947 / Sep. 10, 2016”

Unfortunately, the only photo I could find of the gravestone is not the highest resolution, so the handwriting is a bit hard to make out. I did my best to transcribe the recipe, as inscribed on the gravestone. Here is the recipe:

Recipe for Chicken Soup

From the kitchen of Mommy

  • 1 Perdue oven stuffer
  • Cut in 10 pieces
  • 1 small Parsnip
  • 1 small Turnip
  • 2 stalks Celery
  • 4 Carrots
  • Parsley —
  • Dill —

This makes 1 large pot or 2 — pots / Clean chicken. Cover with / cold water — / Celery, Carrots, parsnip – turnip / Bring to a boil — / — / — / — / Cook about 2 1/2 hours.  / Valeria C. Volpe

Since I had such a hard time reading the recipe from the photo, I went by this recipe description from Billion Graves:

“Cut an “oven stuffer” into 10 pieces. Place in a pot. Rinse and cover with cold water. Add salt. Cut up 1 small parsnip, 4 carrots, 1 turnip, and 2 stalks of celery. Add to the pot and bring to a boil. Sprinkle with dill. Cook for 2 1/2 hours and then remove the bones. Top with chopped parsley when ready to serve.”

This is one of the more detailed recipes I have made so far, so once I had the above instructions I didn’t have too much to decipher to make it. The recipe does call for a Perdue oven stuffer, which I did have to look up. A Perdue “oven stuffer” is an American brand, of fresh whole chicken. These chickens, also called roasters, are older chickens and usually weigh between 5 and 7 pounds. I made a shopping trip specifically for the ingredients of this recipe and although we don’t have Perdue brand in Canada, I was able to find a fresh chicken that would work for my needs. 

I have trimmed a roasted chicken before, but trimming a fresh chicken was new for me. I didn’t end up using 10 pieces of the chicken, as the thighs, wings, drumsticks, and chicken breasts were more than enough. I was also worried about smaller bones being lost in the soup and causing a choking hazard, so I was happy to have just some larger bones in the pot. 

I should note that this was my first time making soup from scratch! Aside from getting the chicken ready, this soup is pretty simple with hearty ingredients. 

Once the soup was at a boil I lowered the heat to medium and let it simmer for 2 1/2 hours, checking on it now and then to stir. I will admit I did need to add water periodically as it boiled off leaving more of a stew at times. I made sure to re-season the pot every time I added fresh water, but in the end, I still needed to season it when it was ready to serve. I’m not sure if that was supposed to happen, or if I didn’t really need to let the pot simmer for that long, but in the end, the soup still turned out. I was of course mindful of making sure the chicken was cooked through.

Since it took so long to prepare, I didn’t have soup for supper that night, but I did make sure to do a taste test after removing the bones. It wasn’t as seasoned as I would have liked, but the cozy warm chicken soup taste is unmistakeable. I ended up enjoying a bowl for lunch the next day.

This one was a little tricky for me, and I would tweak the cooking time if I were to make it again. This recipe took me out of my cooking comfort zone. I think I would prefer to stick to sweet gravestone treats, but at least I tried.

Have you made this recipe before? Do you make soup from scratch often? I would appreciate any tips in the comments! 

Thanks for reading!


References:

  1. Gravestone recipes so good they are set in stone | Billion Graves

Cemetery Recipes: Spritz Cookies

It’s the holiday baking season! A time when many family members are baking delicious sweet treats to share with loved ones. What better time than to try out another gravestone recipe? 

For this month’s recipe, I wanted to try Naomi Miller-Dawson’s Spritz Cookies. I have been saving this recipe to try specifically for this month. I hope to share these cookies with my loved ones this Christmas, at our annual family get-together. 

This cookie recipe can be found on the grave of Naomi Odessa Miller-Dawson. Beloved mother, aunt, grandmother and great-grandmother. She passed away in June of 2009 at the age of 87. Her gravestone, which can be found in Green-Wood Cemetery in Brooklyn, features an open-book design.

Commonly a book represents the Bible or book of life, but an open book is sometimes used as a device to display the deceased’s details, like names and dates. Miller-Dawson’s son, Richard, told Medium in 2019, “It’s probably from the design that [one would] use if someone was putting a Bible verse onto the headstone, but instead of having the Bible verse, we put the part of the recipe from spritz cookies.”1  

Naomi Miller-Dawson was a first-generation American, her parents and two older sisters having been born in Barbados. Her family immigrated to America before she was born. She lived in Brooklyn, NY and supported her family by working as a postal worker for over 20 years. She was also an excellent baker, so much so that her two children immortalized her cookie recipe on her gravestone.1

Here is the recipe, as written on the gravestone:

Spritz Cookies⁠

  • 1 cup of butter or margarine⁠
  • 3/4 cup sugar⁠
  • 1 teaspoon vanilla⁠
  • 1 egg⁠
  • 2 1/4 cups of flour⁠
  • 1/2 teaspoon baking powder⁠
  • 1/8 teaspoon salt

You may have noticed that this gravestone recipe only lists the ingredients. I have not baked a lot of cookies in my lifetime, so I did need to do some extra research to figure out the directions of this recipe. I learned that spritz cookies are similar to a sugar cookie but more buttery, and require some extra care when combining the ingredients. 

I found some tips for making spritz cookies online and added the ingredients together in the order they are listed on the gravestone. First, I whipped the butter and sugar together, until it was light and fluffy. I used a hand mixer for this part. I then added the vanilla and egg and used the hand mixer again to incorporate them.2

Another tip I found was not to overwork the dough, so I added the flour slowly and folded it into the butter mixture by hand. I then added the baking powder and salt. Making sure not to overwork the mixture created a light and fluffy dough. This is very important for the next part.

This is where the cookie press comes in! Spritz cookies are named from the German word spritzen, which means “to squirt”. The soft fluffy dough is squirted or pushed through a cookie press to make fancy designs.3 I had heard of a cookie press before but had never tried one. I did specifically buy a cookie press this summer for this recipe. I purchased my Wilton Cookie press at a local thrift shop, making sure to clean it thoroughly before using it. Since I had never used one before, and my thrifted press didn’t come with instructions, I turned to YouTube to learn how. I found a quick tutorial video that made it look incredibly easy.

Unfortunately, my press has a crack in it where it connects to the barrel, so the process of pressing my cookies was a little difficult. It was a bit of a struggle, but I was able to make it work. Luckily, because the dough is so light and soft, mistakes could be easily scrapped up and put back in the barrel to try again. 

To make them festive, I decorated them with red cherries. Sanding sugar and sprinkles. I had hoped to also use green cherries, but unfortunately, my local shops don’t carry them anymore. 

This recipe makes a fairly large batch of cookies, but because my press was malfunctioning, I don’t know how accurate of a count I can make. I ended up baking 5 full cookie sheets in the oven, at 400°F for 6 to 8 minutes each. You need to keep an eye on your cookies, as you only want to bake them until they are golden brown on the edges. They should still be very light in color when they are done. 

All in all, these were a very fun recipe to make, and the cookies turned out delicious. They are similar in taste to a sugar cookie but much more buttery. These would be great to make as an activity with friends or young children because they are so fun to decorate, the possibilities are endless. These spritz cookies also make a great big batch, which is perfect for sharing with friends and family while also enjoying a few, or several yourself.

Will you be trying out this recipe? Or do you have another gravestone recipe that you are dying to try? I would love to read about it in the comments.

Thanks for reading!


Refernces:

  1. Memorializing a Mother Who Fueled Lives With Spritz Cookies | Medium
  2. Tips To Make the Best Spritz Cookies | Go Bold with Butter
  3. Classic Spritz Cookies | Gold Medal Flour

Cemetery Recipes: Dr. Death’s Ranch

I am still on the hunt for Canadian gravestone recipes. The majority of the ones I have learned about are in the United States. Hopefully one day, I will have a Canadian recipe to share with you. Until then I will keep trying out the gravestone recipes I learn about online. 

For this month’s gravestone recipe, I wanted to try out Dr. Death’s Ranch!

This is the first savory gravestone recipe I have tried, and it looks like it will be an easy one to make. I first learned about this recipe through Rosie Grant, who you may know as Ghostly Archive on TikTok. According to Grant, this gravestone belongs to Marty Lee Woolf, who passed away suddenly on August 21, 2022.1 

According to Woolfs’ obituary, he was a hard-working family man with a good sense of humor. He leaves behind a wife and three children.2 I would like to think this recipe was one of his favourites. So much so, that his family chose to inscribe it on his gravestone for others to remember him by. I wasn’t able to find much information about this ranch dressing recipe, so I am very curious; who is Dr. Death? Was this Woolf’s signature dip recipe? Was this his go-to recipe for family gatherings or get-togethers? 

What I could find about this stone, is that this gravestone was most likely made in Washington state. The only photo I have been able to find of this gravestone looks to have been taken before the stone was installed at the cemetery, possibly after it had been engraved. I don’t know for certain, but the gravestone is possibly located in Riverside Memorial Park in Spokane, Washington.

Here is the recipe, as written on the gravestone:

Dr. Death’s Ranch

  • 1 C. Mayonnaise
  • 1/2 C. Buttermilk
  • 1 Tbsp. Hidden Valley Ranch Dressing Mix
  • 1/4 Tsp. Black Pepper
  • 1/8 Tsp. Paprika
  • 1/8 Tsp. Garlic Powder

This has to be the easiest gravestone recipe I have made so far. There are only 6 ingredients and there is no baking or cooking involved. My kind of recipe! The hardest part for me was gathering the ingredients. Being in Canada, we sometimes don’t have the same name brands of foodstuffs. I wasn’t able to find any Hidden Valley Ranch Dressing mix, so I substituted in some Club House Ranch Style Dressing and Dip Mix. I tried to compare the mix ingredients to see if the mix I had found was close, but I wasn’t able to tell since both mixes don’t go into detail on what spices are actually in them. Hopefully, the flavors aren’t too off! 

After easily mixing everything by hand with a whisk, until smooth, I let the mixture sit in the fridge for a few minutes to let the flavors combine. While the dressing was resting, I sliced up some cucumbers and red bell pepper to make a little veggie platter. I also threw some cherry tomatoes and baby carrots on there for some variety.

When the veggie platter was ready, it was time to try Dr. Death’s Ranch.

This is a super tasty recipe! I wasn’t sure about the buttermilk as I don’t think I have ever had it before like that, but the bright flavor combination is a winner. I also love how quick & easy it is. I was surprised at the amount of dip this recipe makes too. The addition of the buttermilk helps smooth out the texture and thins it out a little, making it a decent-sized batch.

This would be the perfect thing to bring to a Summer get-together with friends and family, or maybe to some game day festivities. The next time I go to a potluck, I know I will be reaching for this recipe again for super easy veggies and dip platter.

Have you heard about this gravestone recipe before? Are you going to give it a try? Tell me about it in the comments! 

Thanks for reading!


References:

  1. ‘I’ve made 23 recipes I found engraved on gravestones – they’re to die for’ | Mirror
  2. Marty WOOLF Obituary | Legacy.com

Cemetery Recipes: Heavenly Daze Ice Cream

The August heat is starting to wane, as the cooler Autumn weather is starting to take over here in Northern Ontario. In an attempt to hold onto the last Summer has to offer, I thought it might be a good time to make another gravestone recipe. This month, I am trying out Marian’s Heavenly Daze Ice Cream.

That’s right, an ice cream recipe that can be found on a gravestone! 

This recipe can be found on the gravestone of Marian Woodward Sheaffer Montfort. Marian passed away at the age of 86, in Portland, Maine. According to her obituary, she was a dedicated wife and mother who also enjoyed sewing and knitting. She was also very independent, living at home until the end, enjoying the company of her cats and the wildlife in her yard. By that description, she reminds me a little of my own mother.

Marian is laid to rest in Robertson Cemetery in Weld, Maine, beside her husband Robert Montfort, who passed away in 1991. Sadly, her daughter Amethyst also rests in Robertson Cemetery, having also passed away in 1991. I couldn’t find more information about Robert and Amethyst, but I was grateful to see they were laid to rest in the same cemetery.

Marian’s gravestone also boldly states “I Loved To Cook”. So what better way to remember her, than by making and enjoying her ice cream recipe!

The recipe reads: 

Heavenly Daze Ice Cream

  • 1 cup Apricot Preserves
  • 1/2 cup Sugar
  • 1 tsp Vanilla
  • 1/4 cup Dried Apricots in tiny pieces
  • 3 cups Cream
  • 1/2 tsp Nutmeg

Stir preserves, apricots, and sugar on low heat so preserves melt and sugar dissolves.

Cool and mix in cream. Chill. Add vanilla and nutmeg. Stir during freezing.

This recipe was easy to make but ended up taking way more time than I thought it would. It’s been a while since I made an ice cream recipe, but I made sure to make some room in my freezer and put my ice cream machine bowl in there to freeze for a couple of days before attempting this recipe. For the ingredients, I used apricot jam instead of preserves because I couldn’t find any. I think the jam probably has some extra sugar in it, so I was a little worried that it would be too sweet, but I took the chance.

I melted the jam, sugar, and apricot pieces on low heat, but I wasn’t sure how long it would need. I kept an eye on it to make sure it didn’t burn and kept stirring it until the sugar looked like it was melted and incorporated into the jam.

Like with most gravestone recipes, I did have to look up some best practices for cooking and cooling times. Luckily, I have an ice cream recipe book. So I did refer to that to see how long I should be cooling it. I followed the book’s instructions, and put the saucepan in the fridge for 30 minutes to cool. After that, I incorporated the cream and put it back in the fridge for 3 hours to chill. It was about 9 p.m. when my timer went off to take it out of the fridge. I was too tired to start up the ice cream machine at that point, so I left the saucepan in the fridge overnight to chill more. 

The next day, on my lunch break, I mixed in the vanilla and nutmeg and started up the ice cream maker. I forgot how loud that thing is! I let it run for 30 minutes and checked on it now and then. I love seeing the consistency get thicker over time. I also had to sneak a taste. The nutmeg really makes this recipe!

After enjoying a little bowl for dessert, I removed the machine bowl and placed it back in the freezer. I recommend letting it sit over night so the flavours can really combine and the extra time in the freezer also brings out that ice cream texture we all love.

This was such an easy recipe to make, made even easier by the use of an ice cream maker. The flavours of the apricot and nutmeg work so well together. I think I like apricot a little more because of this recipe. As for my use of jam vs. preserves, I don’t think it made much of a difference. My ice cream didn’t turn out nearly as sweet as I thought it would because of it. 

I would love to learn more about how this recipe came to be on Marian’s grave. Was this her favourite ice cream? Did she make it often? In any case, I think it’s so sweet (pun intended) that this recipe lives on along with her memory. 

Do you have a favorite gravestone recipe? What family recipe would you put on your gravestone? I would love to read your thoughts in the comments.

Thanks for reading!


References:

Cemetery Recipes: O’Neal’s Peach Cobbler

I’ve been craving a sweet treat lately, so I think it’s time for another cemetery recipe! Peaches are coming into season right now so I thought why not try O’Neal’s Peach Cobbler? This tasty treat would also go well with a side of ice cream. It is summer after all!

O’Neal’s Peach Cobbler recipe can be found on the gravestone of O’Neal Bogan “Peony” Watson, in New Ebenezer Cemetery in Castor, Louisiana. O’Neal’s son Charlie McBride loves this family recipe so much, that he had it inscribed on his Mother’s grave after she passed away in 2005. He said “It really is just a great recipe”.1 In an article for the Sault Lake Tribune, Charlie reminisced about memories that making this recipe brought up. It’s a perfect example of how these cemetery recipes are a sweet way to remember our loved ones. 

Here is the recipe, as inscribed on the gravestone:

O’Neal’s Peach Cobbler

  • 1 c. Flour
  • 2/3 c. Sugar
  • 2 tsp. Baking Powder
  • 1/2 c. Butter
  • 1/4 tsp. Salt

Mix ingredients. Add 3/4 c. Milk.

Put fruit into pan. Pour on topping.

Bake at 350’ until done.

I always find it interesting how descriptive or nondescriptive recipes found on gravestones can be. I realize it might be too expensive to inscribe too much text on a stone. I do appreciate how creative some authors get to skirt around that. This recipe is a short and sweet one, pun intended. The only things I found missing was the amount of fruit, and how long to bake it for.

Rosie Grant over at GhostlyArchive, of TikTok fame, used 1 can of whole peaches that she cubed up, so I did something similar and used 1 big can of sliced peaches. I drained the peaches before putting them in the pan and tried to make sure they were evenly distributed. 

I followed the recipe as closely as possible, mixing the dry ingredients first, then adding the milk. I poured on the topping as evenly as I could, now it was time for it to go into the oven. The recipe says to bake it at 350’ “until done”. I wasn’t sure how long that should be, so I started with a timer for 20 minutes. After 20 minutes it wasn’t looking cooked through, so I left it in for another 10 minutes, then another 5. After 35 minutes it was looking nice and golden so I took it out to cool.

I paired my first serving of O’Neal’s Peach Cobbler with Häagen-Dazs vanilla ice cream. It was to die for! The topping puffed up, creating a lovely fluffy texture that combined nicely with the soft peaches. I’ll be keeping this first batch for myself, since there isn’t enough left to share! But, I will need to make this again for a friend or family gathering.

Have you tried recreating any cemetery recipes yet? Share your favorites in the comments! 

Thanks for reading! 


References:

  1. Family Recipes Etched in Stone. Gravestone, That Is. | The Sault Lake Tribune
  2. O’Neal Bogan “Peony” Watson | Find a Grave
  3. O’Neil’s Peach Cobbler | GhostlyArchive on TikTok

Cemetery Recipes: A Good Carrot Cake

Today on the blog I wanted to share another cemetery recipe with you. All the recipes I have made so far have been sweet treats, and today’s recipe is no different. It’s the Easter long weekend, so I thought today’s recipe would be a perfect fit – A Good Carrot Cake. 

This recipe is a little different than the previous ones I have made. It can be found on a white tablet gravestone for Christine W Hammill in Ferndale, California. Her stone sits beside the stone for her husband Richard. The difference is that Christine and Richard are still living.

They seem like pretty fun folks as well, based on their gravestones! Not only can this delicious recipe be found on the back side of Christine’s gravestone, they both also have some funny epitaphs on their headstones.


The white granite tablet gravestones read:

“Oops, / I should / have listened / to my wife.”

Richards S. Hammill

June 3, 19__ – 

“Yeah. / Look where / we ended up.”

Christine W. Hammill

Nov. 

Unfortunately, I haven’t been able to find more information about the Hammills and where their future resting place is, but I do know that Christine makes an excellent carrot cake.

Here is the recipe:

A Good Carrot Cake

  • 2 cups flour
  • 4 eggs
  • 2 tsp. baking powder
  • 2 cups sugar
  • 1 1/2 tsp. soda
  • 1 1/2 cups oil
  • 1 tsp. salt
  • 2 cups grated carrots
  • 2 tsp. cinnamon
  • 1 (8 1/2 oz.) crushed pineapple, drained
  • 2/3 cup chopped nuts

Sift together flour, baking powder, soda salt, and cinnamon. Beat eggs and add sugar. Let stand 10 mins. Mix in oil, pineapple, carrots, nuts, flour mixture. Turn into 3 greased and floured 9-inch round cake pans. Bake at 350’ for 35 – 40 min. Cool in pans for 10 min, remove to wire racks, and cool well. 

Vanilla Cream Cheese Frosting

  • 1/2 cup butter
  • 1 (8 oz.) cream cheese
  • 1 tsp. vanilla
  • 1 pound powdered sugar, sifted

Mix butter, cream cheese, vanilla then add sugar. First between layers, top and sides.

This is one of the more thorough sets of baking instructions I have come across on a gravestone. It didn’t need any guesswork at all. The recipe is very easy to follow and create. I started with the prep work first; chopping, grating, and measuring out ingredients to make the mixing process a bit smoother. 

I did start off thinking I would only need two cake pans, but I did need to make a third layer. I only filled the cake pans about halfway with batter because I had a feeling they would rise as they baked. They did rise as I suspected so that left batter for a third layer. I only have 2 cake pans though. I put the first two pans in the oven for 35 minutes and used the toothpick trick to test if they were done. 

If you don’t know this trick, you take a toothpick and stab it into the middle of the cake, touching the bottom of the pan. If it comes out clean when you pull it out, it means the cake is done. If there is batter on the toothpick when you pull it out, it means the center is not cooked all the way through and should go back in for a few more minutes. 

After the first two layers were done, I let them cool for ten minutes then removed them from the pan and placed them on a wire rack to continue cooling. Then I put the third layer into the oven to bake. This did make the baking process a bit longer, but it wouldn’t be an issue if you have extra cake pans. 

I used the time while the last layer was baking, to make the cream cheese frosting. I have to say, it’s the best frosting I have ever made. Sifting the powdered sugar made all the difference in creating a smooth and creamy frosting. I ended up with some extra frosting as I was unsure how much to frost in between the layers. I was afraid to run out of frosting for the top and the sides. I didn’t have to worry though as I had quite a bit left over. I put the leftover frosting in a container and put it in the fridge to use as a cookie dip. I couldn’t let that deliciousness go to waste.

I had some chopped walnuts left over and decided to sprinkle them on the outer edge of the cake as decoration and to use them up. I think it was a nice added touch, but you can decorate it however you like. The white frosting is a lovely base for frosting accents, sprinkles, or any other type of decoration you may want to add to make your cake more festive. 

I love a good carrot cake with a good cream cheese frosting, and this might just be the best one yet. I was curious how the final product would taste with the addition of pineapple. I had never seen that in a carrot cake recipe before. The cake is so moist and sweet, I think because of the pineapple. It’s one of the best cakes I’ve ever made. I shared this cake with my mother and fiancé, and they both agreed, it was delicious. I think this cake would make a lovely finish to an Easter meal, or any meal for that matter. It’s a big cake, so it’s perfect for sharing with loved ones. 

I wish I knew more about Christine and this recipe. I am going to assume that it is a Hammill family favorite. At any rate, I want to say thank you to Christine, for sharing this sweet treat with the world!

Have you tried this recipe before? Do you have a favorite carrot cake recipe? I would love to read about it in the comments. 

Happy Easter, and thanks for reading!


References:

Cemetery Recipes: Glazed Blueberry Pie

For the last two weeks, I have been feeling a bit under the weather. I was struggling with a bad head cold, that turned out to be COVID-19. Before I got sick and went into isolation, I had done groceries and specifically bought the ingredients I needed to make a gravestone recipe that I had been eager to try. Once I was on the mend I decided to try some baking to lift my spirits, and use up the blueberries before they went bad. So for today’s blog post, I wanted to share my experience making Margaret Davis’ Glazed Blueberry Pie.

The grave of Margaret Davis can be found in Mountain View Memorial Park, in Washington State. Margaret rests with her husband Eddy, beneath a beautiful black marble monument designed as a bench. Their grave is adorned with a beautiful color portrait of the couple, doves of peace, the American flag, and a bible quote. If you look to the left side of the monument, you will also find a note From the Kitchen of Margaret Davis, her Glazed Blueberry Pie recipe. 

I was not able to find much information about Margaret in life, but from her gravestone, we know that Margaret was born on the 4th of July in 1918. Her husband Eddy was born in September of the same year. They were married on Boxing Day in 1942. Margaret passed away on November 6th, 2004 at the age of 86. Eddy passed away 6 years later at the age of 90. Underneath the recipe that adorns their gravestone is the symbol of the Freemasons, telling us that Eddy was a member. There are also a couple of other symbols as well that could tell us more about the couple’s affiliations in life, but they are cut off in the photos I have seen, and I can’t decipher them. There are currently no photos of the recipe side of the gravestone on Find a Grave, but a quick google search should bring up photos of this cemetery recipe.

Here is the Recipe:

From the Kitchen of Margaret Davis

Glazed Blueberry Pie

  • Soften a 3 oz. pkg. cream cheese.
  • Spread in bottom of cooled, cooked pastry shell.
  • Fill shell with 3 cups of blueberries.
  • To an additional 1 cup of blueberries add 1 cup of water.
  • Bring just to boiling.
  • Simmer 2 min.
  • Strain reserving juice, about 1/2 cup.
  • Combine 3/4 cup sugar, and 2 tablespoons corn starch.
  • Gradually add reserved juice.
  • Cook, stirring constantly until thick and clear.
  • Cool slightly and add:
  • 2 tablespoons lemon juice
  • Pour over berries in pastry shell and chill.

This recipe is straightforward and easy to follow. The only issue I came across is the fact that blueberries are not currently in season here. So, the blueberries I was able to find were the non-organic kind that are comically large, and because of that are not very flavourful. And no, I didn’t lose my sense of taste or smell while I was sick. I will need to try this recipe again in the summer months when the local blueberry patches are ripe and plentiful. Because the blueberries were oversized, also messed with the measurements a little bit. I ended up using less than the 3 cups the recipe calls for, as my pie shell could just not fit them all. 

Despite all that, this recipe turned out deliciously! It’s almost like a blueberry cheesecake, but much easier to make. And because I made it during my isolation, I had it all to myself! That is another reason to make this pie again in the summer, so I can share it with friends and family. Baking and enjoying Margaret’s recipe helped relieve some of the boredom I was feeling at the time and helped take my mind off things.  

Will you be trying out this recipe? Do you have a family pie recipe that you would put on your gravestone? I would love to hear about it in the comments.

Thanks for reading!


References:

Cemetery Recipes: Mom’s Christmas Cookies

Christmas time is almost here! For me, Christmas is synonymous with holiday baking! What better time of year to warm the house with the sweet smell of cookies in the oven? So, I thought it’s the perfect time to try out another tombstone recipe. I have been saving this one specifically for this time of year—Mom’s Christmas Cookies. 

This cookie recipe can be found on the backside of a beautiful, large black marble tombstone. This is the gravestone of Maxine Menster.1 It can be found in Cascade Cemetery, in Cascade Iowa. The front of the stone has a beautiful sand-blasted winter scene, of a lovely detached house surrounded by forest. You can view the front of the stone on Maxine’s memorial page on Find A Grave.

Maxine’s family wanted to do something special to remember their mother and chose the sweetest way—with the family sugar cookie recipe. Jane Menster, Maxine’s daughter has said that when they were trying to think of something specific to her mother to put on her stone, “It was her cookies.”2 

Maxine passed away in 1994, so this recipe has marked her grave for decades. According to Atlas Obscura, this recipe was part of a long-standing family tradition, where they would bake this cookie recipe on Christmas Eve, then hang the sugar cookies on the Christmas tree. They would be an early morning treat on Christmas Day.3

Here’s the recipe:

Mom’s Christmas Cookies

Cream:

  • 1 cup sugar
  • 1/2 cup oleo

Add:

  • 2 beaten eggs
  • 1 tsp. vanilla

Add:

  • 3 cups flour
  • 3 tsp. baking powder
  • 1 tsp. salt

Add alternately with 1 cup cream.

Chill and roll out with flour.

Bake 350 degrees oven, and frost.

Most tombstone recipes use short form when it comes to the instructions. Instead of turning to Google, I thought I would ask my Mom. We went through the recipe together and talked about each step, and how long to chill the dough. My mom is an avid baker, especially at this time of year. We had a nice chat about baking instructions and tombstone recipes in general. I have yet to find a Canadian one. 

I was also surprised to find out that my mom was familiar with the tradition of baking cookies to put on the tree for Christmas morning. It’s not something we ever did when I was growing up. We also had dogs. She recounted a story about putting candy canes in the tree one year and coming home one day to find the tree on the floor. My dog Shadow had gotten a little too excited about finding candy in the tree. No foodstuffs ever went into our tree after that. 

After our chat, I got to baking cookies! This recipe is very straightforward. There is one ingredient that some people might question, the 1/2 cup of oleo. What is oleo? Turns out that it is just an older term for margarine. Mixing everything was a breeze and didn’t take that long at all. The biggest question I had about the recipe was how long to chill the dough. My Mom had suggested an hour. After an hour in the fridge, I got to work on cutting out the shapes. 

I am not a traditional Christmas person and don’t actually own any Christmas cookie cutters. I choose to go with a skull, tombstone, and bat for my shapes. I also didn’t have any frosting on hand, so instead, I opted to use sprinkles. My usual go-to for baking is cupcakes, so I have a lot of sprinkles on hand—just not Christmas ones. So I used black sanding sugar, red and black nonpareils, black bats, and purple, red and black sprinkles. 

I left the cookies in the oven for about 10-14 minutes and ended up baking 4 trays of cookies. This recipe makes a pretty big batch.

They turned out delicious! I think this will be my go-to sugar cookie recipe moving forward. They are very easy to make and so tasty, especially right out of the oven. I ate way more of them off the cookie sheet than I should have, but I just couldn’t resist. I also really enjoyed making this recipe because it prompted some good conversations with my Mom. Usually, when I make tombstone recipes, I talk out loud to the deceased, talking through the recipe. This time around it made more sense to talk about Mom’s Christmas cookies with my own Mom.

Thank you, Maxine, and the Menster family for sharing this delicious recipe with the world!

Have you made this recipe before? Or do you have a go-to Christmas cookie recipe? I would love to hear about it in the comments. 

Thanks for reading!


References:

  1. Maxine Kathleen Poppe Menster | Find a Grave
  2. Family cookie recipe stands the test of time | The Gazette
  3. The Menster Christmas Cookie Gravestone | Atlas Obscura

Cemetery Recipes: Kay’s Fudge

Last year I posted a news article on my Facebook page about an interesting tombstone. What makes Kathryn Andrew’s stone so unique is that it features her go-to fudge recipe. Kay had asked for her recipe to be engraved on her tombstone as a way to share her delicious recipe with others. According to Janice, Kay’s daughter, Kay would often share her fudge with friends and family1

Kay passed away in 2019, at the age of 97. She was laid to rest beside her husband Wade. Her now-famous tombstone has been circulating on the internet, with many folks trying out her famous fudge recipe. 

To learn more about Kay and see more photos of her tombstone, visit her memorial page at findagrave.com.

Here is the recipe, as listed on Kay’s tombstone:

  • 2 SQ. CHOCOLATE
  • 2 TBS. BUTTER
  • MELT ON LOW HEAT
  • STIR IN 1 CUP MILK
  • BRING TO BOIL
  • 3 CUPS SUGAR
  • 1 TSP. VANILLA
  • PINCH OF SALT
  • COOK TO SOFTBALL STAGE
  • POUR ON MARBLE SLAB
  • COOL & BEAT & EAT

Interestingly, when the recipe was first engraved, there was a typo. It originally called for a tablespoon of vanilla. I’m told that that would make for some very runny fudge. The tombstone was updated to read a teaspoon of vanilla. I wonder if this correction was made while Kay was still around, and how she would have felt about it?

Of course, I couldn’t write about this unique tombstone without trying my hand at making Kay’s fudge recipe myself. I have dabbled in the past with making candy but never had much success, so I was a bit worried about ruining it. I made sure to take my time and follow the instructions, although I did need to take some time to Google a few things. I used a candy thermometer to make sure I didn’t overcook the ingredients. I did have a little trouble at first as I was not reading my thermometer properly. I started talking to Kay out loud as I poured out the mixture into a bowl. It looked too runny to me. Talking it out with Kay, I put the mixture back on the stove and took a closer look at the thermometer. A Google search clarified that the softball stage is reached between 112 to 115 Celsius. You don’t need a candy thermometer though.

To tell when you have reached the softball stage you can use a spoon to drop a little bit of the mixture into a cold glass of water. If the mixture forms small malleable balls in the water, you have reached the softball stage. After getting that sorted, I watched it carefully to get to the right temperature.

I don’t have a marble slab so I opted to pour the mixture into a bowl to let it cool. I did another Google search to see how long it should cool for. After 15 minutes, it was time to beat the mixture. Again I had to do a little bit of research to see how long to beat the fudge. Traditionally it would be beaten on a marble slab, but I read that you can beat it in a bowl with just a spoon. The trick is to beat it until it is no longer glossy. I was a little unsure about this step as it did not seem to be losing its shine but after a few minutes it did, and it started to firm up. I then poured the mixture into an 8×8 square dish and let it set.

I am very happy with how it turned out! It’s sweet and chocolatey with a lovely texture. It also made a decent size batch. In the spirit of Kay’s generosity, I brought my batch of Kays fudge to a small gathering to share with my friends.

Thank you so much, Kay, for sharing your recipe with us!

To read more about Kathryn’s unique tombstone, visit: Headstone for woman who died at 97 includes her signature fudge recipe | ABC Action News

After all the fun of making this recipe, I started to wonder if there were other tombstone treats I could try? If you know of other cemetery recipes out there, please share! I would also love to hear how your fudge turned out, if you attempted Kay’s recipe.

Thanks for reading!


References:

  1. We tried the famous fudge recipe engraved on a late grandmother’s gravestone | Today.com | June 2, 2021