As the holiday season settles in, certain foods start appearing on tables everywhere. Fruit cake is one of those dishes that shows up year after year, especially around Christmas. Love it or hate it, fruit cake has become deeply tied to the season. Because of that, this month’s cemetery recipe feels especially fitting. It’s a recipe connected to family, tradition, and a time of year when food and memories tend to go hand in hand.
Mary Ann Rapp was someone whose life revolved lovingly around family. Her obituary speaks to a woman who was deeply loved and loved right back through the everyday things that matter most. She was a wife, mother, grandmother, sister, and friend, all roles that shaped much of her life and how she spent her time.1
Food and cooking were part of how Mary Ann showed care for the people around her. Her love of cooking and feeding others lives on with a recipe carved into her gravestone.1 It’s easy to imagine her in the kitchen, preparing meals for family gatherings, holidays, or just regular days when food brought everyone together.
Mary Ann passed away on March 16, 2021, after a courageous battle with metastatic breast cancer.1 She was laid to rest in Shipley Cemetery in Bristol, Tennessee, where her gravestone now shares a piece of her legacy through an engraved recipe.

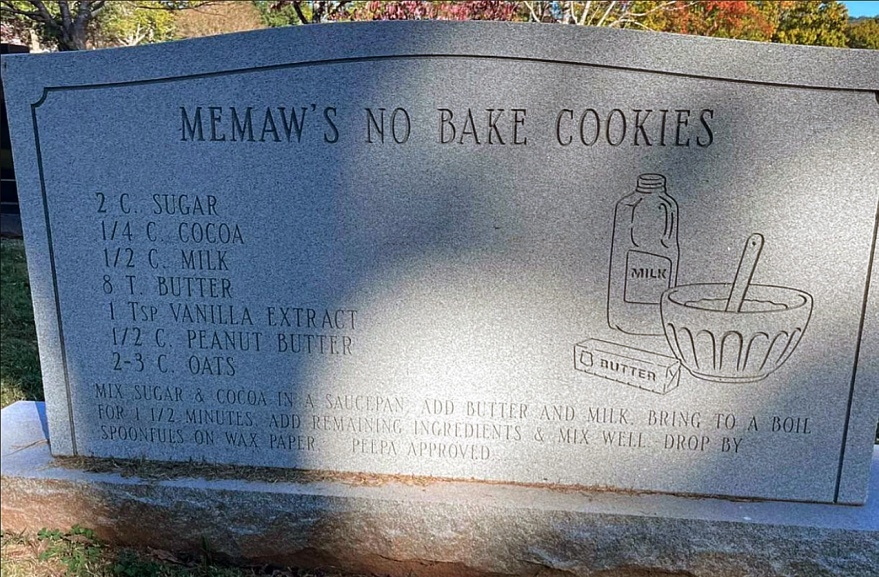
Gravestone of Mary Ann Rapp, Shipley Cemetery in Bristol, Tennessee. Photo by Find a Grave contributor Cat.
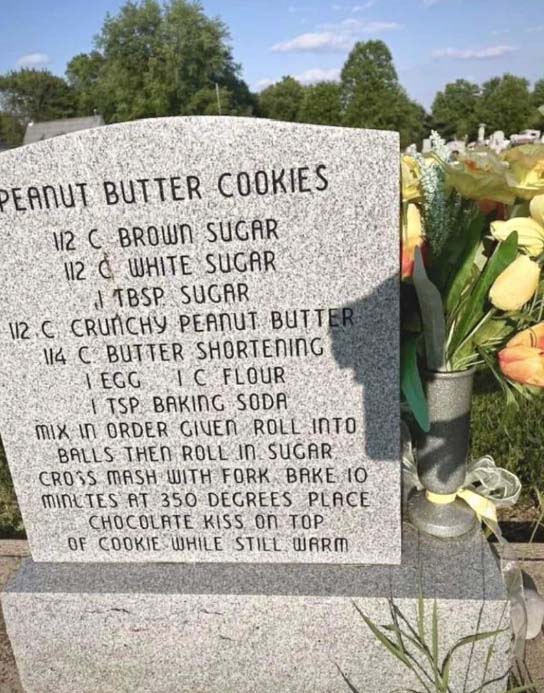
Here is the recipe, as engraved on here tombstone:
Grandma Mary’s Fruit Cake
8 oz Pineapple wedges
8 oz Red cherries
8 oz Green cherries
1 C Raisins
1 C Walnuts
1 C Pecans
1/2 C Butter soften
3/4 C Brown sugar
3/4 C White sugar
5 Eggs
2 Tsp Dark molasses
1 Tsp Ground cinnamon
1 1/2 C Self rising flour
Mix in large bowl
Mix on low speed for 3 minutes
Spread in a bundt pan. Spray pan
Oven 250 degrees for 1 hour or
Until done
If the middle is brown
In the kitchen
Fruit cake has a surprisingly long history. Versions of fruit-filled cakes can be traced back to ancient times, when dried fruits, nuts, and sweeteners were mixed to create food that would last without refrigeration.2 Over time, these dense cakes have become associated with celebrations and special occasions.2
Fruit cake’s strong connection to Christmas comes from practicality as much as tradition. Dried fruits and nuts were ways to preserve harvests for winter, making fruit cake a natural choice for holiday feasts. Over time, it has become a symbol of abundance, hospitality, and sharing during the Christmas season.3
For me, there is also another special connection to this controversial treat. My mother loves fruit cake, and every Christmas she would receive one as a gift from my sister-in-law’s parents, who joined us every year for our family Christmas dinner. They have both passed on now, and their presence is still missed at our family gatherings. My mother often reminisces about her fruit cake Christmas gift tradition, so I thought bringing one to Christmas dinner this year might make her smile.
Honestly, this recipe is so simple and easy to make that it might become a new yearly addition to our dessert table.
I was a little intimidated at first by the number of ingredients, but that feeling quickly faded once I started mixing everything. I did have to make one substitution, though. After a few unsuccessful searches for green cherries, I finally gave up and doubled up on red cherries instead. I combined everything in the order listed in the recipe, and as I sprinkled in the cinnamon, I couldn’t help but think that it already looked like Christmas in a bowl.


Because the recipe called for mixing on low for three minutes, I pulled out my little hand mixer and followed the instructions exactly. I was a bit worried that the fruit and nuts might get completely pulverized, but they seemed to hold together for the most part. Once the mixing was done, I was left with a lovely caramel-coloured batter that was a bit chunky, but smelled wonderful.
I borrowed the fanciest bundt pan my mother owns for this bake. I did notice that the directions seemed slightly out of order, as they read, “Spread in a bundt pan. Spray pan.” I’m pretty sure the pan should be sprayed first, so that’s what I did before carefully spreading the batter inside. I then used a spatula to smooth out the top and wiped away any drips along the edge of the pan. I then placed it into the oven, which had been preheating since I started putting all the ingredients together.


After one hour in the oven, I took a peek to see how things were going. The kitchen smelled warm and sweet, with hints of cinnamon. The cake had turned a darker brown, but when I looked more closely, I could tell the batter was still a little too soft and still slightly liquid in a few spots. I slid it back into the oven for another five minutes, then another five, then another five. I had to remind myself that patience is part of baking, too.
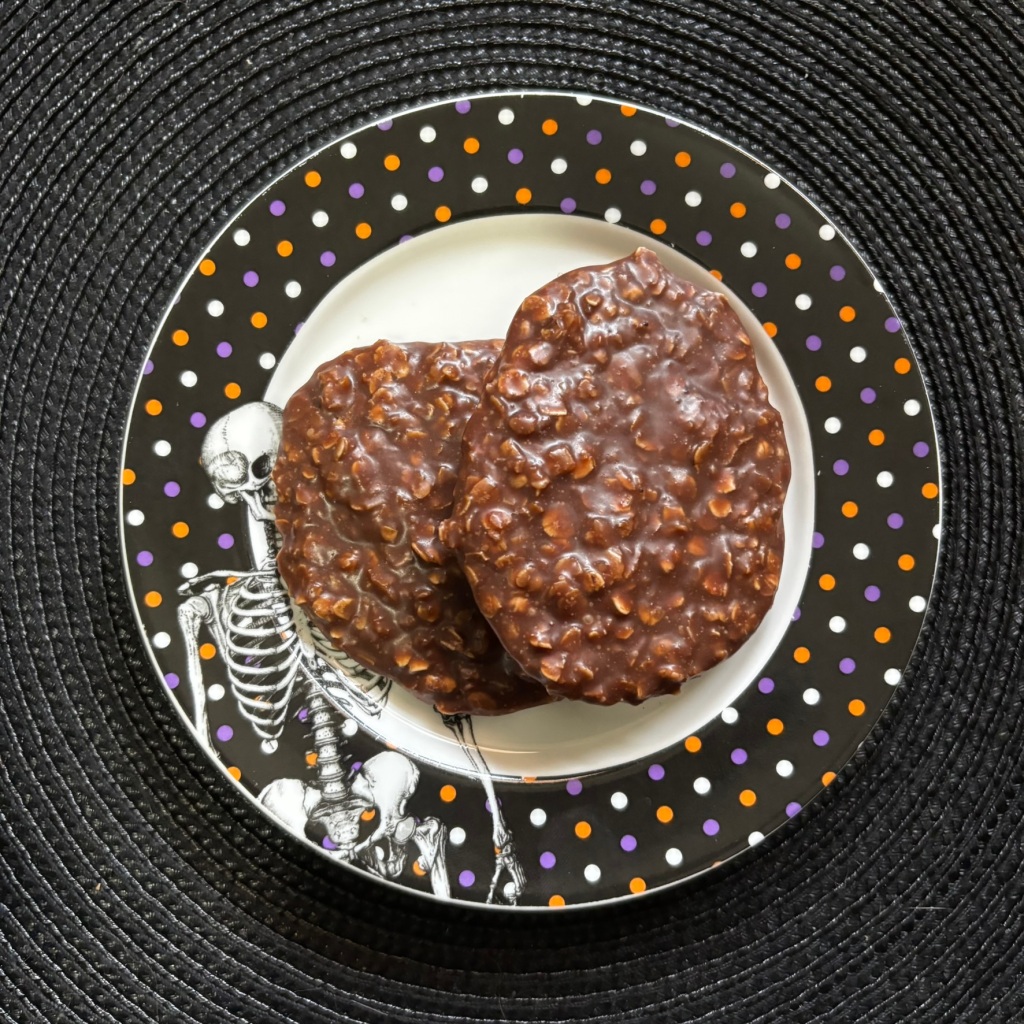
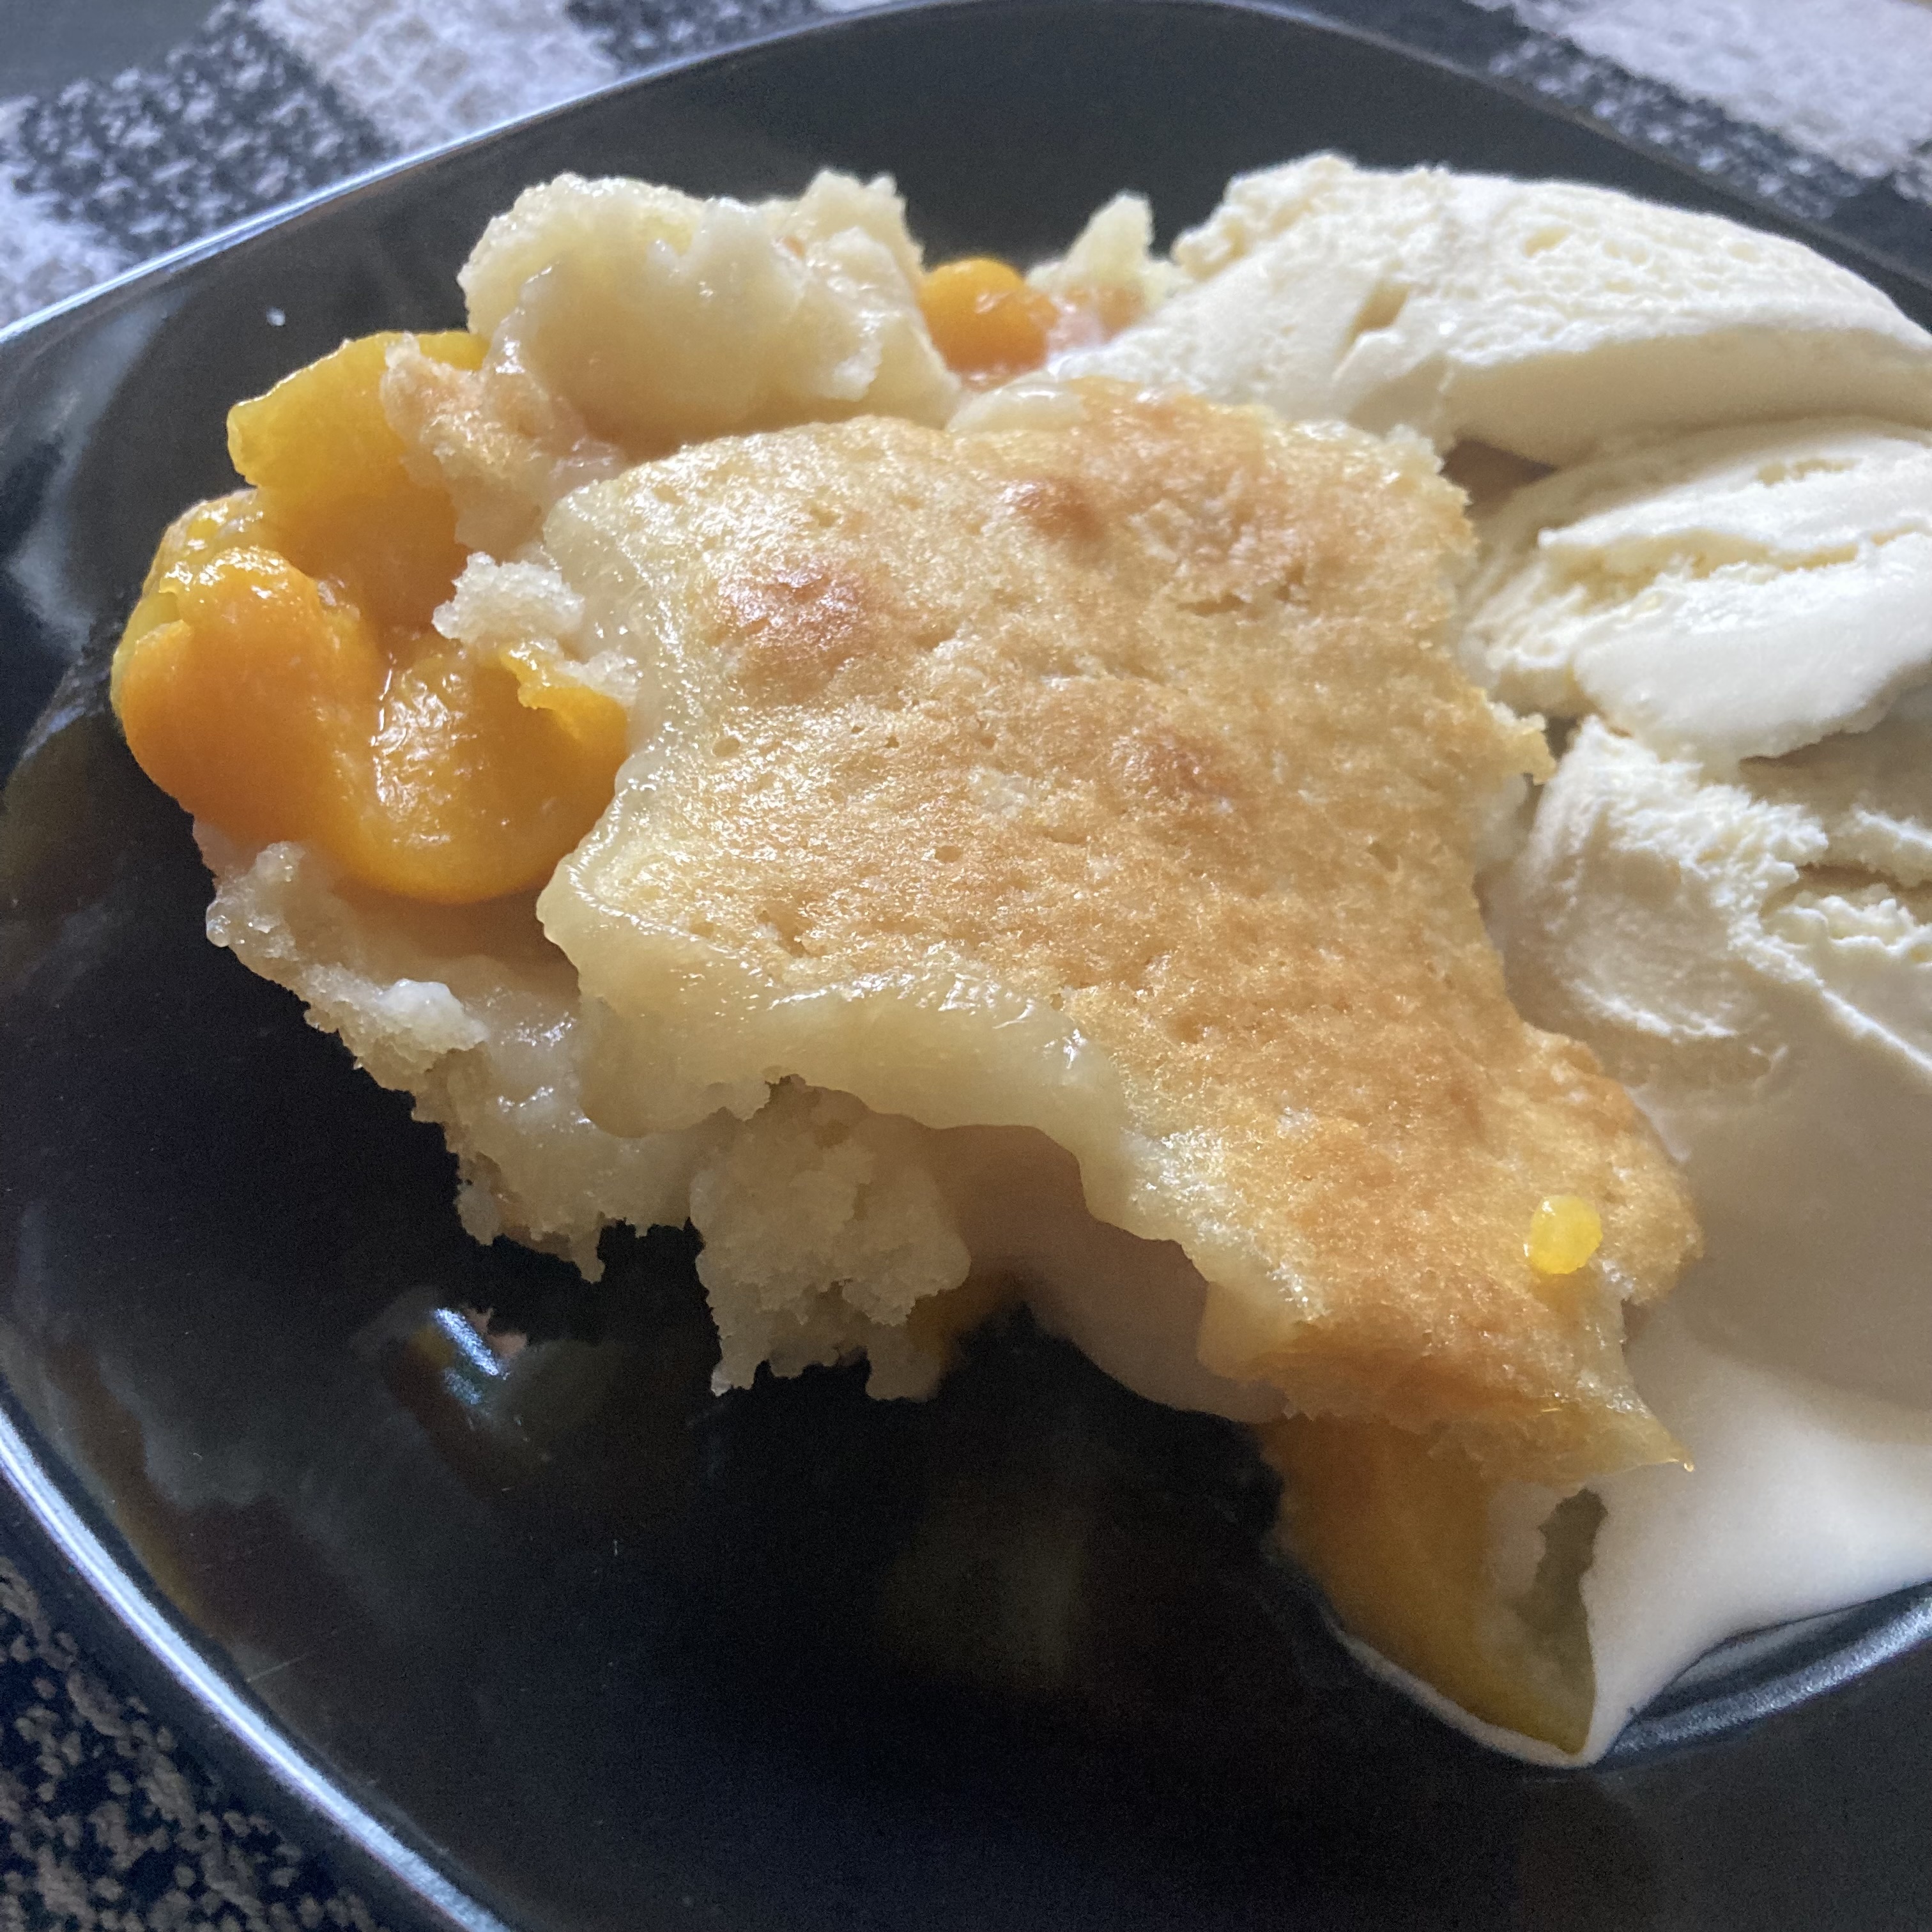
After letting the cake cool, I flipped it upside down on a plate and gently released it from the pan. Using a fancy bundt pan turned out to be a great decision, as the finished cake looks beautiful with all of its facets clearly defined. The dark brown colour of the cake, combined with the fruit and nuts peeking through, makes it a genuinely pretty dessert. It really is a nice-looking cake, which is always a bonus.


Grandma Mary’s Fruit cake
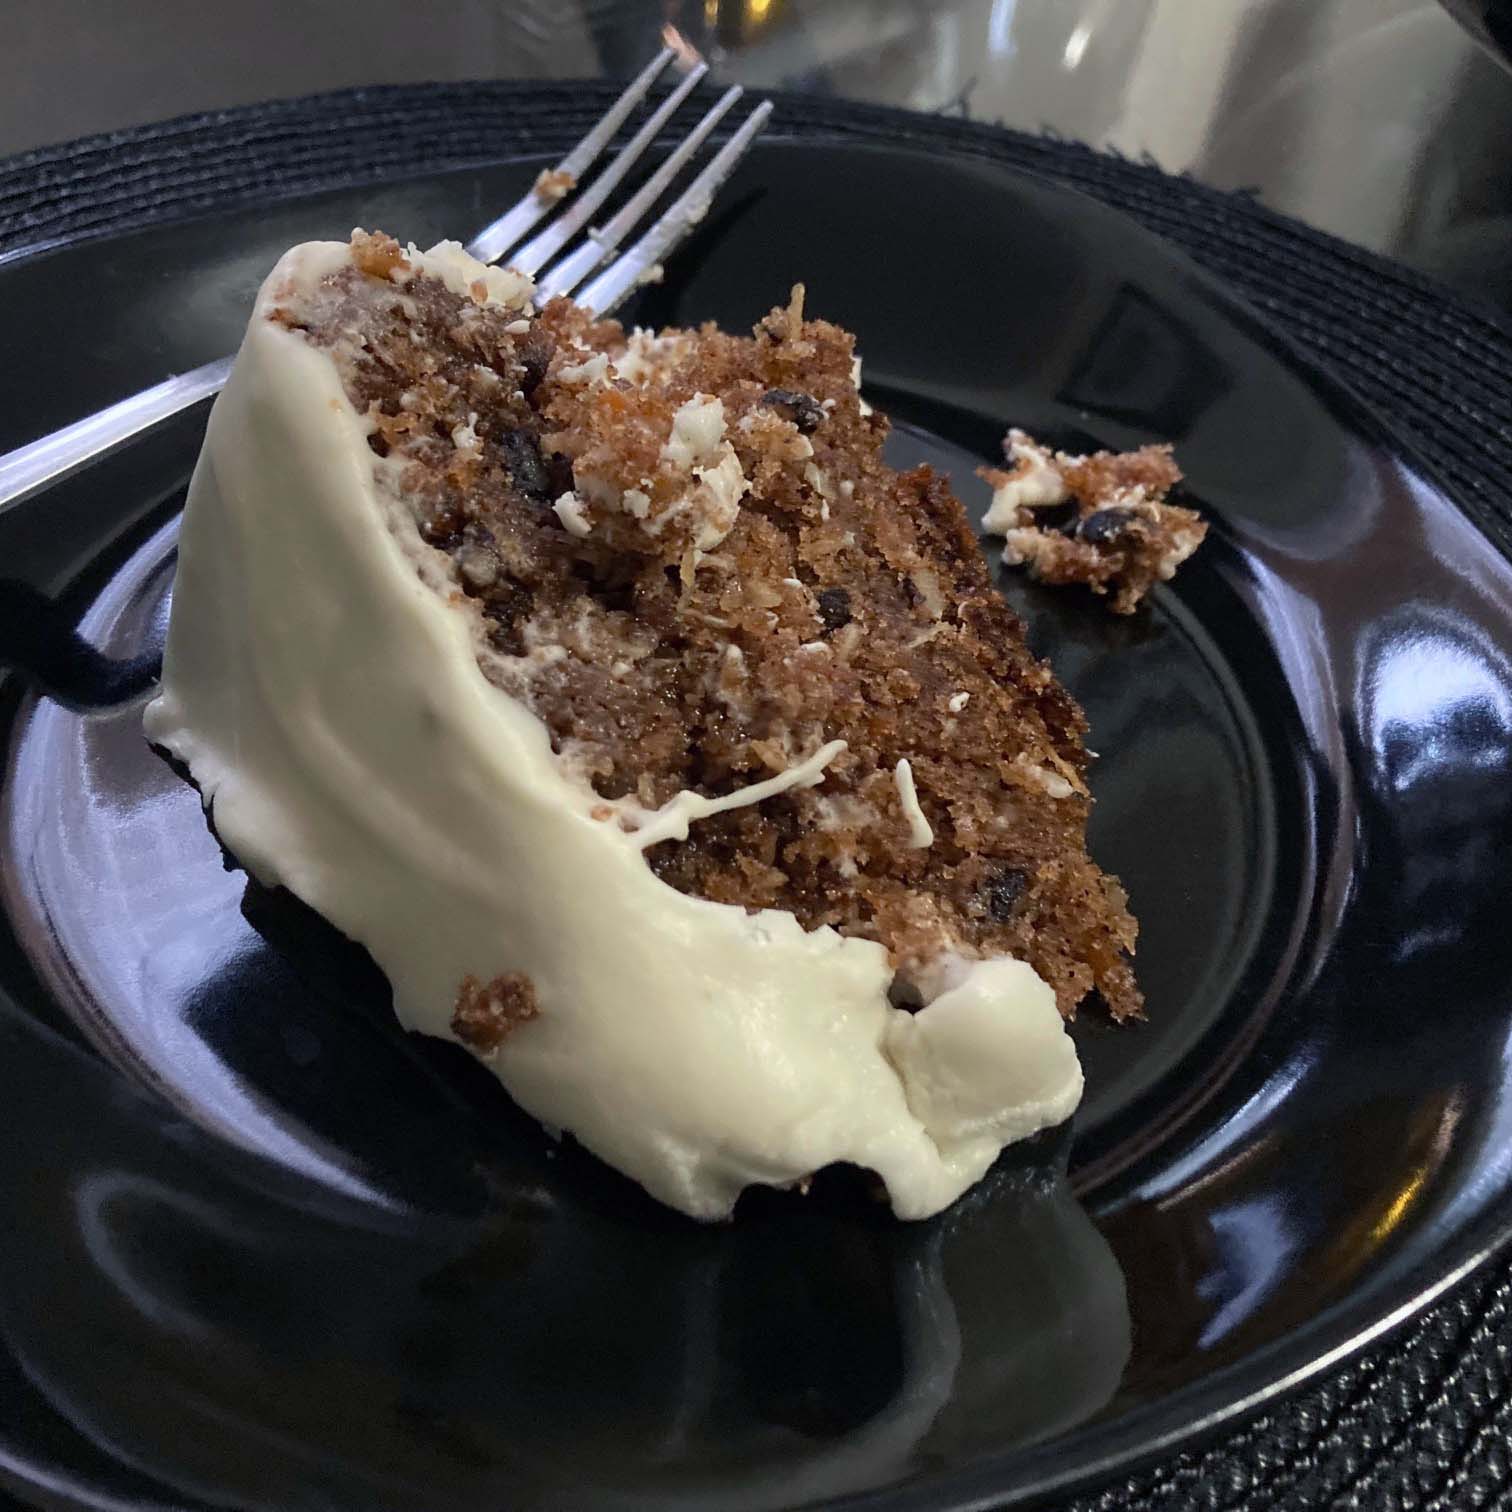
Of course, the real test is the taste. The cake is dense and sweet, and the combination of fruit, nuts, and cinnamon truly does taste like Christmas. It’s the kind of dessert meant to be sliced thin and shared, which feels exactly right for a recipe meant to carry so much history and meaning.
There’s something especially touching about a gravestone recipe when you know how important cooking was to the person it belonged to. Grandma Mary’s fruit cake isn’t just a holiday dessert. It’s a reflection of how she cared for others and how she brought people together.
Baking this recipe to share with my own family feels a little like continuing that tradition. Even years later, Mary Ann’s love of food, family, and togetherness still finds a place at the table, especially during the holidays.
Thanks for reading!
References:
- Mary Ann Rapp Obituary | Oakley-Cook Funeral Home and Crematory
- The History of Fruitcake | Collin Street Bakery
- Why Do We Eat Fruit Cake at Christmas Time? | Christmas Central