Cemetery Recipes: Scotcharoo Bars

After taking a break from gravestone recipes over the summer, I’m excited to dive back in with a sweet treat that has a story. Kari Jo Lozenski’s Scotcharoo Bars seemed like the perfect place to start.

Kari was known for her energy, kindness, and the way she brought people together. She managed the AmericInn Hotel in Aberdeen, South Dakota, where she was named National General Manager of the Year in 2015.1 She was also a devoted mom and an active part of her community.

Baking was one of her favourite things to do, and she earned the nickname “Betty Crocker” from friends and family, who loved her treats.1 Kari passed away from breast cancer in 2020, leaving behind memories of good food, laughter, and a whole lot of love.1
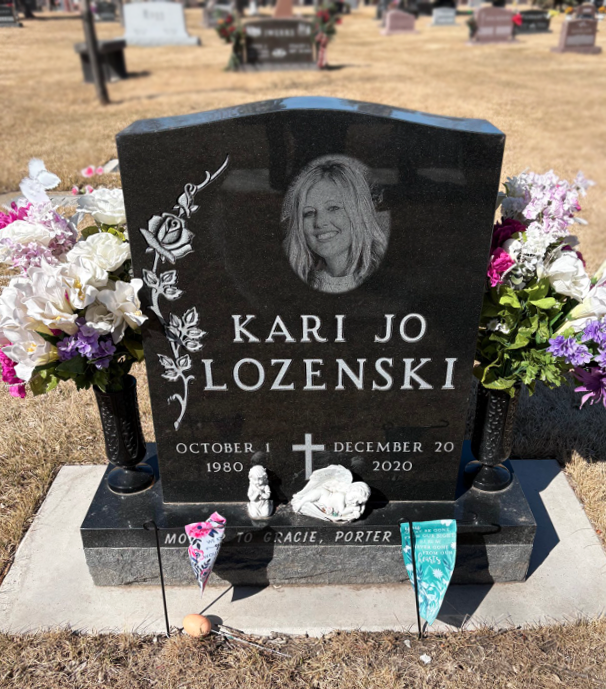
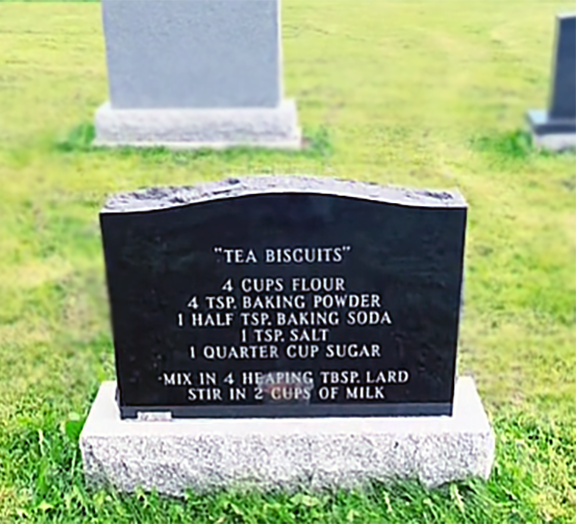
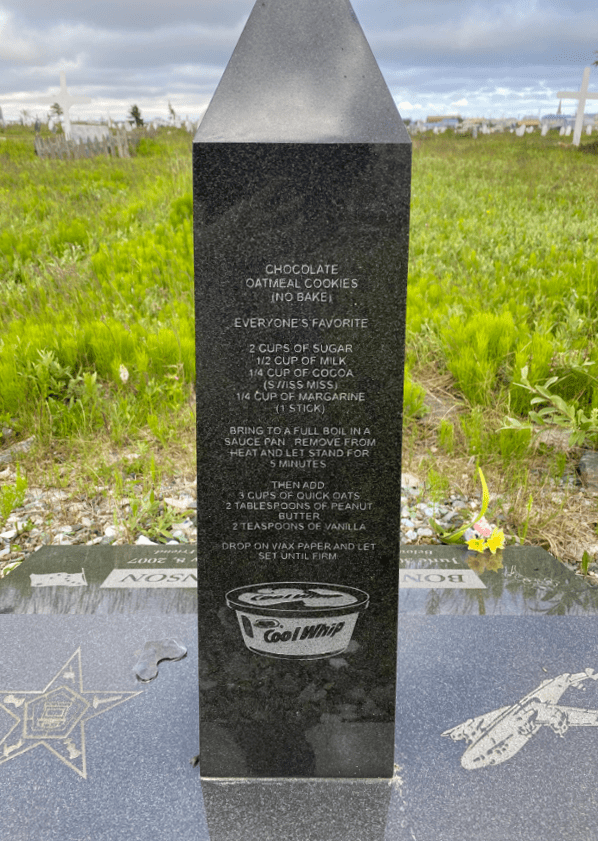
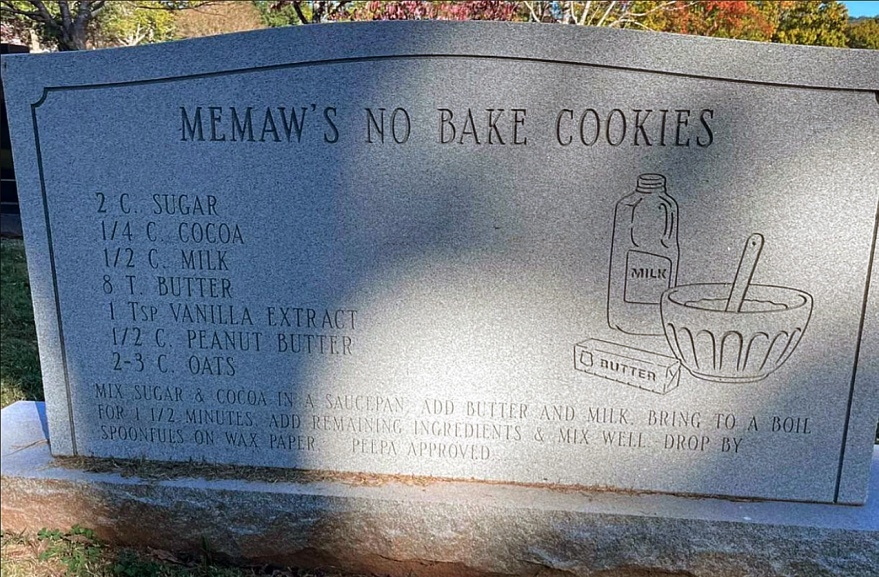
According to her gravestone, which can be found in Riverside Cemetery in Aberdeen, this recipe was one of her favourites:

Scotcharoo Bars

  • 6 Cups crushed Rice Crispies
  • 1 1/4 Cup Corn Syrup
  • 1/4 Cup Honey
  • 1 Cup Peanut Butter
  • 1 Cup Sugar
  • 1/2 Bag Butterscotch Chips
  • 1/2 Bag Chocolate Chips

| Crush the Rice Crispies in a big bowl and then measure them out. In a Pan | Add Sugar, CS, PB & Honey. | Heat that until the sugar is dissolved. Do not bring to a boil. Put in pan and melt chips over top and that’s it!!
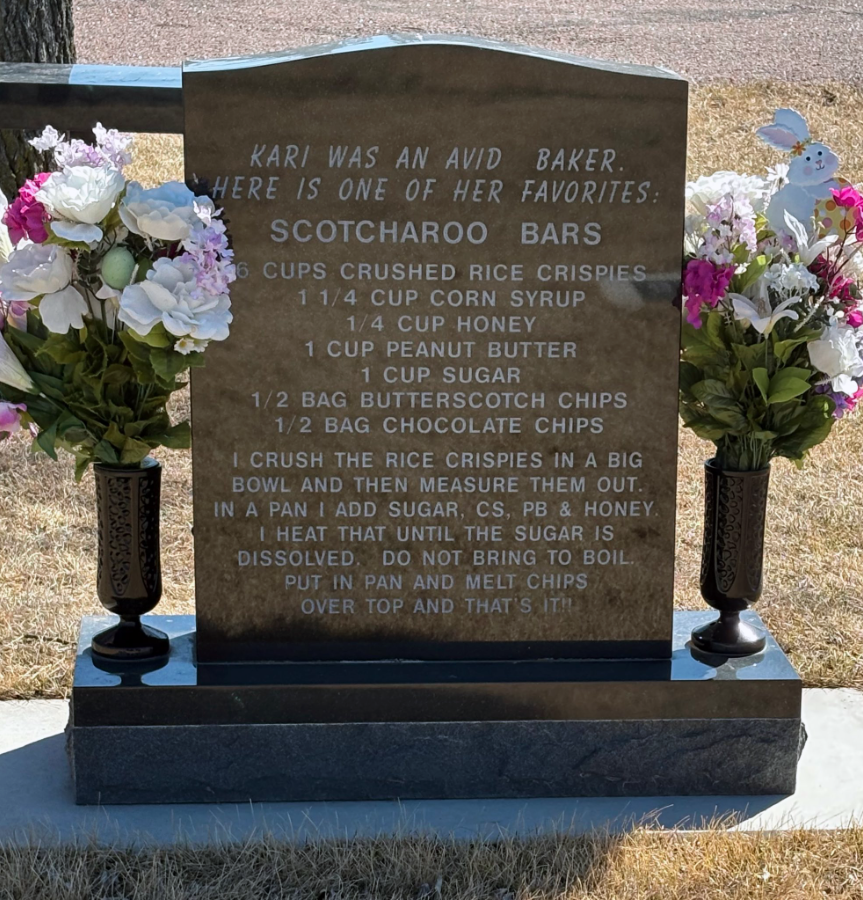
In The Kitchen

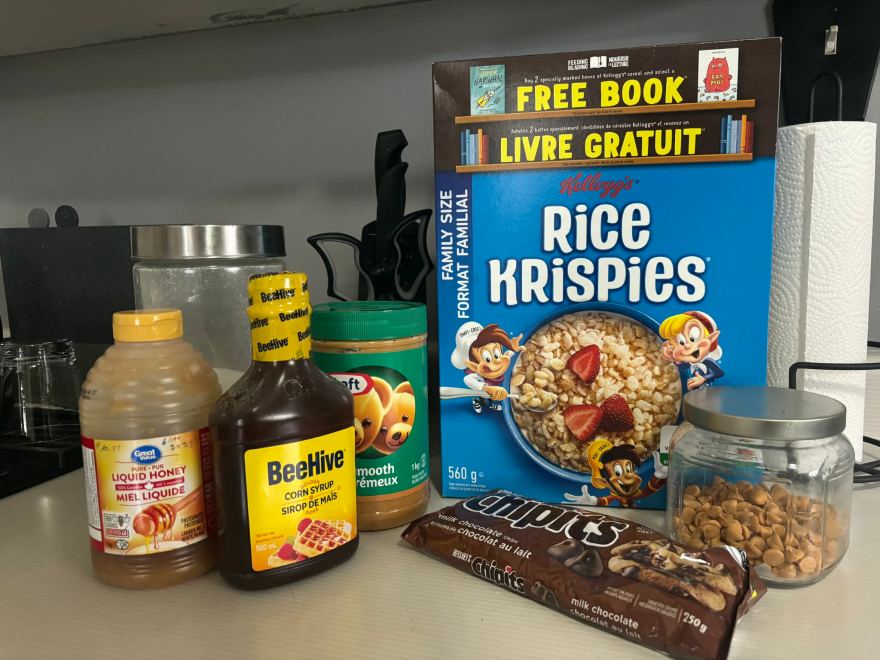
I went into this recipe thinking it would be quick and simple, but the more I studied the recipe, the more tiny question marks popped up. A quick online search cleared some things up, so I gathered my ingredients and cookware and got started.

When I reached out to Tasha Tietz, also known as Graveyard Girl, to ask for permission to use her photos for this post, I also asked if she had any advice for making these bars. Her biggest tip was to use the largest bowl I owned because the crushed Rice Crispies will get everywhere. I usually try to follow gravestone recipes as closely as possible, but I decided I wouldn’t be crushing mine up. I did take her bowl advice, though.

From there, it all came together pretty quickly. I measured out the sugar, corn syrup, honey and peanut butter, then warmed everything on the stove. I kept a close eye on the mixture to make sure it didn’t boil and waited until the sugar was dissolved completely. Once it looked smooth, I poured it over the Rice Crispies and gently folded everything together with a spatula. Then I pressed the mixture into a 9×13 pan, having forgotten to butter it, of course.

The topping was supposed to be a mix of butterscotch and chocolate chips, but my butterscotch had definitely seen better days. I stuck with straight melted milk chocolate chips, which gave the bars a thinner top layer, but honestly, considering the sugar load in this recipe, it didn’t feel like a loss.

That unbuttered pan did come back to haunt me when I tried to cut the bars after they had cooled. Thankfully, a few minutes in the oven at 350°F loosened everything enough for me to pry them out. Crisis averted!

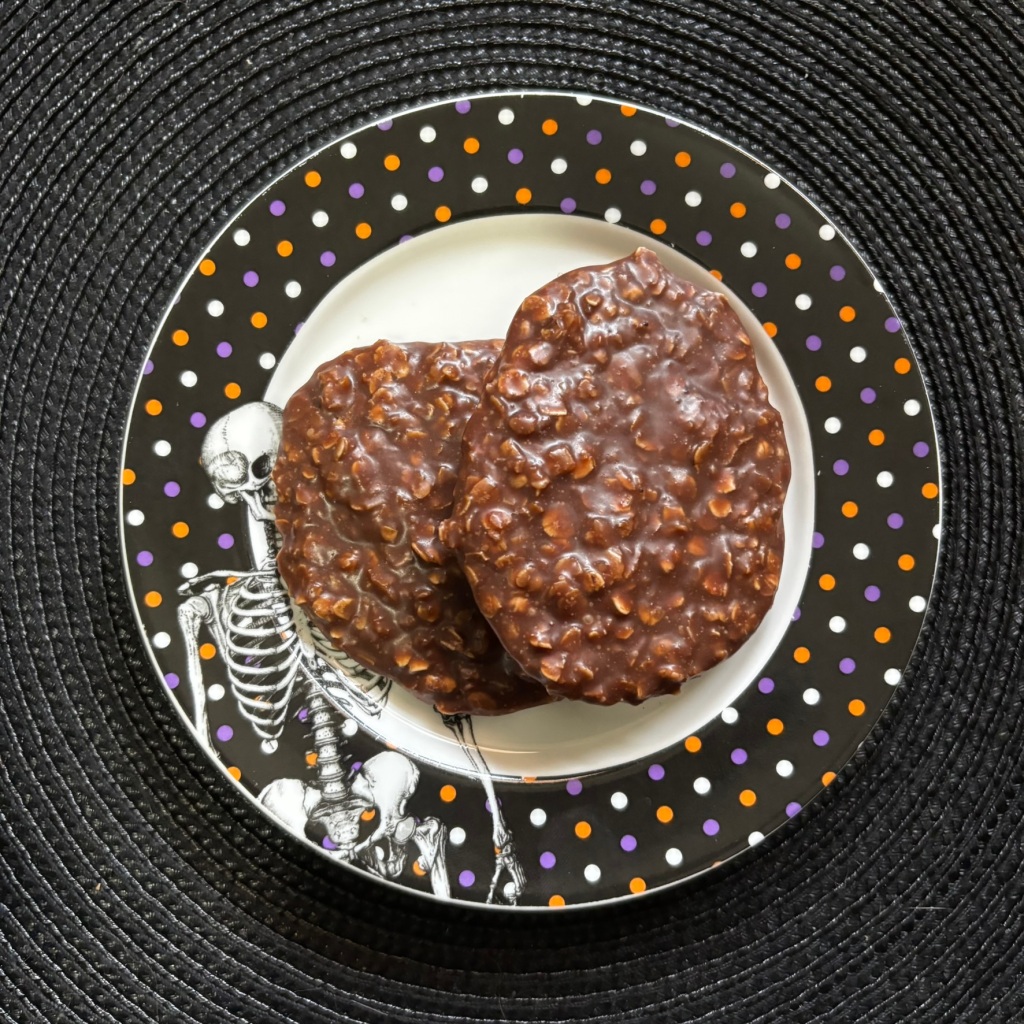
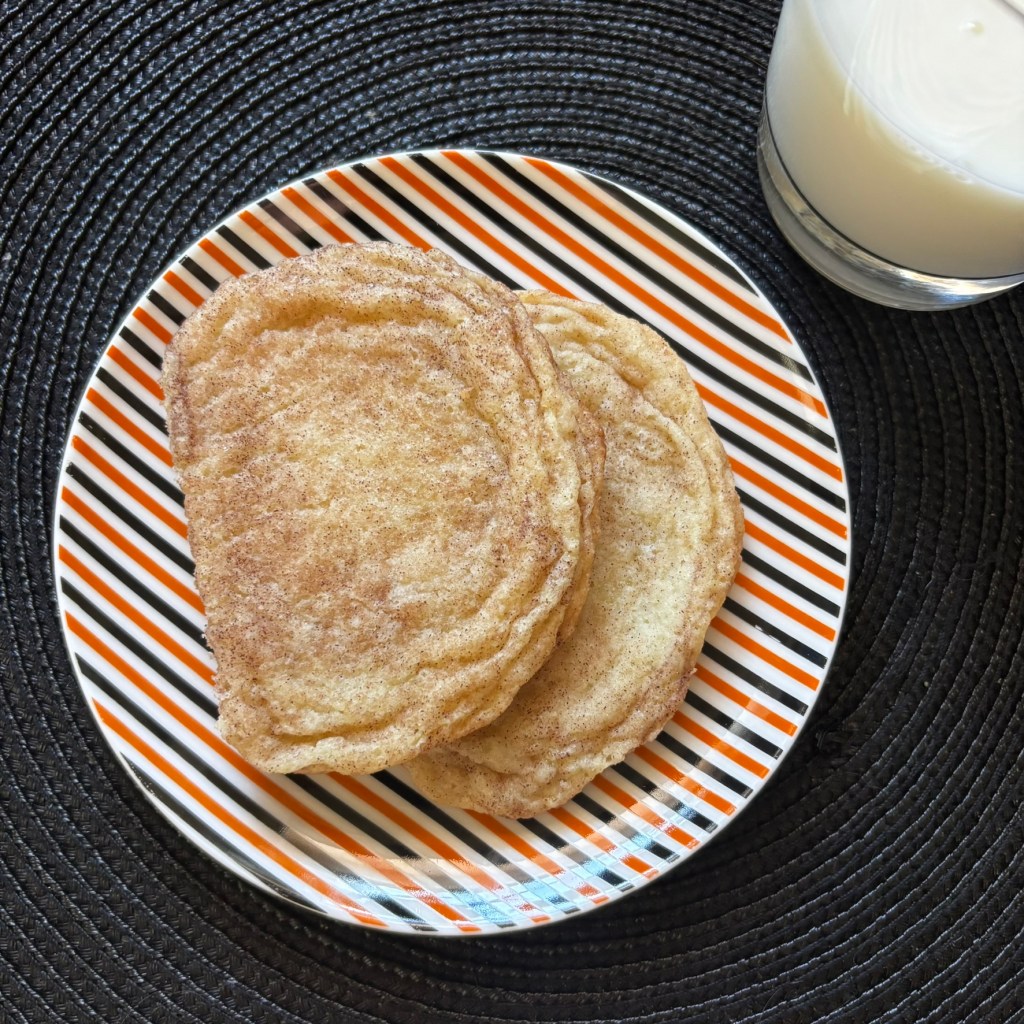
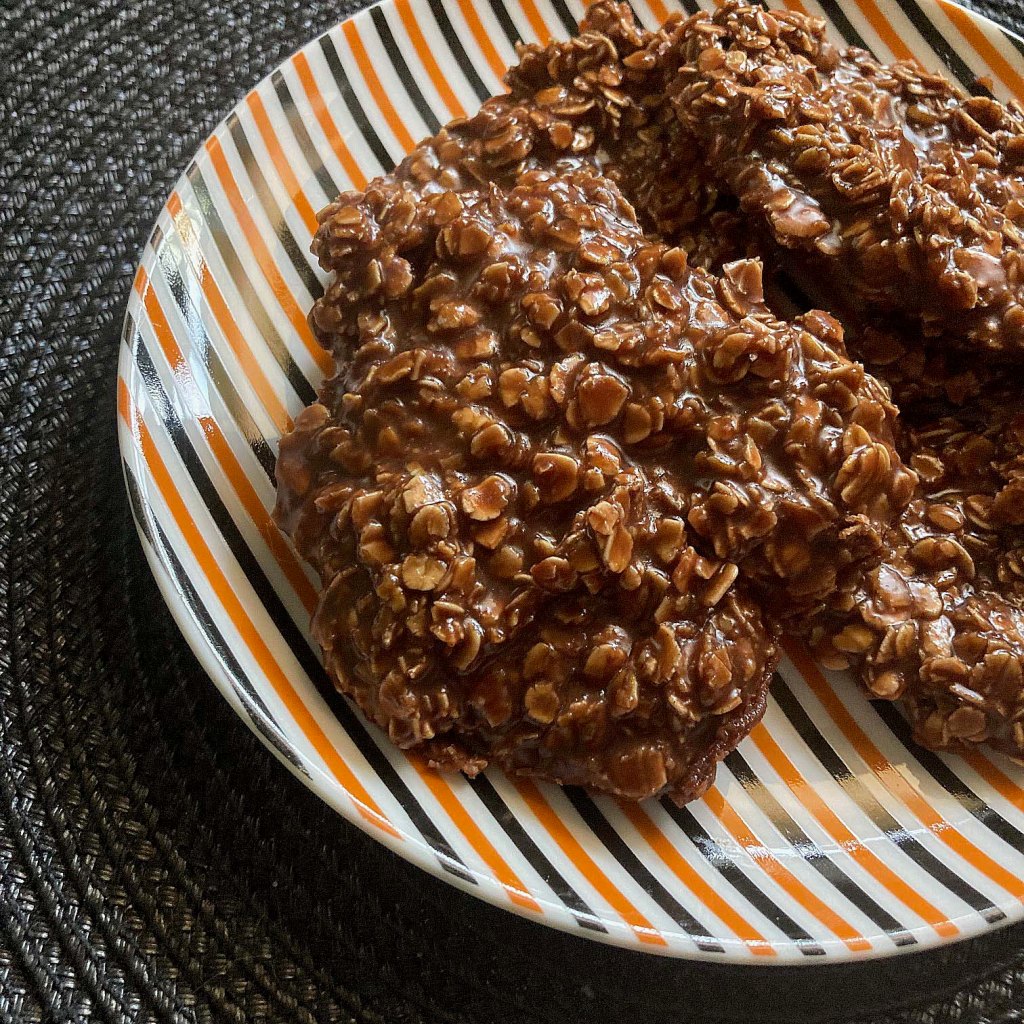
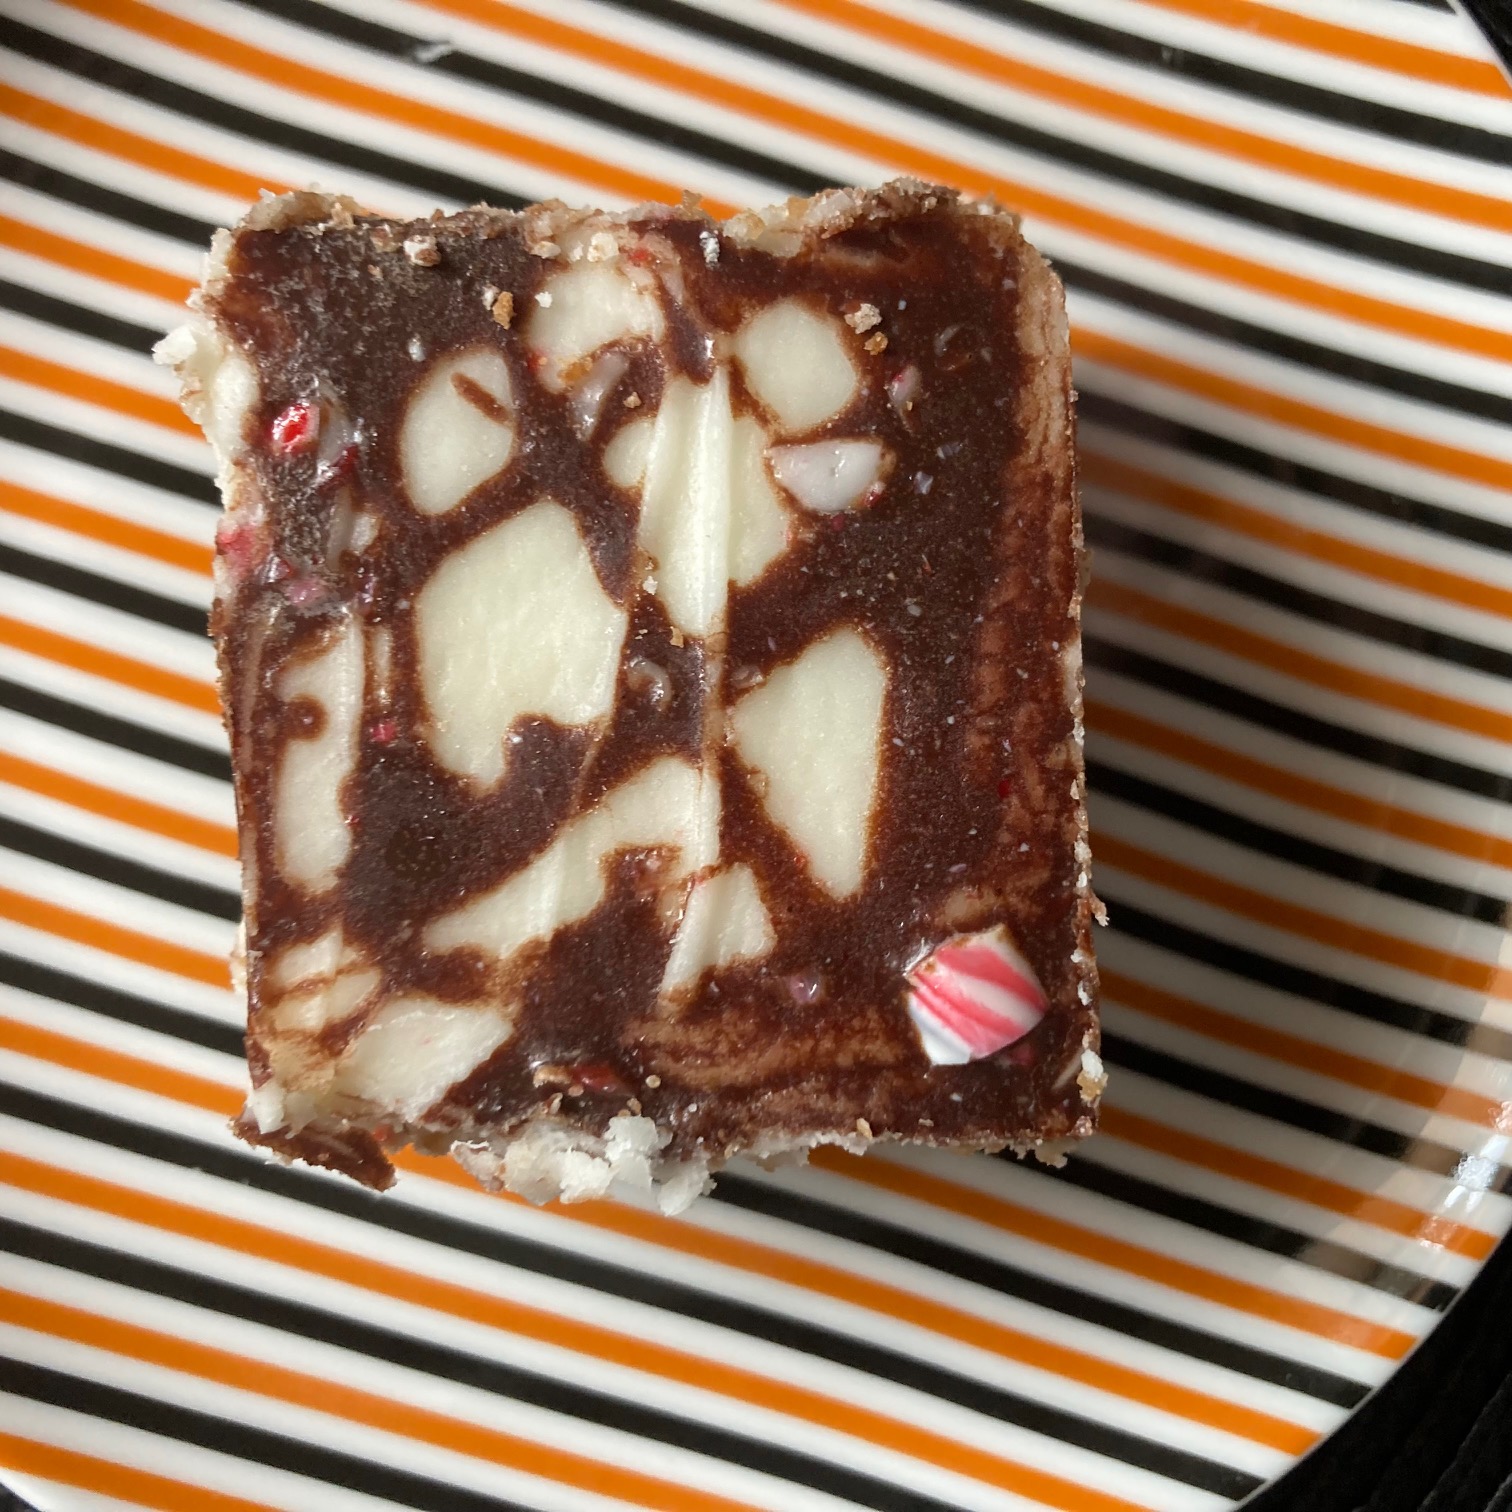
The final result was sweet and chewy, and perfect with a cold glass of milk. Although I didn’t make them exactly according to Kari’s recipe, I did have a lot of fun trying, and they still tasted delicious in the end. I hope I did her memory justice by bringing her recipe to life in my own kitchen.

Recreating Kari’s Scotcharoo Bars was a great way to ease back into gravestone recipes. This recipe is simple, sweet, and exactly the kind of treat that disappears fast. A nice way to spend an afternoon experimenting in the kitchen, remembering Kari and sharing food.

Thanks for reading!


References:

  1. Kari Jo (Ulmer) Lozenski (Obituary) | Schriver’s Memorial Mortuary & Crematory

Cemetery Recipes: Memaw’s No Bake Cookies

Cemeteries have a way of surprising me.

I expect to find history, love stories, and sometimes even a bit of mystery—so it’s always surprising to me to find a recipe carved in stone before its creator has even passed.

This isn’t the first gravestone recipe I have tried where the person is still alive, and that fact has made it a bit tricky to find more information about who the gravestone belongs to.

I stumbled upon this gravestone recipe while browsing Reddit. It caught my attention right away—not just because it featured a full recipe, but because the person behind it, Memaw, is still alive. I’ve learned that this gravestone is located in Maple Hill Cemetery in Huntsville, Alabama, but I still have so many questions!

Who is Memaw? Why, did she decide to engrave her cookie recipe before she passed? I have no idea, but you know I had to try out the cookie recipe for myself.

Here is the recipe, as inscribed on the gravestone:

Memaw’s No Bake Cookies

  • 2 C. Sugar
  • ¼ C. Cocoa
  • ½ C. Milk
  • 8 T. Butter
  • 1 Tsp Vanilla Extract
  • ½ C. Peanut Butter
  • 2-3 C. Oats

Mix sugar & cocoa in a saucepan. Add butter and milk. Bring to a boil for 1 ½ minutes. Add remaining ingredients & mix well. Drop by spoonfuls on wax paper.

Peepa Approved.

In the Kitchen

This isn’t my first time trying out a no-bake cookie recipe from a gravestone. Last time, I tested a recipe for Chocolate Oatmeal Cookies, which turned out to be an easy and delicious treat. (You can read all about that kitchen adventure here.) Since I had a great experience with those, I was excited to see how Memaw’s cookies would compare.

Since I already had experience making no-bake cookies, I knew what to expect, but I still followed Memaw’s instructions exactly. The recipe is very straightforward, using just a few ingredients I already had on hand, so the mixture came together quickly. Within minutes I had a batch of rich, chocolaty cookies setting on my counter.

They are so tasty, and the peanut butter adds just the right amount of creaminess.

I haven’t been able to track down any information about Memaw or Peepa, but I can only imagine the stories behind this sweet little tribute. Maybe Memaw is a master cookie-maker in her family. Maybe she wanted to leave something fun behind for future generations. Either way, I love the idea that her recipe will live on—literally carved in stone.

If you’ve never made no-bake cookies, Memaw’s recipe is a perfect place to start. They’re quick, delicious, and don’t require an oven—what’s not to love? This recipe is also proof that food, family, and tradition can be just as lasting a legacy, as a date and name.

With graving season now in full swing, I’ll be taking a little break from cemetery recipes for the summer. Between road trips, photography, and tracking down stories in person, I just won’t have time to be in the kitchen as much—but don’t worry, I’ve got a bunch of great cemetery adventures to share with you along the way.

Until then, happy graving—and don’t forget to pack snacks!

Thanks for reading!

Cemetery Recipes: Snickerdoodles

For this month’s cemetery recipe, I decided to venture back into the world of cookies. After recently finding this recipe etched in stone, I thought it would be a perfect time to try another Snickerdoodle recipe.

This will be the second Snickerdoodle gravestone recipe I have tried, and I was curious to see how this version would compare.

This cookie recipe comes from the gravestone of Sharon Faye Johnson Lawrence, who is buried in Mount Hope Cemetery in Webb City, Missouri.

Sharon passed away on May 25, 2020, at the age of 73, after a sudden illness. A beloved mother, grandmother, and member of the community, Sharon was known for her love of gardening and spending time with her family—especially her grandchildren.1

Her obituary also mentions how much she enjoyed baking and cooking for her family, which makes this recipe engraved on her tombstone even more special.1

This snickerdoodle recipe is now forever part of her legacy, engraved on her tombstone for future generations to discover and enjoy. It’s a beautiful memorial, accented by the lovely image of a cookie jar and plate of cookies.

Here is the recipe, as written on the gravestone:

Snickerdoodles

  • 1 cup soft shortening (part butter)
  • 1 ½ cups sugar
  • 2 eggs
  • 2 ¾ cups gold medal flour
  • 2 tsp cream of tartar
  • 1 tsp soda
  • ¼ tsp salt

Heat oven to 400° degrees. Mix shortening, sugar, and eggs thoroughly. Measure flour by dip-level-pour method or by sifting. Blend all dry ingredients. Stir in. Roll into balls the size of small walnuts. Roll in mixture of 2 tbsp sugar and 2 tsp cinnamon. Place 2 apart on ungreased baking sheet. Bake 8-10 minutes. (These cookies puff up at first then flatten out)

In the Kitchen

In my kitchen, the baking experience was straightforward and fun. This gravestone recipe was more detailed than most, so it was very easy to follow. Mixing the ingredients was a breeze, and I loved the smell of cinnamon that filled the air. Rolling the dough into small balls and rolling them in the sugar mixture was my favorite part of the process.

I didn’t have the exact flour that Sharon’s recipe called for, but I used the Great Value all-purpose flour I had on hand. Even though it wasn’t the Gold Medal brand specified, the cookies still turned out wonderfully.

I did learn that there is a name for the way I usually measure out dry ingredients. I was curious about the dip-level-pour method that was named in the directions, so I did a quick Google search.

Apparently, this is a common measuring technique, where you scoop the flour into a measuring cup till it’s slightly mounded at the top, then you level it off with a flat edge, like a knife, and then pour that into your mixing bowl.2

The recipe made a big batch of cookies. I ended up baking two and half trays full. I think I maybe should have spaced them out a wee bit more, as most of them spread out into each other. In the end, that wasn’t a big deal, though.

The smell as they baked was lovely, and the warm, slightly crunchy cookies that emerged from the oven were just perfect!

There is something really heartwarming about baking a recipe with such a personal story behind it. Sharon’s love for baking and sharing meals with her family lives on in this recipe. It’s easy to imagine her making these delicious Snickerdoodles for her grandchildren, sharing the happiness and comfort that only homemade cookies can bring.

Will you give this recipe a try? I’d love to hear how they turned out! Whether you enjoy them with a glass of milk (my favorite) or as a treat to share with friends, they are a sweet way to remember Sharon’s love for her family and her passion for baking.

Thanks for reading!


References:

  1. Sharon Faye Lawrence obituary | Parker Mortuary and Crematory
  2. Measuring Flour–The Right Way | The Cook Along Podcast

Cemetery Recipes: Debbie’s Tea Biscuits

For this month’s cemetery recipe, I wanted to try something a little less sugary after indulging in all the sweets this holiday season. So, when I came across this tea biscuit recipe, I thought it might be the perfect fit.

Most of the gravestone recipes I have come across in my research have been desserts, so I was pleasantly surprised when I found this biscuit recipe.

This recipe can be found on the gravestone of Debbie Ann Wilson McNutt, who is laid to rest in Pine Grove Cemetery in Stewiacke East, Nova Scotia. This my first Canadian gravestone recipe.

Debbie passed away on May 19, 2019, just 17 days after her birthday, following a long battle with cancer. She was 65. A beloved teacher and active member of her church, Debbie is remembered for her active lifestyle and for hosting family and friends in the summer.1 She is also fondly remembered for her tea biscuit recipe. According to family and friends, she made these biscuits about once a week.2

It was Debbie’s husband’s idea to engrave the recipe on her gravestone, hoping it would make people smile.2 This family recipe comes from Debbie’s mother, Jessie Wilson, who is still living. According to the family, the biscuits are best enjoyed topped with homemade jam.2

Here is the recipe as written on the gravestone:

Tea Biscuits

  • 4 Cups Flour
  • 4 Tsp. Baking Powder
  • 1 Half Tsp. Baking Soda
  • 1 Tsp. Salt
  • 1 Quarter Cup Sugar

Mix in 4 heaping tbsp. lard. Stir in 2 cups of milk.

This recipe was also printed on a memorial card for Debbie, which includes the extra baking instructions2:

Roll out, bake at 400oF degrees until golden brown.

In the Kitchen

I have never made biscuits that didn’t come out of a can before, so I enjoyed putting this recipe together. It was very straightforward to follow and pretty quick and easy.

After setting my oven to preheat at 400oF and gathering all my ingredients, I followed the recipe’s instructions and mixed all the dry ingredients together. After adding the last two wet ingredients, I used a hand mixer to combine everything together.

This is where things got a bit messy, but I trusted the process. Using a hand mixer may not have been the wisest choice, but it got the job done. After the dough was ready, I put down a thin cutting board on my counter to create my rolling space. I floured the surface and my hands and rolled out the dough. The dough is very sticky, so I continuously had to flour the surface and my hands.

To cut out my biscuits, I used a drinking glass because I didn’t have a circular cookie cutter. I also had to repeatedly flour the rim of the glass so the dough wouldn’t stick.

This recipe made a fairly big batch—more than I thought it would. I prepared two baking sheets with parchment paper and placed the uncooked biscuits on the sheets as I cut them out.

Unfortunately, the recipe doesn’t say how long to bake the biscuits for, only stating to bake until golden brown. I didn’t want to guess, so I did Google how long they should be baked for, and I found that 8 to 16 minutes should do—or until golden brown.

I put them in the oven and set a timer for 8 minutes. They still needed a bit more time after that, so I put them in for another 2 minutes. That seemed to do the trick.

I can see why Debbie would make this at least once a week. They are quick and easy to make, and taste lovely!

Trying out these cemetery recipes always adds an extra layer of meaning to the experience, thanks to the special stories behind them. There’s something truly heartwarming about preparing and sharing a dish that has been passed down through generations—especially one that brings a person’s legacy to life.

Are you planning to try this recipe? Let me know how it turns out! Whether you enjoy your biscuits with jam or as part of a cozy meal, I’m sure they’ll taste even better knowing the meaningful history they carry with them.

Thanks for reading!


References:

  1. Debbie Ann McNutt obituary | Mattatall-Verner Funeral Home
  2. Ghostlyarchive | TikTok

Cemetery Recipes: Peg’s Sugar Cookies

The holidays are the perfect time for baking, so this month, I wanted to try out another gravestone recipe. This sugar cookie recipe seemed like a perfect fit.

This recipe can be found on Mitchell Edward Neal’s black granite gravestone in the Garden of Memories Cemetery in Charleston, Arkansas. Engraved on the back of the stone is a recipe for Peg’s Sugar Cookies, a sweet tribute from his wife, Peggy Sue Loughridge Neal, who is still living.

Mitchell Edward Neal passed away on March 20, 2019 after a long battle with dementia. An avid outdoorsman, Neal enjoyed hunting, fishing, and gardening.1 Based on the recipe engraved on his tombstone, it’s clear he also loved his wife’s cookie recipe. Neal met his wife Peg in high school, and they were married for 53 years, raising four children together.1 The addition of the cookie recipe is such a heartfelt way to honor their sweet memories.

Here is the recipe as inscribed on the gravestone:

Peg’s Sugar Cookies

  • 2 Cups Sugar
  • 2/3 Cup Oil
  • 2 Eggs
  • 3 Tbls. Water
  • 1 Teas. Vanilla
  • 3 1/2 Cups Flour
  • 1/2 Teas. Salt
  • 2 Teas. Baking Powder

Mix all together. May have to add more flour as rolling out. Cut into cookies. Bake on greased pan at 350 for 6-8 minutes.

In the Kitchen

This was a pretty straightforward recipe. The Ingredients are all staples, so I didn’t have to make an extra trip to the store. I love those kinds of recipes.

After gathering all my ingredients, I mixed them in the order they were engraved on the stone. I was a little worried about the amount of flour, as it seemed like it might have been too much. I did my best to mix everything with a fork, but after adding the last cup of flour, I switched to a small hand mixer, just to make things a bit easier.

This did create a really flaky dough, so I did have to spend some time working it into a smooth ball. The instructions are brief but clear, and I didn’t have any issues following along.

This recipe makes a big batch of dough. I had only prepared two baking sheets, but quickly realized I would need a couple more. I ended up baking three and a half cookie sheets full.

Since I was planning to share these cookies at a Christmas family gathering, I tried my best to make them festive. I was hoping I had some star-shaped cookie cutters, but all my cookie cutters are Halloween-themed. I settled on a gravestone and a coffin shape. Luckily, my family knows me well and probably expects this kind of thing from me by now!

I baked the cookies as instructed, for 6 minutes at 350°F, then checked to see if they were done. They needed an extra minute, so I continued baking the rest for 7 minutes.

Once they were done, I moved them to a cutting board to cool a little before frosting. I went with a red frosting to keep with the festive theme. I had hoped that I had white sprinkles for a nice contrast, but I didn’t. So, I used some colorful nonpareils instead.

I think they turned out quite pretty! They also taste pretty good, too. They did turn out a bit chewy, which I wasn’t expecting, but they still have that sweet sugar cookie taste. The frosting adds a bit of sweetness as well, perfect for pairing with a fresh glass of milk.

Christmas time always calls for something sweet, and what better way to bring a little extra sweetness than by baking cookies with a story? As I baked these sugar cookies in Mitchell’s memory, I couldn’t help but think of the love and tradition behind the recipe.

Trying out this recipe seemed like a fitting way to honor the season of giving—and of course, I’m always up for a delicious sugar cookie!

Will you be giving this recipe a try? Let me know in the comments.

Thanks for reading!


References:

  1. Mitchell Edward Neal | Find a Grave

Cemetery Recipes: Chocolate Chip Cookies from the Cookie Book

Over the summer I took a little break from making gravestone recipes, but I think it’s time to try another one. Fall is coming, so what better time to make chocolate chip cookies? They are always the best when they are still warm from the oven.

I came across this gravestone on reddit, posted by user ubercrabby. So, today on the blog, I want to try making Chocolate Chip Cookies from the Cookie Book gravestone of Jennifer P. Ferrante.

Ferrante’s red granite gravestone, found in a cemetery in upstate New York, is shaped like a book, with “Cookie Book” inscribed on the side. The recipe can be found on the back side of the stone.

Jennifer Peggy Allan Ferrante was only 54 when she passed away suddenly in August of 2019. According to her obituary, she was a consulting engineer for many years, traveled extensively, and loved spending time with her family and pets.1 She was also an avid baker and was known for her chocolate chip cookies, which she often shared with her loved ones.1

It seems fitting that they would honor her by inscribing her famous recipe on her gravestone for others to make and share.

Here is the recipe as inscribed on the gravestone:

Chocolate Chip Cookies

9 to 11 min 375’F

1) 2 1/4 cups flour
1 tsp baking soda
1/2 tsp salt

2) 1 cup Crisco
3/4 cup white sugar
3/4 cup light brown sugar

2) 1 tsp vanilla
2 eggs
2 cups chocolate chips

Combine dry
Combine wet then add dry

Making the Recipe

Although this recipe is similar to the famous Nestlay Toulouse recipe, also known as Nestle Toll House, there are some small differences—most notably the substitution of Crisco for butter, and the omission of nuts.

It also looks like there might be a typo on the stone, as it has two step 2’s, BUT it might not be a mistake. Both step 2’s contain wet ingredients. Is it possible that it is direction on how to mix the ingredients?

That is the way I read the recipe when I tried it. I mixed the dry ingredients in one bowl, and then in a second bowl, I mixed the ingredients from step 2. Then in the same bowl from step 2, I mixed the vanilla, eggs, and chocolate chips. I was a bit worried about the amount of chocolate chips, it seemed like a lot! When that was mixed well, I then combined the wet ingredients with the dry ingredients, forming a nice cookie dough.

The ingredients consist of pantry staples so it was nice not having to make a special grocery trip to make this recipe. I was curious about the use of Crisco instead of butter. Crisco or shortening, is made from 100% hydrogenated vegetable oil and contains no water.2 It has a higher melting point than butter, so it tends to produce more lift and holds its shape better.2

I try my best to stick to the recipes as written on the gravestone and only make substitutions when necessary—like when ingredients are not available. That being said, shortening has no flavor, so baked goods made with it do miss that buttery taste that only butter can produce. If I made this recipe again, I would make the switch and use butter.

Otherwise, following this recipe was incredibly easy and was a quick one to make. The trickiest part for me was spooning the cookie dough from the bowls to the parchment-lined cookie sheets. I had a bit of a hard time getting uniformed portions so after the first cookie sheet was full, I put a little oil on my hands, to prevent the dough from sticking, and rolled the rest of the dough into balls for the second cookie sheet.

In the end, both cookie sheets came out the same, with the cookies spreading out into each other. I should have given them more space and used one more cookie sheet.

My worries about the amount of chocolate chips were also unwarranted as they didn’t come out a melty chocolate mess. These cookies are incredibly decadent, and delicious!

This is a tasty cookie recipe and easy to make. I can see how this would quickly become a favorite. It’s also a simple recipe with room for modifications if desired. I would make this one again the next time I am craving a nice chocolate chip cookie.

Have you tried this recipe? Or do you have another gravestone recipe suggestion I should try? I would love to read about it, in the comments!

Thanks for reading!


References:

  1. Jennifer Peggy Allan Ferrante | Find a Grave
  2. Butter vs. Shortening in Baking | Land O’Lakes

Cemetery Recipes: Chocolate Oatmeal Cookies

I have been craving something sweet and chocolatey for the last two weeks, so when I came across a gravestone recipe for chocolate oatmeal cookies, I knew I had to try them. The bonus is that it’s a no-bake recipe! 

This recipe is found on the gravestone of Bonnie June Rainey Johnson, who is laid to rest in Nome City Cemetery in Nome, Alaska. Johnson, also known as the “driver’s license lady”, worked for the Division of Motor Vehicles in Nome until she retired in 2000, after 30 years of service.1 She was also known for the sweetness of her no-bake chocolate oatmeal cookies.2 In interviews, Johnsons’ daughter Julie, has said that even the person who cleared the snow from their front yard made sure to do a good job because they would get payment in a batch of these cookies.2 Johnson loved spending time in the kitchen, cooking dishes that brought her family and friends together.1 

Bonnie Johnson was diagnosed with Alzheimer’s in 2004 and moved to Anchorage to be with her daughter in her final days. She passed away peacefully on May 8, 2007, surrounded by family.1 She was 71. Her famous oatmeal cookie recipe was inscribed on her gravestone in 2007, along with an image of a Cool Whip container—She was known to collect dozens of them!2

Here is the recipe, as written on the black granite obelisk:

Chocolate Oatmeal Cookies (No Bake)

Everyone’s favorite

  • 2 Cups of Sugar
  • 1/2 Cup of Milk
  • 1/4 Cup of Cocoa (Swiss Miss)
  • 1/4 Cup of Margarine (1 Stick)

Bring to a full boil in a saucepan

Remove from heat and let stand for 5 minutes

Then add

  • 3 Cups of Quick Oats
  • 2 Tablespoons of Peanut Butter
  • 2 Teaspoons of Vanilla

Drop on Wax Paper and Let Set Until Firm

Making the Recipe

This recipe is high on my list for being so easy to make. I had all the ingredients on hand, which was nice as I didn’t have to make an extra grocery trip. I did make one substitution though, as I didn’t have any Swiss Miss cocoa, only a generic store-brand version. 

The recipe is very straightforward to follow. There are also not many steps so it was a quick recipe to make. I added the ingredients in the order they were listed, making sure the margarine was melted and everything was well incorporated. I brought it all to a boil, making sure to watch it so it didn’t burn. I then removed it from the heat and let it sit for five minutes. 

During this time, I prepared two baking sheets with wax paper. I was not sure how big of a batch this recipe would make, but I thought two cookie sheets would be a good start.

After the five minutes, the chocolate mixture had a bit of a film on it. I didn’t stir it, but instead just added in the next ingredients. At this point I did change the order of things, adding the vanilla and peanut butter first. My thought was to melt the peanut butter to better incorporate it into the mixture. Then I added the quick oats, doing so a little at a time and mixing it well. 

All that was left to do was to drop the mixture onto the waxed paper and let them set. Using two spoons, I made my cookies a little too big on the first sheet. I only fit six cookies on a sheet. I spread them fairly thin but they were large. On the second cookie sheet, I tried to pull it back a bit and make smaller dollops, which I flattened out a little after all the remaining mixture had been spooned onto the sheet. The second cookie sheet had about 12 cookies on it.

Because I made one sheet of larger cookies, I opted to put that one in the freezer to set. The second cookie sheet I put in the fridge to set. After a couple of hours, I pulled out the tray in the fridge to give them a try.

They turned out so good! I was a little nervous, considering my problems with the last gravestone recipe I tried. But I think there was no way to mess this one up. I was afraid they were going to be too sweet, but the oatmeal helps cut some of the sweetness, I think. 

This is a great recipe, and I think will be my go-to the next time I need to whip something up fast the night before a family gathering, to share.

Have you tried this recipe? Do you have a favorite recipe that you would put on your gravestone? I would love to read about it in the comments. 

Thanks for reading!


References:

  1. Bonnie Johnson Obituary | Anchorage Daily News
  2. Tombstones with family recipes, from Alaska to Israel | The Observatorial

Cemetery Recipes: Kim’s Carrot Cake

I don’t know why, but Spring often makes me think of carrot cake. So when I was trying to decide which recipe I should make this month, the answer was pretty obvious. Maybe it’s because Easter often falls in April, or because Easter reminds me of picking fresh carrots from the garden when I was a kid. Either way, it’s always a good time to bake a cake. 

So for this month’s gravestone recipe, I wanted to try my hand at making Kim’s carrot cake. This recipe comes from the gravestone of Kimette Lee DeCota, from Cape County Memorial Park Cemetery in Cape Girardeau, Missouri. Kim passed away in August of 2014 at the age of 57.

Reading her obituary on Find A Grave, you will see many references to food and cooking. It describes a passionate woman who loved her family and community. Kim was very active in the church, cooking meals as well as helping her parents in the kitchen among other things. 

I would love to know more about the recipe inscribed on her gravestone. Was this her go-to recipe? Maybe her signature dessert? I may never find out, but it warms my heart to know that someone so passionate about cooking can continue to share their passion from beyond the grave.

Here is the recipe, as written on the gravestone:

Kim’s Carrot Cake

  • 3 cups unbleached all-purpose flour
  • 3 cups sugar
  • 1 teaspoon salt
  • 1 tablespoon baking soda
  • 1 tablespoon ground cinnamon
  • 1-1/2 cups corn oil
  • 4 large eggs, lightly beaten
  • 1 tablespoon vanilla extract
  • 1-1/2 cups shredded coconut
  • 1-1/2 cups shelled walnuts, chopped
  • 1-1/3 cups puréed cooked carrots
  • 3/4 cup drained crushed pineapple
  1. Preheat oven to 350F. Grease two 9-inch springform pans.
  2. Sift dry ingredients into a bowl. Add oil, eggs, vanilla. Beat well. Fold in the walnuts, coconut, carrots, pineapple.
  3. Pour batter into the prepared pans. Set on the center rack of the oven and bake until the edges have pulled away from the sides and a cake tester inserted in the center comes out clean, 50 minutes.
  4. Cool on a cake rack for 3 hours. Fill and frost the cake with the cream cheese frosting.

Cream Cheese Frosting

Doubling the frosting recipe is highly recommended.

  • 8 ounces cream cheese, at room temperature
  • 6 tablespoons unsalted butter, at room temperature
  • 3 cups confectioners’ sugar
  • 1 teaspoon vanilla extract
  • Juice of 1/2 lemon (optional)
  1. Cream the cream cheese and butter in a mixing bowl.
  2. Slowly sift in the confectioners’ sugar and continue beating until ingredients are fully incorporated. The mixture should be free of lumps.
  3. Stir in the vanilla, and lemon juice if desired.

Serve with love.

This recipe is very easy to follow and has very detailed instructions. I found it interesting that the recipe takes up almost all of the room on the gravestone. On the left hand of the stone is an ingredient list and directions to make the cake, while the right-hand side has the ingredient list and instructions to make the frosting. I love that the first note is to double the frosting recipe. I like the way Kim thinks! 

I made this recipe in two parts, first baking the cake and then frosting the next day. For some reason, I only have one spring-form pan so I had to bake the layers one at a time. I really need to rectify that. After the first cake layer was done baking, I took it out of the pan and sat it on a wire rack to cool. I wiped down and reassembled the spring-form pan and poured in the last of the batter. I then put that in the oven to bake.

The recipe calls for the cake to be cooled for three hours. After I took the second layer out of the oven it was fairly late in the evening, so I placed both layers in the fridge to cool overnight.

After work the next day, I set to work making the frosting. I took the cake out of the fridge and placed it on the table to warm up a bit while I mixed the frosting. I know the recipe recommends doubling the frosting, but I found that one batch made more than enough frosting for me. 

Although the instructions were incredibly easy to follow, I do think I messed up a little bit. I baked each cake layer in the oven for the instructed 50 minutes, but didn’t check on them at all. 50 minutes turned out to be too long for my oven; I think I over-baked the cake. It wasn’t burned or anything like that, but the edges became very hard and crisp. So hard that I had trouble cutting the cake when it came time to try a piece. If I were to make this recipe again, I would start checking on the cake at about the 30-minute mark and doing a toothpick test to see if it’s cooked through. 

I also think I didn’t frost the cake properly. I think I might be a bit rusty at making cakes! I was afraid to use up too much frosting in between the cake layers so I frosted that section sparingly. I shouldn’t have been worried though, as I had way too much frosting left over. 

I hoped that the frosting would help moisten and soften the cake a bit, but it’s still a bit hard to cut. Other than the human error on my part, this recipe turned out great. This delicious cake is sweet, and the shredded coconut adds a nice flavor to the mix. I would definitely make this one again! 

Have you tried this recipe? I would love to hear how yours turned out, and if you have any baking tips for me. 

Thanks for reading!

Cemetery Recipes: Peanut Butter Cookies

I have been craving peanut butter lately so I thought it would be a perfect time to try another gravestone recipe. This recipe went viral in June of 2023 after Twitter (now X) user SoloFlow786 replied to a Stephen King tweet with a photo of a peanut butter cookie gravestone recipe. The photo quickly went viral, amassing 500k views and over 5,000 likes.1 

Unfortunately, I wasn’t able to learn much about this recipe, or whose gravestone it is written on. According to Rosie Grant, of Ghostly Archive it might be inscribed on a gravestone somewhere in Raymond, Maine. I did find that after this tweet went viral, many folks tried their hand at making this recipe, with great success. 

Interestingly, some users on Reddit think this recipe is a variation of an old Betty Crocker recipe from the 1950s. From what I could find, the recipes are a bit similar. The gravestone version does omit a few things and has the added touch of the chocolate kiss.

Here is the recipe, as written on the gravestone:

Peanut Butter Cookies

  • 1/2 C Brown Sugar
  • 1/2 C White Sugar
  • 1 Tbsp Sugar
  • 1/2 C Crunchy Peanut Butter
  • 1/4 C Butter Shortening
  • 1 Egg
  • 1 C Flour
  • 1 Tsp Baking Soda

Mix in order given. Roll into balls, then roll in sugar. Cross mash with fork. Bake 10 minutes at 350 degrees. Place chocolate kiss on top of cookie while still warm.

This is a pretty straightforward recipe with few ingredients. So it didn’t take long to whip up a batch. The longest part of the process I found, was rolling the cookie dough into even-sized balls. 

The extra tsp of sugar that the recipe calls for, is for rolling the cookie dough into. For my batch, since it was St. Patrick’s Day on March 17th, I decided I would try adding a touch of green to be festive. I managed to find some green sanding sugar, but unfortunately, it was more of a pastel green. More for Easter than St. Paddy’s, so after baking the green colour had pretty much disappeared.

I spaced the cookies out evenly on two baking sheets. My batch made 19 cookies. I found my dough was a bit crumbly, so after mashing it with a fork, they didn’t keep a round shape and some crumbled a little bit. They didn’t spread out too much and kept their crumbly shape. They still taste delicious though. 

I found making this recipe was a little different for me. I often find myself talking aloud to the person whose gravestone the recipe comes from, but this time I don’t know who this recipe belongs to. I find talking out loud while I bake or cook helps me connect to the person. I hope one day I can find out where this gravestone recipe comes from. It would be lovely to be able to put a name to the gravestone.

Until then, I will highly recommend this delicious peanut butter recipe to anyone craving a sweet peanut butter treat.

Have you tried this recipe? What did you think?

Thanks for reading!


References: 

  1. This Peanut Butter Cookie Recipe Is Too Bizarre To Digest | Zee News

Cemetery Recipes: Chocolate Mint Brownies

This past Wednesday was Valentine’s Day, and like many others this past week, I wanted to make a little sweet treat for my sweetheart. So earlier in the week I tried out another gravestone recipe. My fiancé is quite supportive of my gravestone hobby, so I knew he wouldn’t mind where I got the recipe from. 

For this month’s gravestone recipe, I made chocolate mint brownies. This tombstone recipe can be found on the gravestone of John Rodda, in Maple Grove Cemetery in Wichita, Kansas. 

John Harold Rodda passed away on January 18, 2019, following a brief but courageous battle with cancer. He was a compassionate Funeral Director and Embalmer, having worked at Cochran Mortuary for 54 years. He enjoyed music, cooking, and collecting recipes and cookbooks.1 He was famous for his chocolate mint brownie family recipe, so famous that it was inscribed on a black marble plaque that can be found on his gravestone.2

Here is the recipe, as written the gravestone:

Chocolate Mint Brownies

  • Bake: 350 
  • Time: 20 Minutes

By Sharon Wiens (Aunt Marie McKee’s recipe)

  • Beat: 4 beaten eggs, 1 cup melted margarine, 2 cups sugar.
  • Add: 4 squares melted unsweetened chocolate, 1 tsp peppermint flavouring, 1 cup flour.
  • Beat.
  • I put in a greased and floured small cookie sheet (can use a 9×13 baking dish).
  • Bake 20 minutes 350. Bake a little less with the thinner brownie.
  • Cool.
  • Frost with > for a 9×13 top: 1/4 cup margarine, 2 tbsp cream, 2 cups powdered sugar, 2 tsp peppermint flavoring (I go 1.5 of this to frost the cookie sheet top).
  • Place the frosted brownie in the freezer for 10 to 15 minutes.
  • Melt 2 squares of unsweetened chocolate, 2 tbsp Margarine. 
  • Cool. 
  • Drizzle over brownie and sprinkle with crushed peppermint.

This is one of the most complete gravestone recipes I have made. The directions are very straightforward, and they even include variations for bake time and measurements depending on what you bake the brownies in.

Unfortunately, I don’t have a 9×13 pan so I opted to bake my brownies in a 9×9 pan. In hindsight, I should have tried baking them on the cookie sheet. Because the 9×9 was deeper than both the cookie sheet and the 9×13, I had to bake my brownies for about an extra 15 minutes. After the initial 20 minutes in the oven, I could tell right away that the center was not cooked through so I put it back in for another five minutes, which then turned into 10 more. I knew it was done when the toothpick I pushed into the center of the dish came out clean.

I followed the cooling instructions and frosted the brownies. I thought about adding a bit of food coloring to the frosting to make it red for Valentine’s, but I also wanted to see how it would look without the added color so I decided against it. You could add whatever color you like to the frosting easily by adding a bit of gel food coloring. 

Because I used a 9×9 pan, I think the two squares of baker’s chocolate for the drizzle were a bit too much since I had less surface area to cover. I should have reduced it to half. I then took a candy cane and put it into a zip-lock bag to crush up for the topping. I wrapped the bagged candy cane in a dish towel and used a pint glass to crush the candy, as I didn’t have a rolling pin. It worked perfectly. 

These are super minty, and sweet, but I would have liked them to be a bit more chocolaty. I think maybe my peppermint extract was a bit off because my batch has a bit of an aftertaste, or perhaps I just used too much? Either way, I still think they turned out decent and would try this recipe again with some slight modifications. Learning and experimenting are all part of the fun, after all. 

Have you tried this recipe before? Do you have any helpful tips for me? I would love to read them in the comments! 

Thanks for reading!


References:

  1. John Harold Rodda Obituary | Cochran Mortuary & Crematory
  2. John Harold Rodda | Find a Grave