While doing some groceries the other day, I was surprised to find fresh guavas at my local Walmart. The guavas immediately made me think of the Guava Cobbler recipe I had seen online not long ago. I have never seen guavas before in the produce section, so I thought what better time to try out another gravestone recipe!
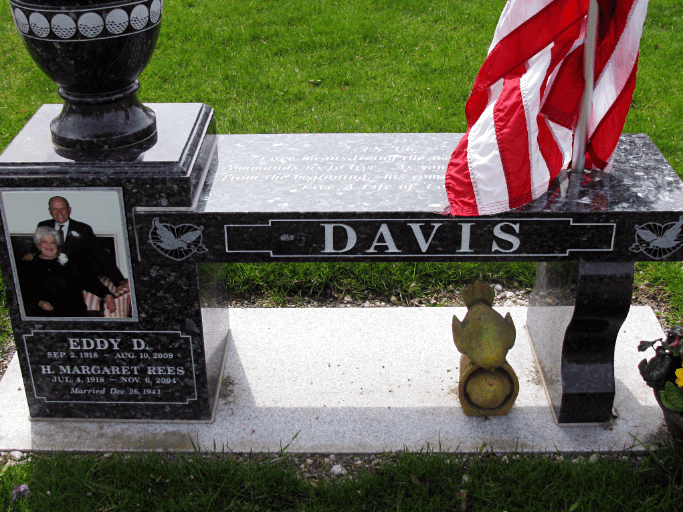
This gravestone recipe is found on the grave of Julia Belle Kelley Pate, who passed away at the age of 87 on May 16, 2011. Julia is laid to rest in Frierson-Hendry Cemetery in Fort Myers Florida. According to her gravestone, Julia made the best guava pie and cobbler in the South!
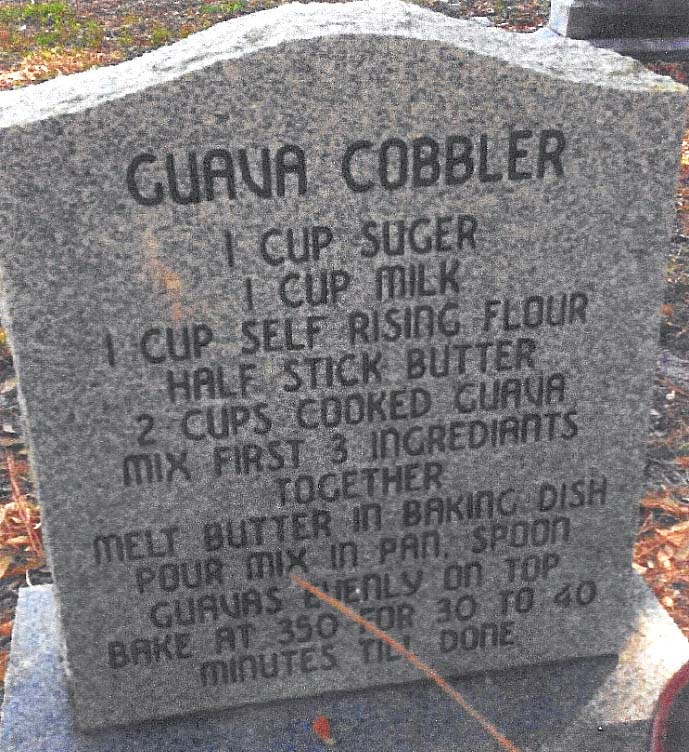
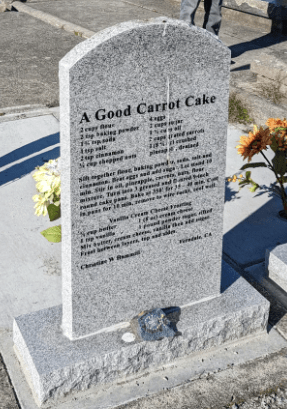
Guava Cobbler recipe on the backside of the gravestone of Julia Belle Kelley Pate. Photo by Find a Grave member, Helen Farrell.
Here is the recipe, as written on the gravestone:
Guava Cobbler
- 1 Cup Sugar
- 1 Cup Milk
- 1 Cup Self Rising Flour
- Half Stick Butter
- 2 Cups Cooked Guava
Mix first 3 ingredients together. Melt butter in baking dish. Pour mix in pan, spoon guavas evenly on top. Bake at 350 for 30 to 40 minutes till done.
I have never bought or baked with fresh guava before, so this recipe would be a lot of fun! My first thought was how to prepare the guava. The recipe is fairly simple and calls for 2 cups of cooked guava. I had to do a little Google search to see how to eat and prepare guava. Guava is completely edible; skin, flesh, seeds, and all. They are a great source of fiber. So to cook my fresh guava, I gave the fruit a good wash and trimmed the stems away. After that, I sliced the guavas into rounds and put them into a pot with a bit of butter to cook.
While those were simmering I worked on mixing the dry ingredients. The recipe calls for self-rising flour. I couldn’t find any at the grocery store, but I discovered later that bread flour would have worked as well. My solution though was to create my own self-rising flour. I had all-purpose flour on hand, so I mixed in 1 teaspoon of baking powder, 1/4 teaspoon of baking soda, and 1/2 teaspoon of salt into my 1 cup of all-purpose flour.
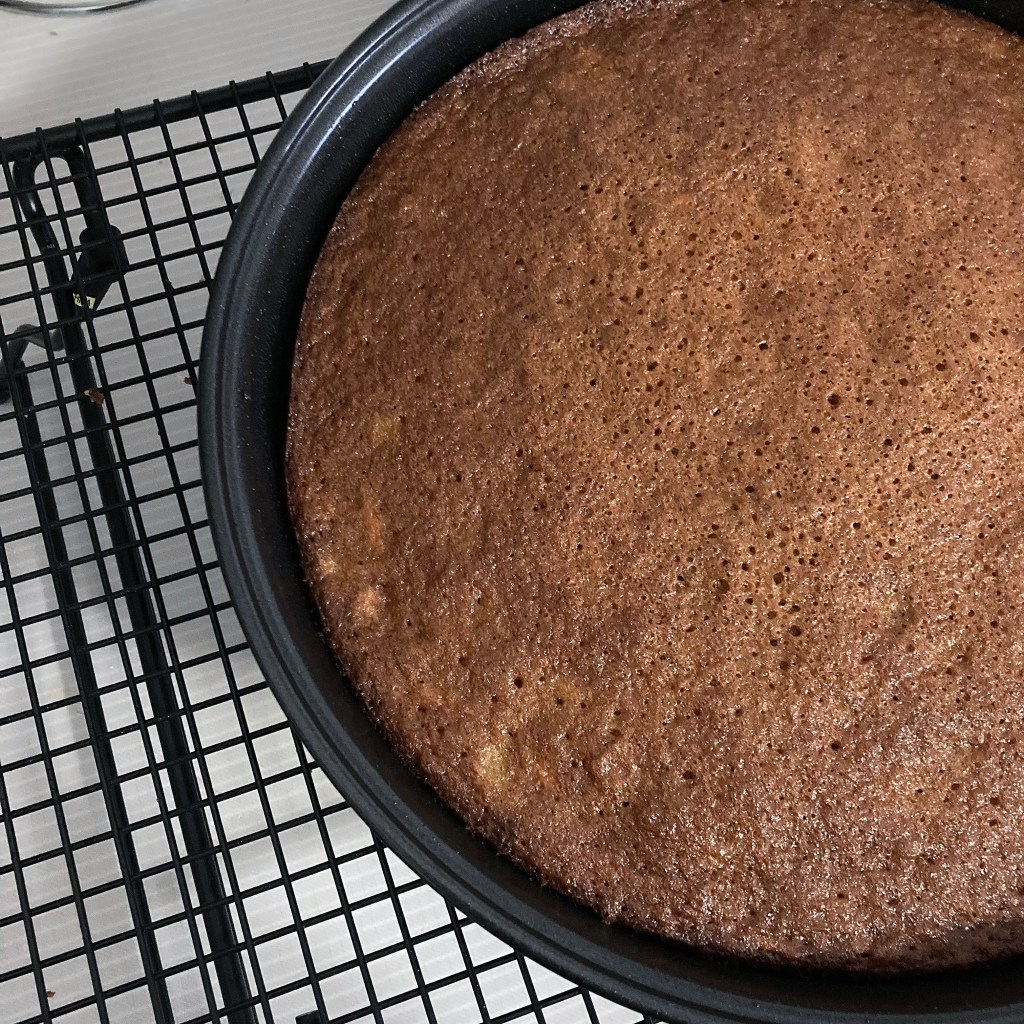
After mixing my dry ingredients I continued following the recipe and popped my cobbler in the oven. After 30 minutes I used the toothpick method to see if it was ready. It still needed a bit more time so I put it in for another 10 minutes. The 40 minutes was perfect, and it came out looking golden brown and beautiful.

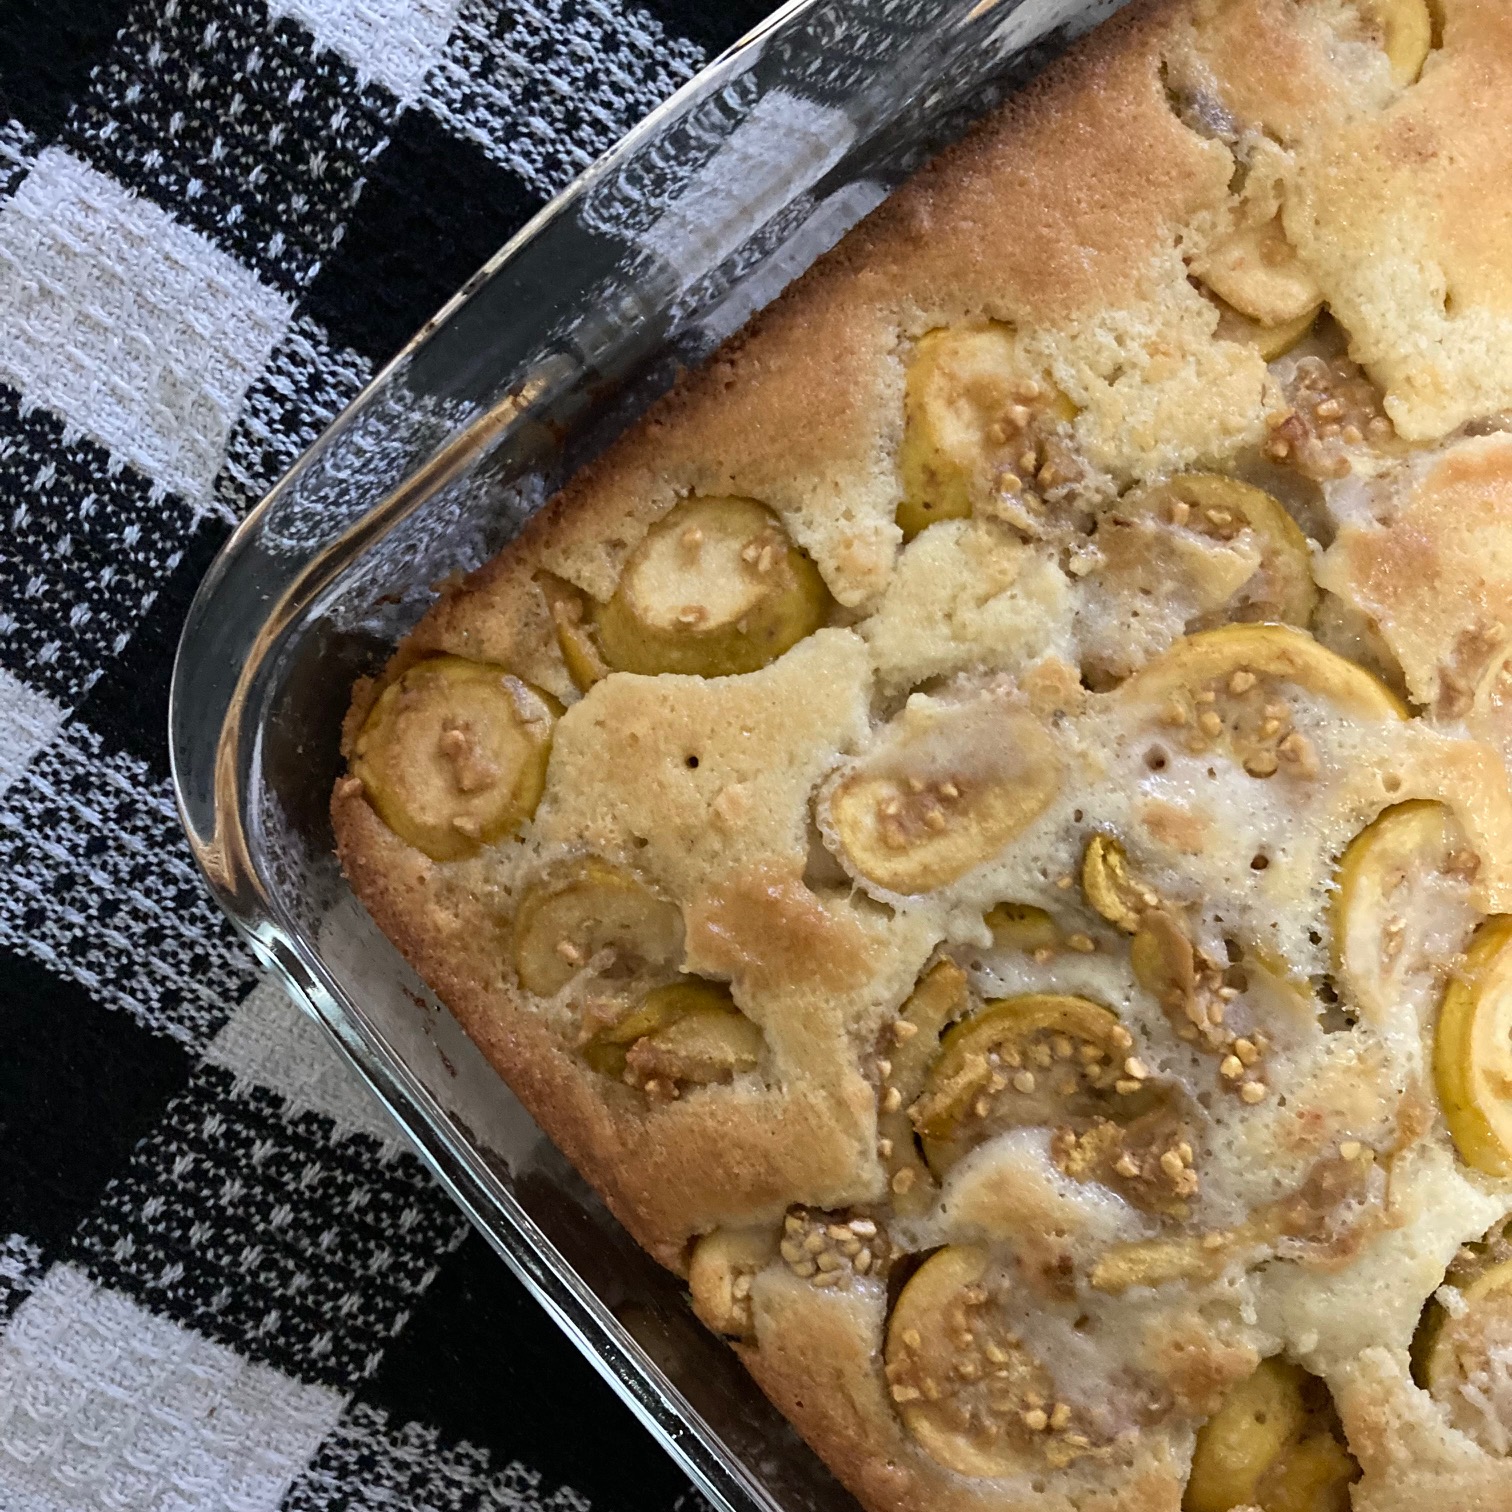
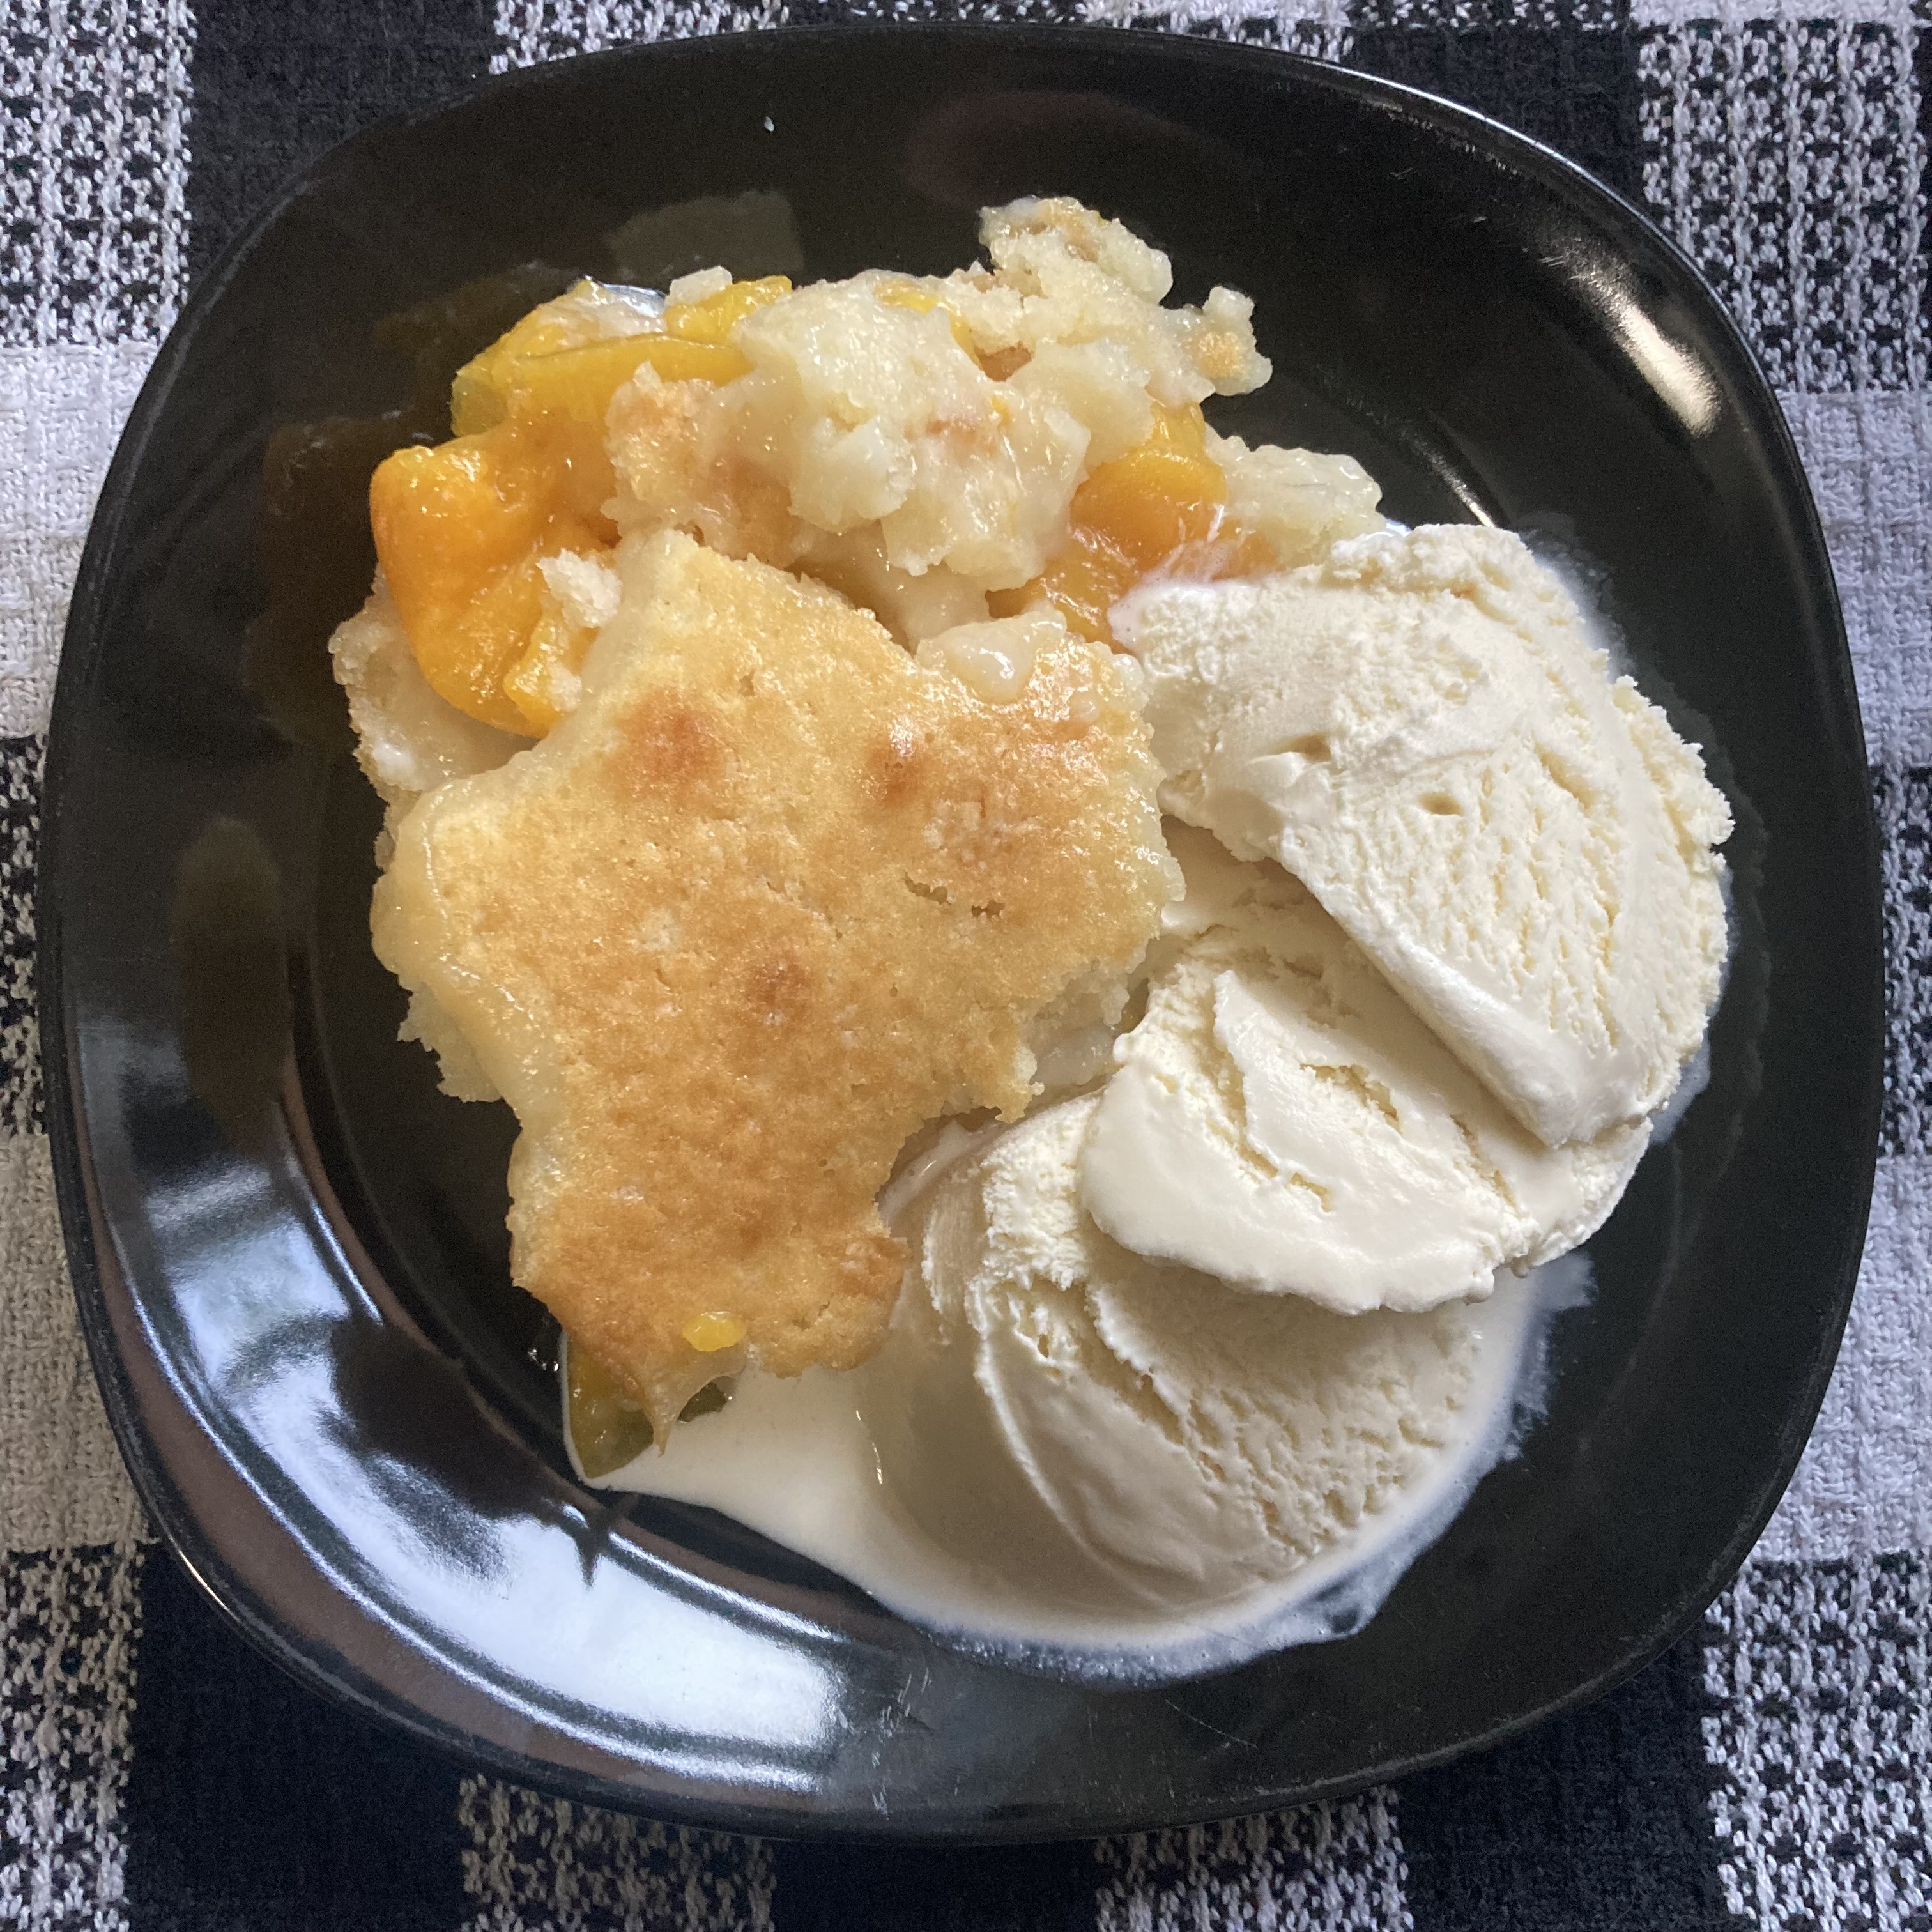
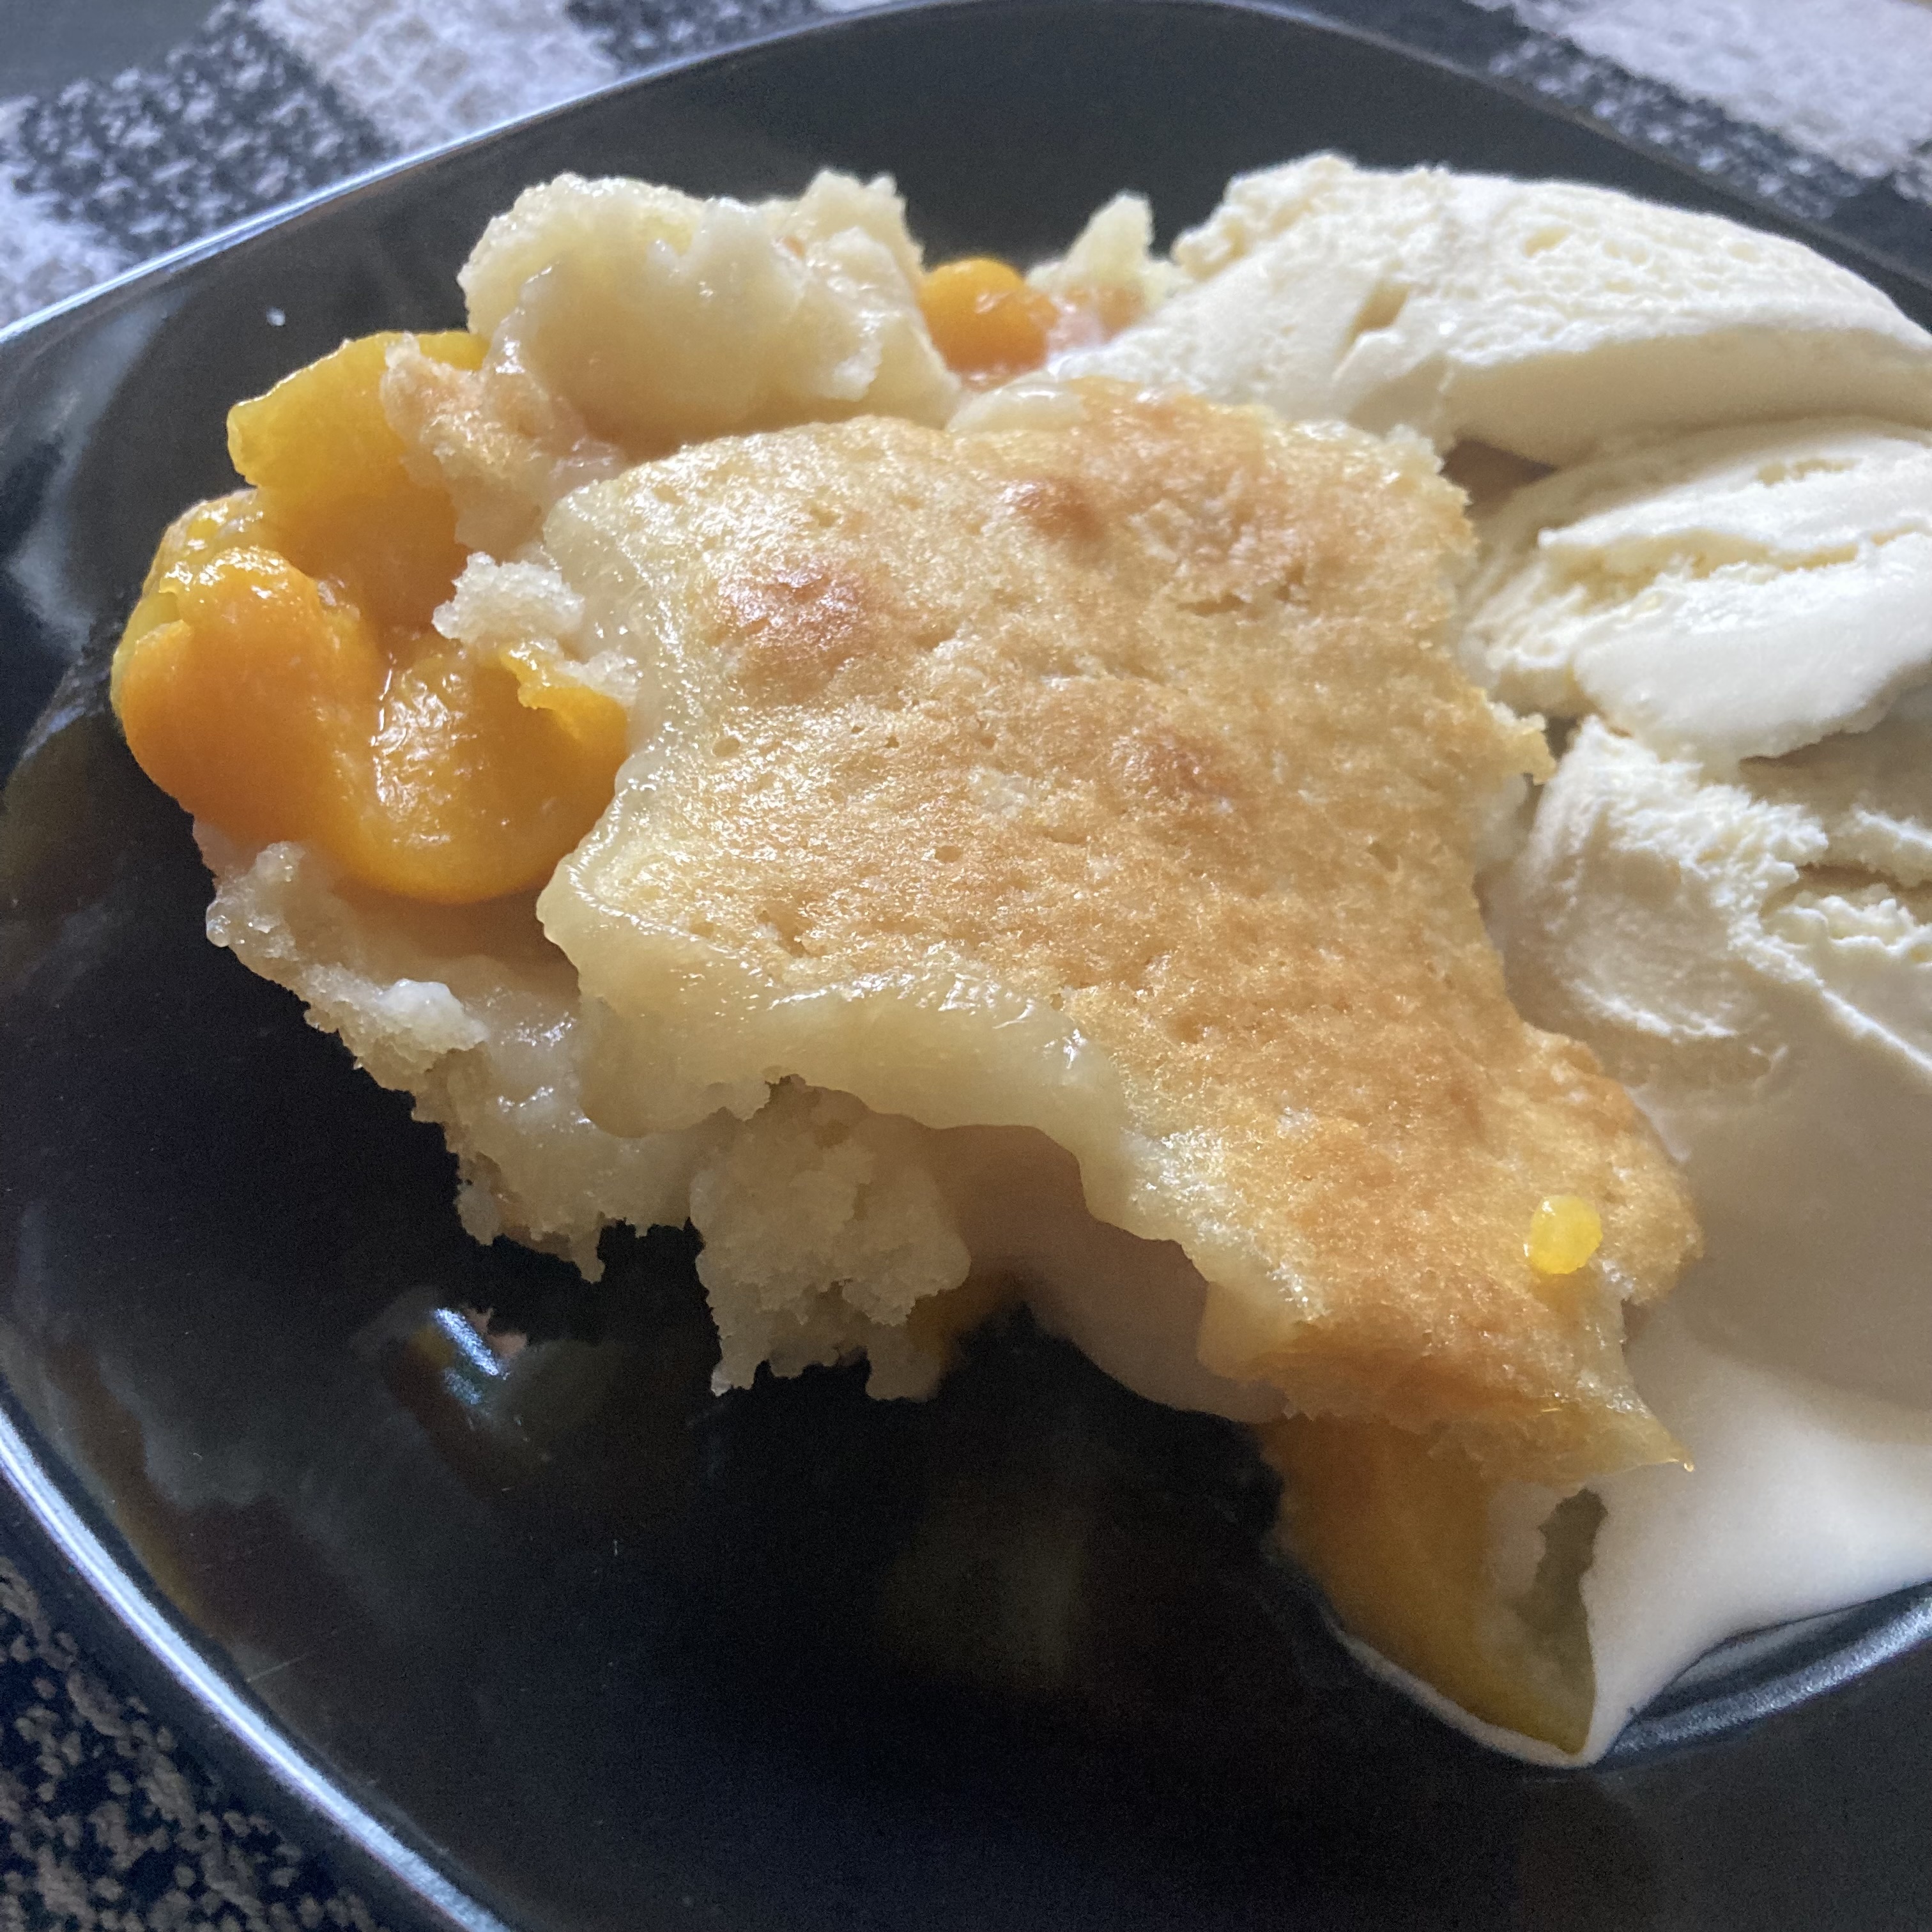
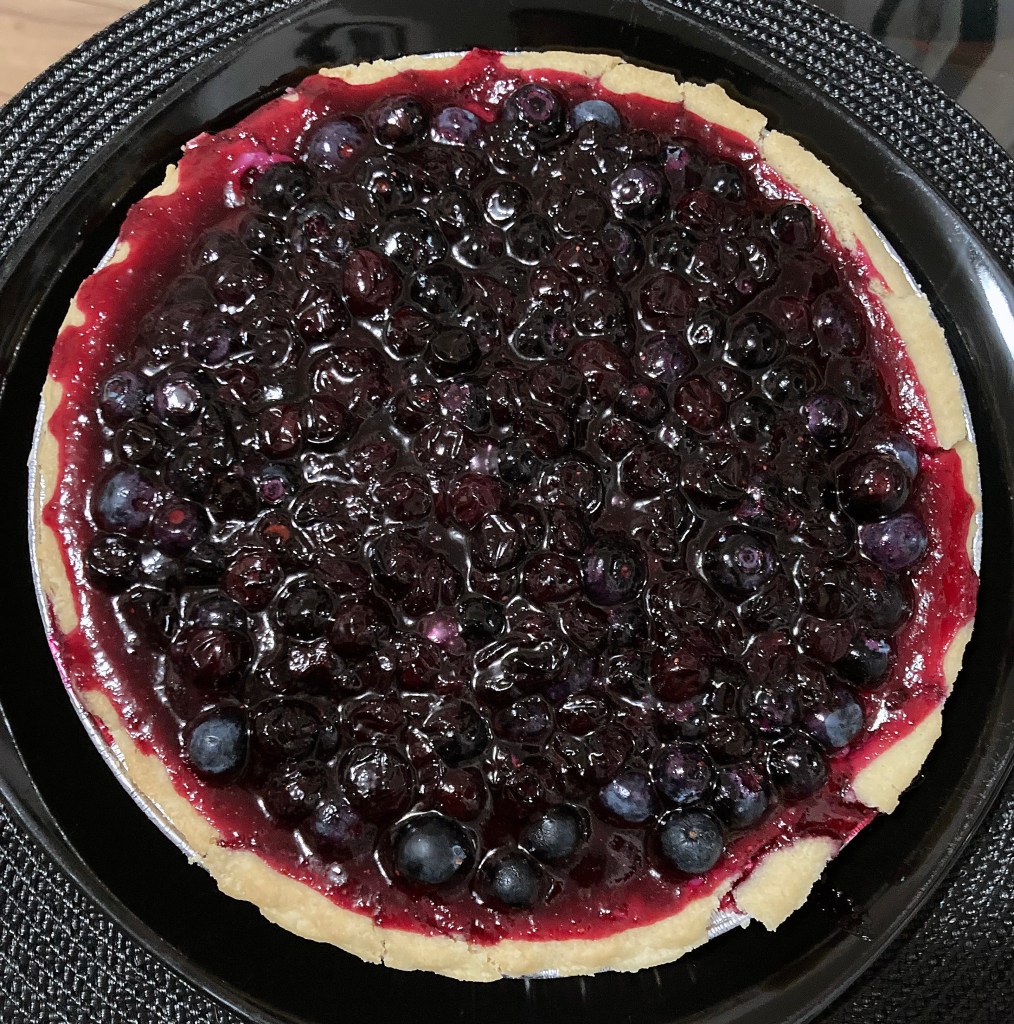
I carved myself a piece right away. In creating these tombstone treats I have found a love of cobblers. This is the second one I have made, the first being O’Neal’s Peach Cobbler. They are so delicious and easy to make. This guava cobbler was no different. This cobbler was not as sweet as the peach cobbler, the guavas do have a sweetness but are also a bit tart. I didn’t have ice cream to pair with my cobbler this time, but I didn’t miss it. The only thing I would do differently next time is remove the seeds. Since the seeds are edible, I decided to leave them in, but I didn’t care for the texture that the seeds created. Next time I would scoop out the seeds.
This recipe is so good and so easy to make! Now I am wondering about Julia’s guava pie recipe. I would have loved to try it!
Have you made this recipe before, or maybe another gravestone recipe? Do you have a gravestone recipe that you would recommend? I would love to hear about it in the comments!
Thanks for reading!
References:
- Frierson-Hendry Cemetery | Find a Grave
- Julia Belle Kelley Pate | Find a Grave